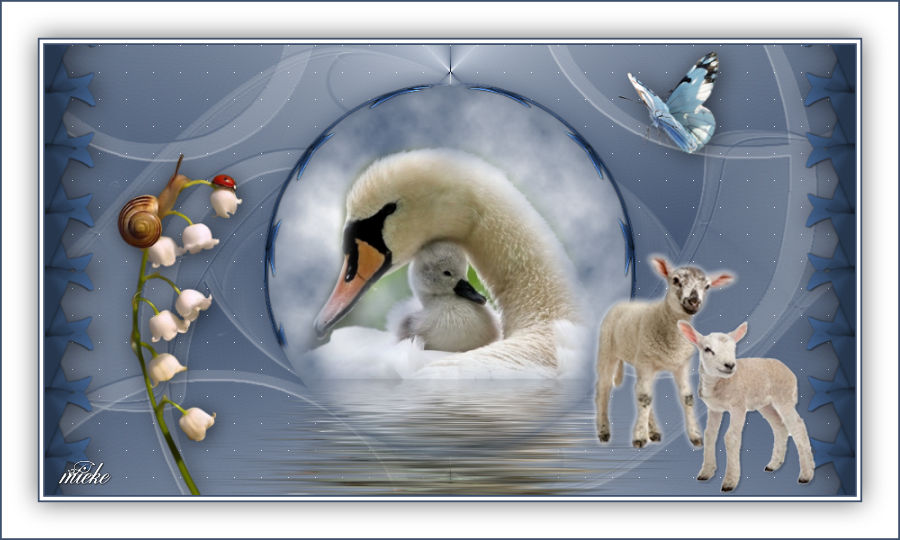
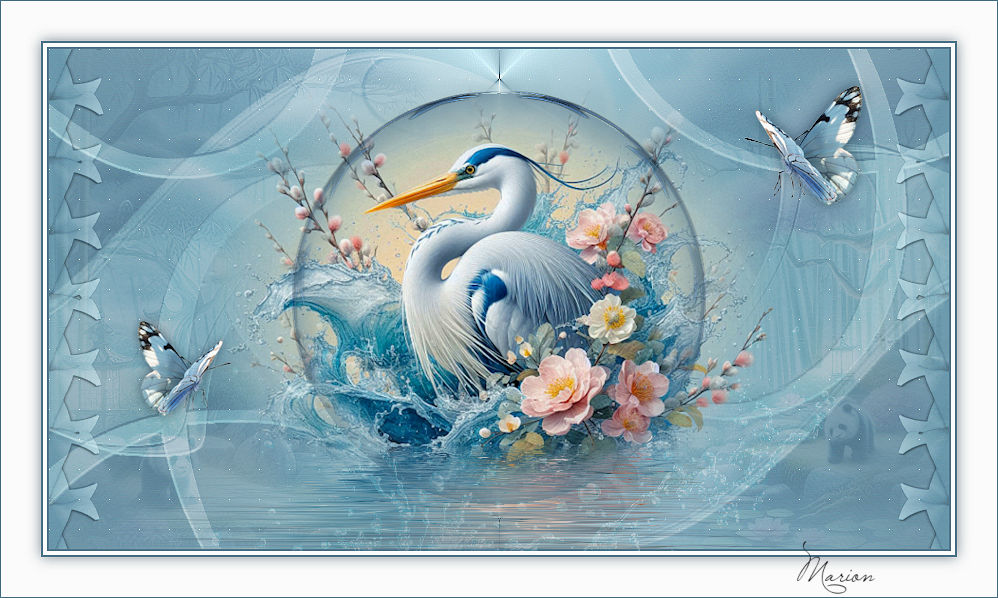
Lesson 194
Translation made by MARION

Supplies
Material

Printlesson.
Tubes
Tubed by Maryse
Leny and Ida
Lamstubster is unknown to me..
Mask and deco ---own material
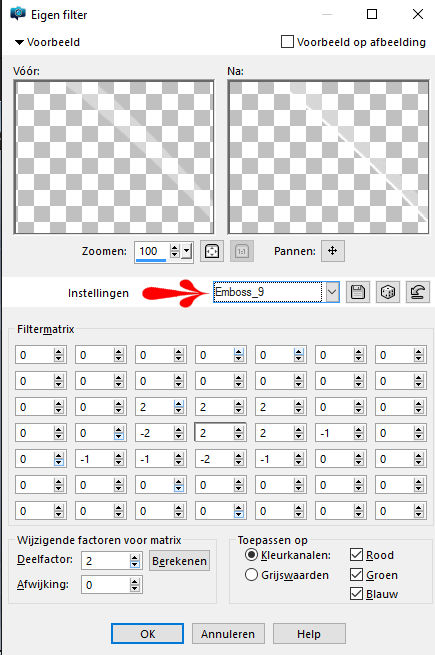
Mieke has used the following filters
Preset_UserDefinedFilter_Emboss_9.
Place this in the presets folder of PSP.
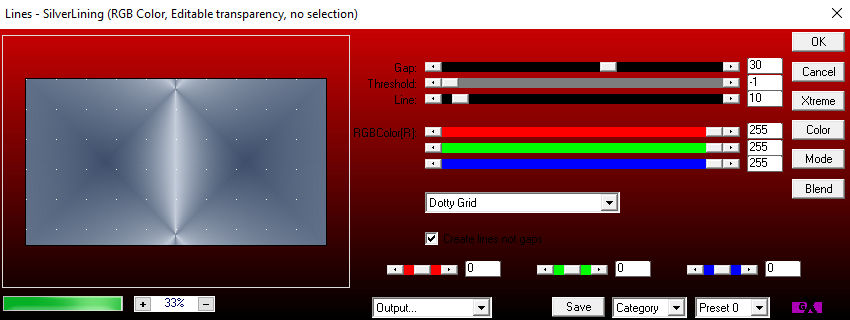
Filter---AP 01 (Innovations)-lines-Silverlining ---Dotty Grid
Filters—Flaming Pear---Flood
Colors
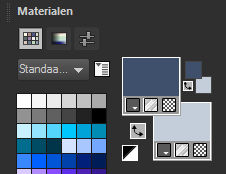
Foreground color # 31506c---Background color#c4cdda
Gradient---Radial

Angle 180---Repeats---Center Point--- Horizontal 50 ---Vertical 94
 You can use my arrow to follow your work
1.File-Open a new transparent image in this size:
Width---900---Heigth 500 Pixels .

2.Flood fill the layer with the gradient
3.Layers---Duplicate
4.Image --- Mirror --- Mirror vertical ( Image - Flip in older versions of PSP)
5.Layers---Properties---Reduce the opacity of this layer to 50%
6.Layers---Merge---Merge Down
7.Effects---Edge Effects---Enhance More.
8.Effects--Plugins---AP 01 (Innovations)---lines-Silverlining ---Dotty Grid
30---min1---10---3x255
9.Layers--New rater layer
Flood fill the layer with #ffffff
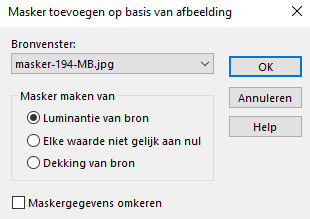
10.Open --- masker-194-MB.jpg---Click on the minus sign in the upper right corner.
11.Layers--New Mask Layer--From Image--Choose--Mask-194-MB.jpg
Source luminance checked
12.Layers---Merge---Merge Group
13.Layers---Properties---Reduce the opacity of this layer to 40%
( Customize at your own discretion)
14.Effects---User Defined Filter---Emboss 9
15.Open--- rondje-deco-1-194.png
16.Edit---Copy
Activate your work -Edit - Paste as a new layer
17.Selections---Select All
Selections---Float
Selections---Defloat
18.Layers--New raster layer
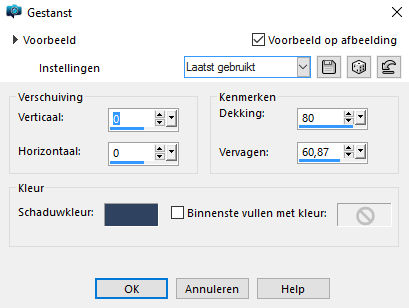
19.Effects---3D effects--Cutout
20.Selections---Select none
Layers--New raster layer
21.Open--- Leny-pasen26.png
Remove the watermark.
22.Edit---Copy
Activate your work -Edit - Paste as a new layer
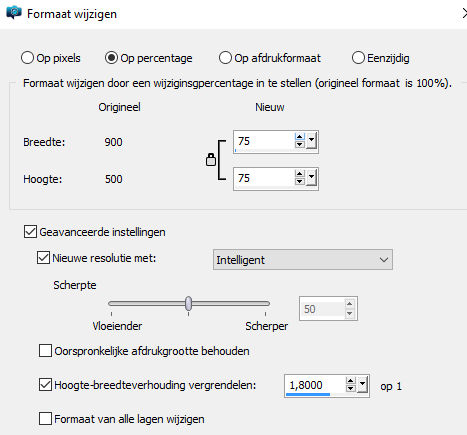
23.Image---Resize---75 %.
Resize all layers not checked
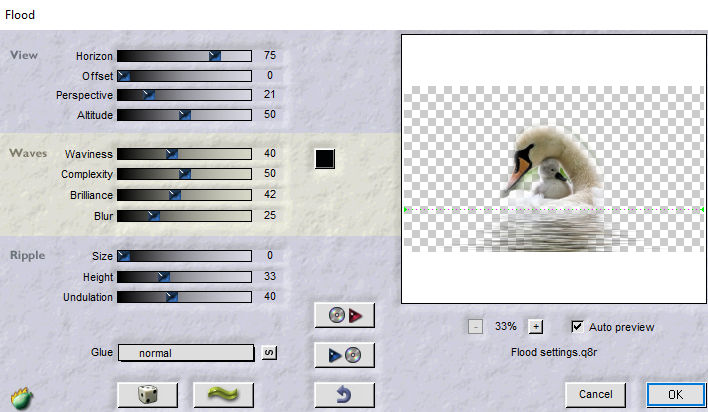
24.Effects---Plugins—Flaming Pear---Flood
75-0-21-50-40-50-42-25-0-33-40-normal
25.Lagers---Arrange---Move Down
26.Activate the top of the layer palette
27.Layers---Merge---Merge Down---
Edit---Repeat --Move Layer Down.
28.Effects---3D- effects--- Drop shadow 0---0---80---40--- Foreground color--- # 31506c

29.Open--- deco-3-194.png
30.Edit---Copy
Activate your work -Edit - Paste as a new layer
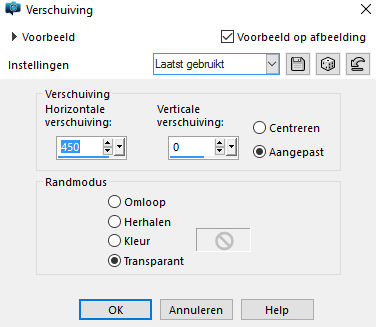
31.Effects---Image Effects----Offset---450---0---Transparent-Custom checked
32.Layers---Duplicate
33.Image - Mirror - Mirror Horizontal (Image - Mirror in older versions of PSP)
34.Layers---Merge---Merge Down
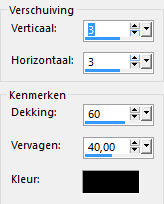
35.Effects---3D-effects--- Drop Shadow---3---3---60---40---Color -black
36.Open---rand-deco-2-194-2016.png
37.Edit---Copy
Activate your work -Edit - Paste as a new layer
38.Open--- MR_Lily for Two.png
Remove the watermark
39.Activate your work -Edit - Paste as a new layer
40.Image---Resize---75 %.
Resize all layers not checked
41.Effects--3D-effects--- Drop Shadow---3---3---60---40---Color--black
42.Open--- lammetje1.png
43.Edit---Copy
Activate your work -Edit - Paste as a new layer
Move the tube to the bottom right
44.Open--- lammetje2.png
45.Edit---Copy
Activate your work -Edit - Paste as a new layer
Move the tube to the bottom right
46.Open--- Idavilinder.png
47.Activate your work -Edit - Paste as a new layer
Move the tube to the top right
48.Image---Resize---75 %.
Resize all layers not checked
49.Image--Add borders---2 pixels---Foreground color
Image--Add borders---4 pixels---Color white
Image--Add borders---2 pixels---Forground color.
50.Selections---Select All
51.Image--Add borders---40 pixels---Color white
52.Effects---3D-effects--- Drop Shadow---0---0---60---40---Color black
53.Selections----Select none
54. Layers---New raster layer ---Place your watermark
55.Layers---Merge---Merge All ( flatten)
Save as JPG.
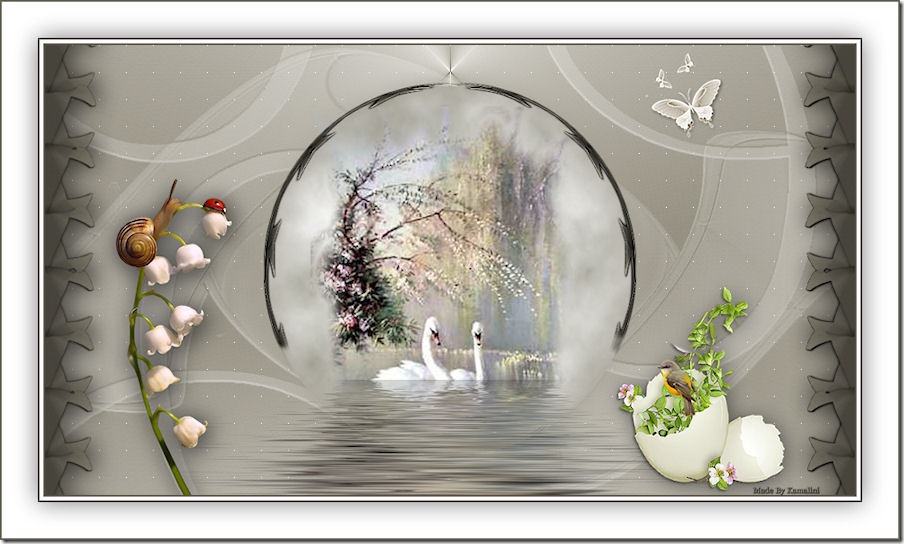
Enjoy this lesson
Greetings Mieke
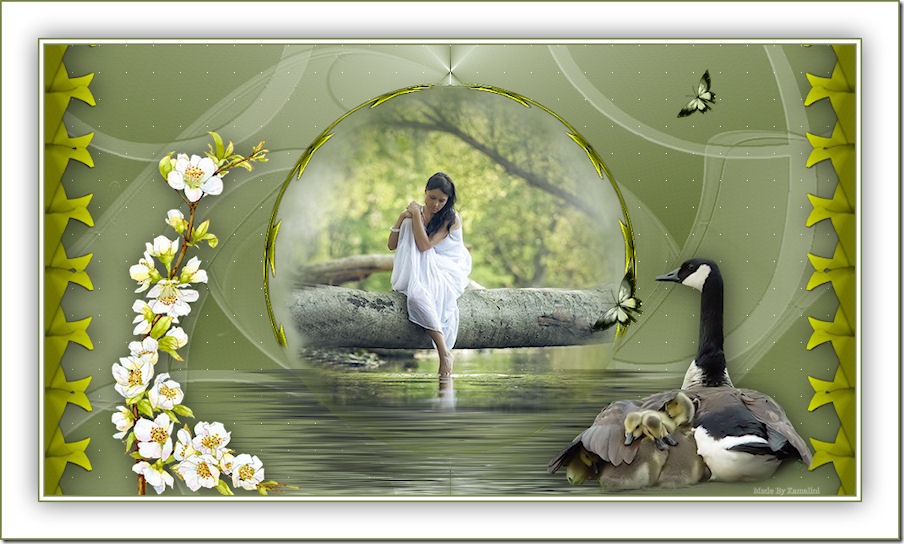
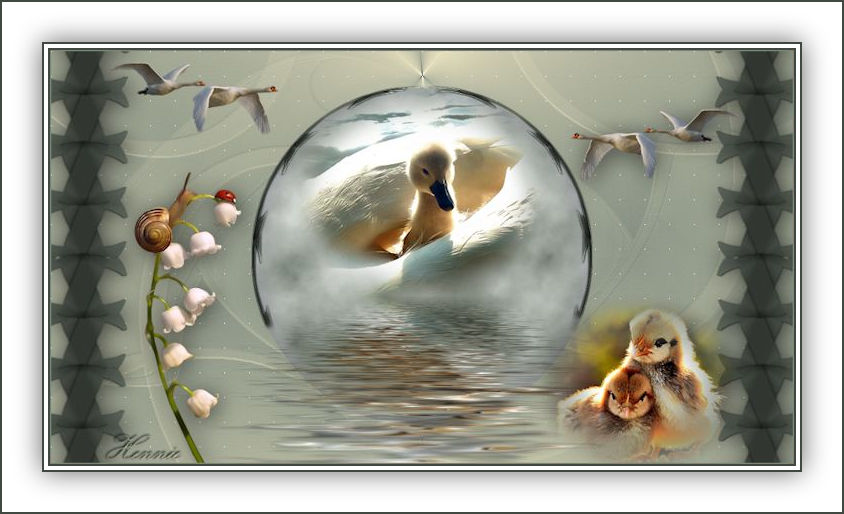
Examples created by Kamalini and Hennie

|


