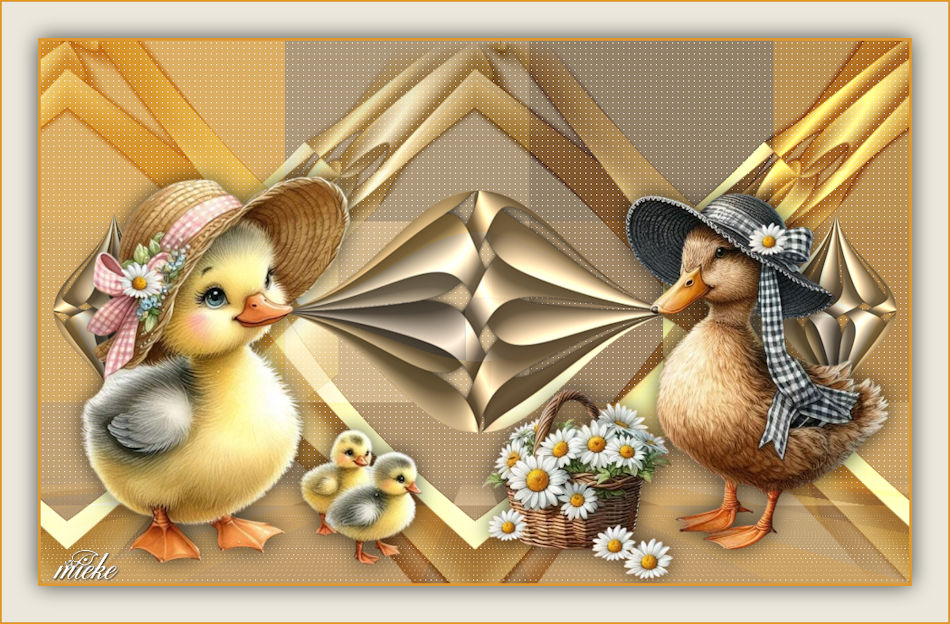
Easter lesson 2025
Translation made by MARION

Materials
Mieke has used the following filters
Filter---<I C Net Software> Filters Unlimited 2.0---V.M.Texture
Filter---Flaming Pear---Flexify 2
Filter---Carolaine and Sensibility CS-LDots
Filter---Mura`s Meister---Perspective Tiling
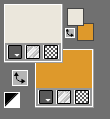
Material Properties:
Set your Foreground color to color ---#ebe7dc---Set your Background color to color #de992c
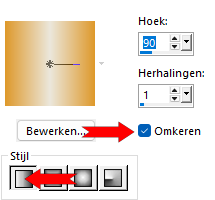
Gradient---Linear----Angle 90---Repeats 1
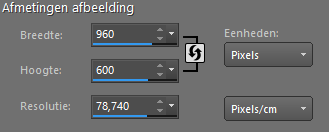
File-Open a new transparent image in this size : Width---960---Heigth---600 Pixels .
1.
Activate Flood fill Tool - Flood fill the layer with the gradient
2.
Selections---Select All
3.
Open the tube---35de6e-removebg-preview.png
Edit---Copy
Activate your work---Edit---Paste into Selection
Selections---Select none
4.
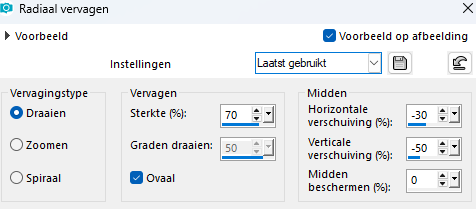
Adjust---Blur---Radial Blur---Spin 70---Elliptical v---Horizontal offset min 30---Vertical offset min 50---Protect center--0
5.
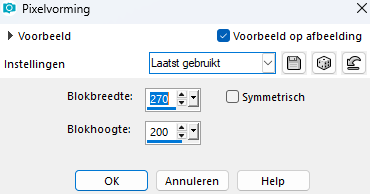
Effects---Distortion Effects--- Pixelate---Block width 270---Block heigth 200.
6.
Layers---Duplicate.
7.
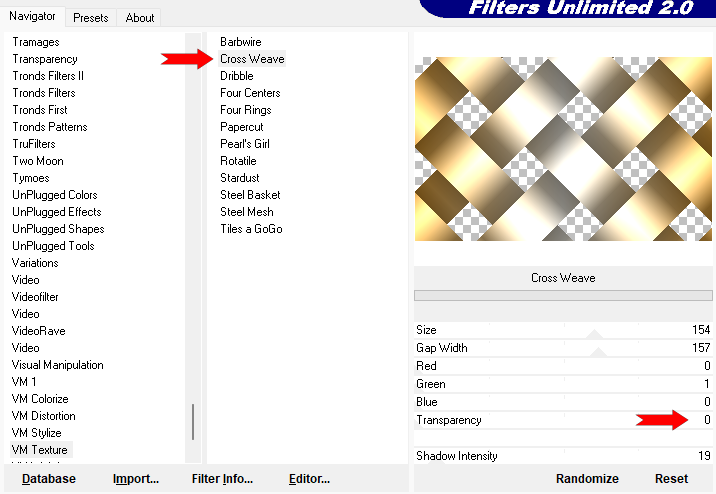
Effects---Plugins---<I C Net Software> Filter in Unlimited 2.0---
V.M.Texture---Transparency at 0---rest standard.
8.
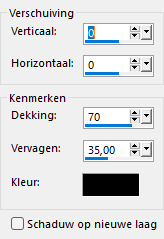
Effects---3D-Effects---Drop Shadow---0---0--70---35. Color black.
9.
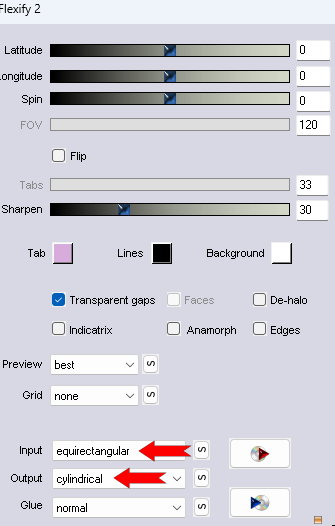
Effects---Plugins---Flaming Pear---Flexify 2---Input---equirectangule---Output---cube---cylindrical---rest standard.
10.
Effects---Distortion Effects ---Polar coordinates---Rectangular to polar---Transparent.

11.
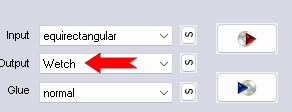
Effects---Plugins---Flaming Pear---Flexify 2---Input---equirectangule---Output---Welch---rest standard.
12.
Effecten---Insteekfilters---Flaming Pear---Flexify 2---Input---equirectangule---Output---square---rest standaard.

13.
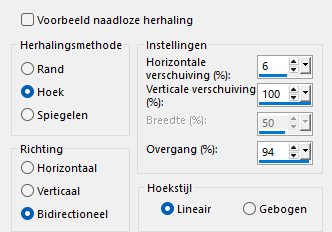
Effects---Image Effects---Seamless Tiling---Preset---Side by side
14.
Layers---Duplicate.
Layers---Merge---Merge Down
Effects---3D-Effects---Drop Shadow 0---0--70---35. Color black
Layers---Properties---Change the blend mode of this layer to Overlay
15.
Open the tube --- deco-1.png
Edit---Copy
Activate your work --- Edit --- Paste as new layer
16.
Layers---Duplicate
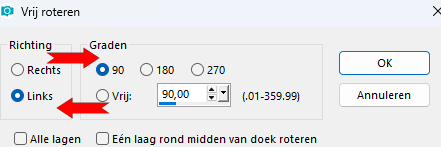
Image ---Free Rotate ---Degrees 90%--- Direction Left
17.
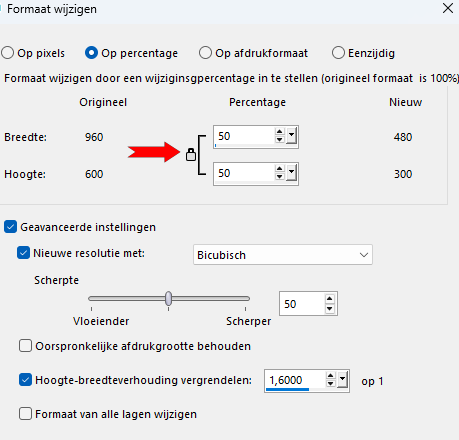
Image ---Resize 50%---Resize all layers not checked
18.
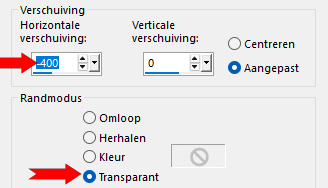
Effects---Image Effects---Offset---min 400---0---Custom---Transparent checked
Layers---Duplicate
Image -Mirror -Mirror Horizontal (Image - Mirror in older versions of PSP).
19.
Activate--- Raster 1 in the layers palette
Effects---Plugins---Carolaine and Sensibility CS-LDots---255---3---2

20.
Layers---Duplicate.
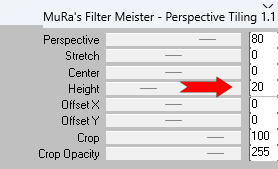
Effects---Plugins---Mura`s Meister---Perspective Tiling 1.1---Height 20.
21.
Effects---Reflection-Effects---Rotating Mirror ---0---0---Reflect checked ( Default)
22.
Activate your Magic Wand - Tolerance at 0 and Feather at 40

Click in the transparent part to select it.--- Delete 4 times on your keyboard
Selections---Select none.
23.
Activate the top of the layers palette
Open the tube---2 35de6e-removebg-preview.png
Edit ---Copy
Activate your work --- Edit ---Paste as new layer
Place tube wherever you like.
Effects---3D-Effects---Drop Shadow---0---0--70---35. Color black
24.
Activate the top of the layers palette
25.
Open the tube--- 9b1-removebg-preview.png
Edit---Copy
Activate your work --- Edit ---Paste as new layer
Place tube wherever you like.
Effects---3D-Effects---Drop Shadow ---0---0--70---35. Color black.
26.
Border
Image - Add borders - Symmetric checked---2 pixels -Dark color
Selections---Select All.
Image - Add borders - Symmetric checked---40 pixels -Light color
Effects---3D-Effects---Drop Shadow ---0---0--70---35. Color black
Selections---Select none.
Image - Add borders - Symmetric checked---2 pixels -Dark color
Add your watermark to a new layer.
Save as JPG
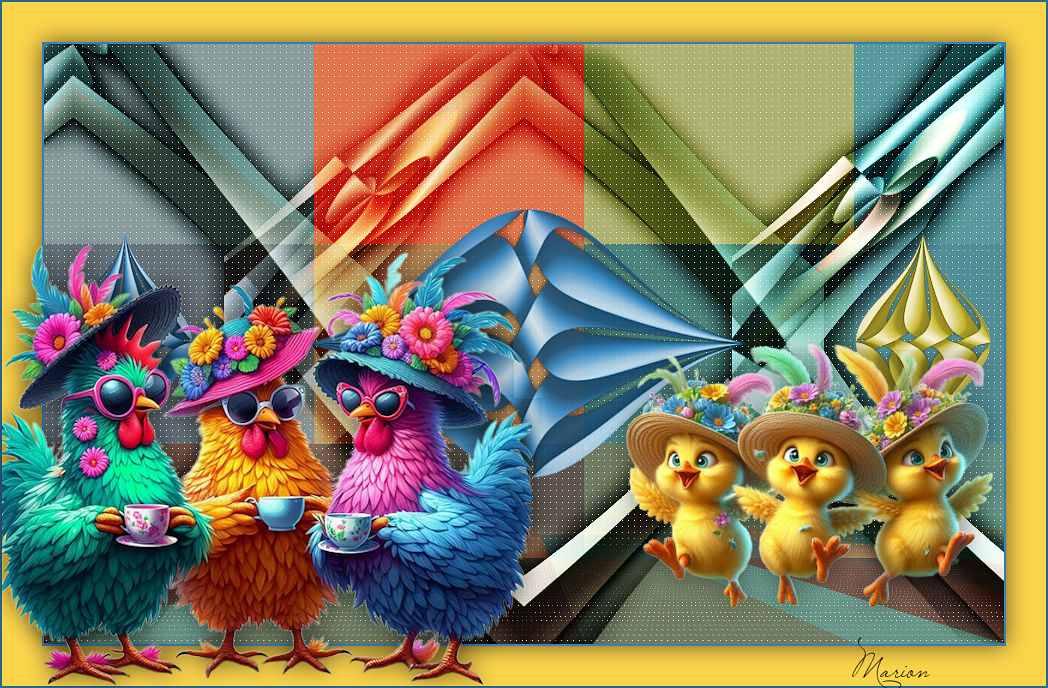
Voorbeelden gemaakt door Kamalini-Hennie-Corrie---Marion (Engelse vertaling.)
 .jpg)

|