Lesson 59
Translation made by MARION


Fournitures
Material Here
This lesson was written in PSP X8
but it can also be made in other versions.
The colors can vary greatly depending on the PSP you are using. .
Open the tubes in PSP
1
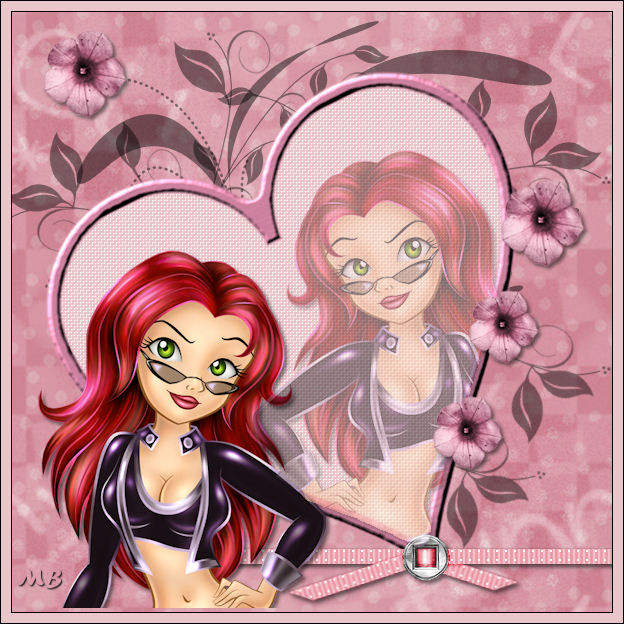
File - Open a new transparent image of this size: 600 x 600 pixels

2.
Selections---Select All
3.
Open the Image ---Achtergrond1---Edit---Copy---
Activate your work --- Edit ---Paste into Selection
4.
Selections---Select none
5.
Open the Tube--- siertak.png---Edit---Copy --- Activate your work --- Edit ---Paste as new layer
Use the Move tool to move it up slightly.
Use your Move tool  --to move the tubes. --to move the tubes.
Remember to activate the layer you're working on in the Layers palette.
6.
Open the tube--- hart-59.png--- Edit---Copy --- Activate your work --- Edit ---Paste as new layer
Effects---3D- Effects---Drop Shadow 3-3-50-20---Color black.
7.
Open the tube--- Riem-024156.png--Edit---Copy --- Activate your work --- Edit ---Paste as new layer
8.
Effects---3D- Effects---Drop Shadow 3-3-50-20---Color black.
9.
Move the tube to the right corner
The flower comes on the tip of the heart (see finished image)
10.
Open the tube---tiener(girl)---2---Edit---Copy --- Activate your work --- Edit ---Paste as new layer
11.
Use the Move tool to slide her into the corner of the heart on the right.---See finished image
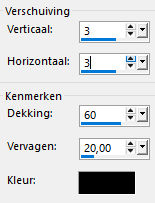
12.
Layers---Properties---Reduce the opacity of this layer to 44%
( Or whatever you like.)
13.
Open the tube---Tiener.
Edit---Copy --- Activate your work --- Edit ---Paste as new layer
Use the move tool. Move the tube to the bottom left.---See finished image
Effects---3D- Effects---Drop Shadow 3-3-50-20---Color black.
15.
Open the tube--- bloem-1.
Edit---Copy --- Activate your work --- Edit ---Paste as new layer
Move the tube in a nice place ---Repeat the Drop Shadow.
16.
Layers---Duplicate----Place the tube at the top left, for example, on the black flower.
17.
Open the Tube---bloem-2--- Edit---Copy --- Activate your work --- Edit ---Paste as new layer
Move the tube in a nice place ---Repeat the Drop Shadow.
18.
Layers---Duplicate---Move the tube in a nice place (See finished image)
19.
All layers are still separate.
Using the Move tool, you can adjust the position of the tubes----
or add a drop shadow by activating the layer in the layers palette.
Do whatever you want.
20.
Image---Add border---1 pixel---Color black.
Image---Add border---10 pixel---Color #f2dddf.
Image---Add border---1 pixel---Color black .
Layers ---Merge--- Merge All (flatten)
Place your watermark on a new layer
Save asJPG
Greetings Mieke
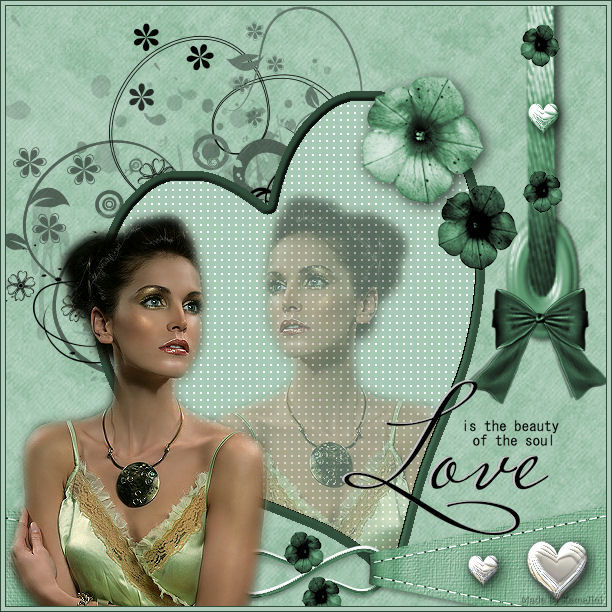
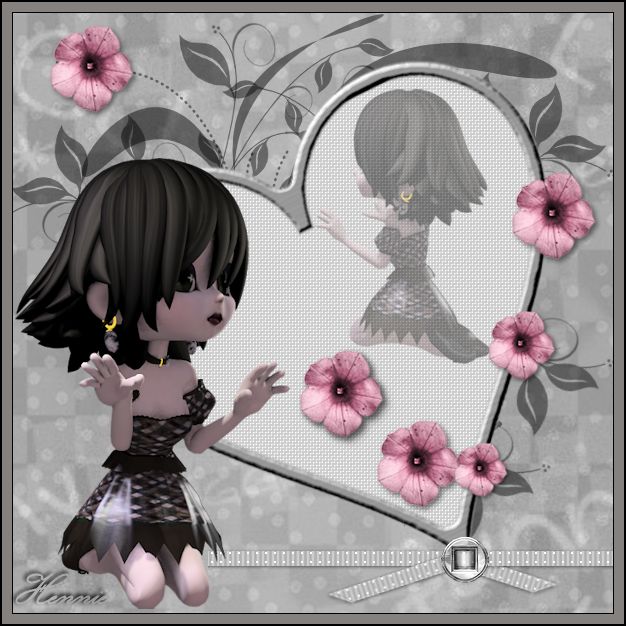
Examples created by Kamalini and Hennie

|


