Supplies
Plugins
Filter---Andrew’s Filter 52---Warping Sign
Filter---Alien Skin Eye Candy 5: Impact---Glass---Clear
Filter---Carolaine and Sensibility---cs texture
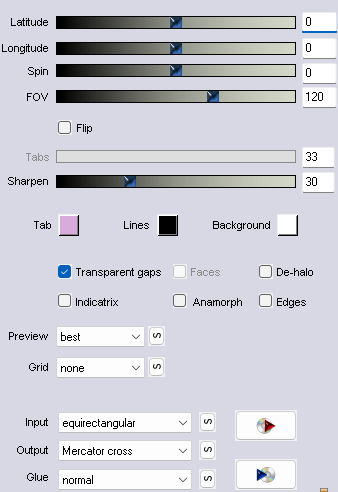
Filter---Flaming Pear---Flexify 2
Material.

Color Palette
Set the foreground color to color #c6bacb---Set the background color to color #5f3d4c

1.
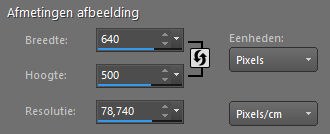
File---New
Open a new transparent image in this size : 640 x 500 pixels
2.
Flood fill the layer with the foreground color #c6bacb
3.
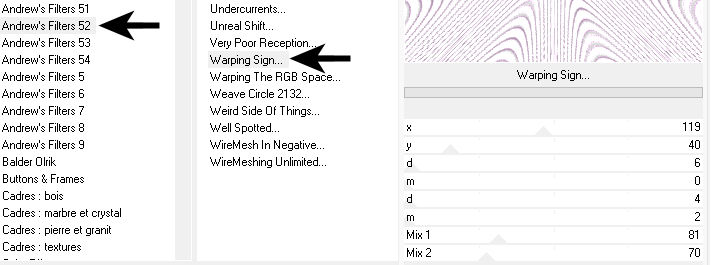
Effects---Plugins
< I.C.Net Software> Filter in Unlimited 2.0>
Andrew’s Filter 52---Warping Sign use the settings below
4.
Image ---Picture Frame --Select--Film--
Frame Canvas ------Frame inside of the image
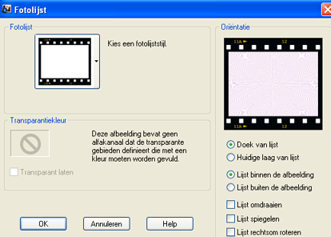
Activate your Magic Wand - Tolerance and Feather at 0

Click on the white squares until they are all selected.
5.
Layers---New raster layer.
Selections---Modify---Expand 2 pixels
Flood fill the selection with the light color
6.
Effects---Plugins---Alien Skin Eye Candy 5: Impact---Glass---Clear
Selections---Select none
Close Raster 1 (background layer) in the layer palette
Activate the layer with the Foto Frame
Activate your Magic Wand - Tolerance and Feather at 0
Click with the Magic wand in the middle of the Frame
Selections---Invert---Flood fill the selection with the light color
Selections ---Invert
7
Layers--New raster layer
Flood fill the selection with the dark color
Selections---Contract---Contract 10 pixels
Delete on the keyboard.
8.
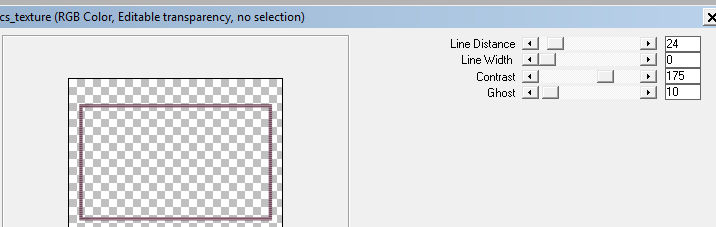
Selections---Select none
Effects---Plugins---Carolaine and Sensibility---cs texture--24---0-175---10.
9.
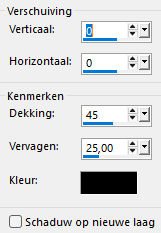
Effects---3D-Effects--- Drop Shadow with these settings ---0---0---45---25---Color Black.
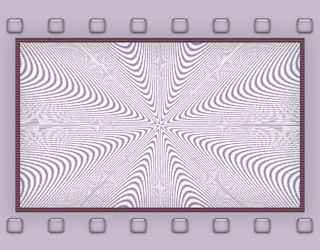
Open ---The Background layer (Raster 1)
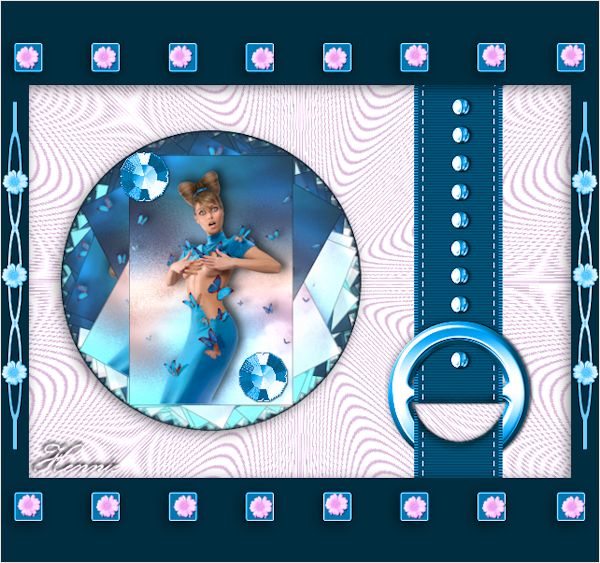
The Result
10
Open the tube ---Riem-25
Edit--- Copy ---Activate your work --- Edit ---Paste as new layer
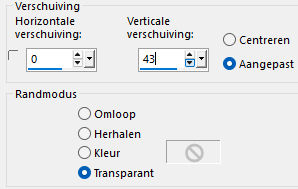
Effects---Image Effects---Offset---0---43---Custom---Transparent---checked.
Effects---3D-Effects--- Drop Shadow with these settings ---0---0---45---25---Color Black.
11.
Open the tube---deco-2.png
Edit--- Copy ---Activate your work --- Edit ---Paste as new layer
Layers---Arrange---Move Down
Layers---Properties---Reduce the opacity of this layer to 55%.
Layers---Duplicate
12.
Effects--Plugins---Flaming Pear---Flexify 2---Input---equirectangule---Output---Mercator cross---rest standard.
Effects---3D-Effects--- Drop Shadow with these settings ---0---0---45---25---Color Black.
Layers---Properties---Opacity 100%.
13.
Open the Tube--- printerst-aa.png
Edit--- Copy ---Activate your work --- Edit ---Paste as new layer
Layers---Arrange---Bring to Top
Put the tube in a nice place
14.
Open the Tube---printerest-789
Edit--- Copy ---Activate your work --- Edit ---Paste as new layer
Put the tube in a nice place
15.
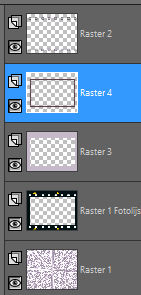
Layers---Merge---Merge All
Selections---Select All
Image--Add borders ---40 Pixels---Dark color.
Effects---3D-Effects--- Drop Shadow with these settings ---0---0---45---25---Color Black.
16.
Selections---Select none
Add your watermark on a new layer.
Save as JPG.
Have fun with this lesson
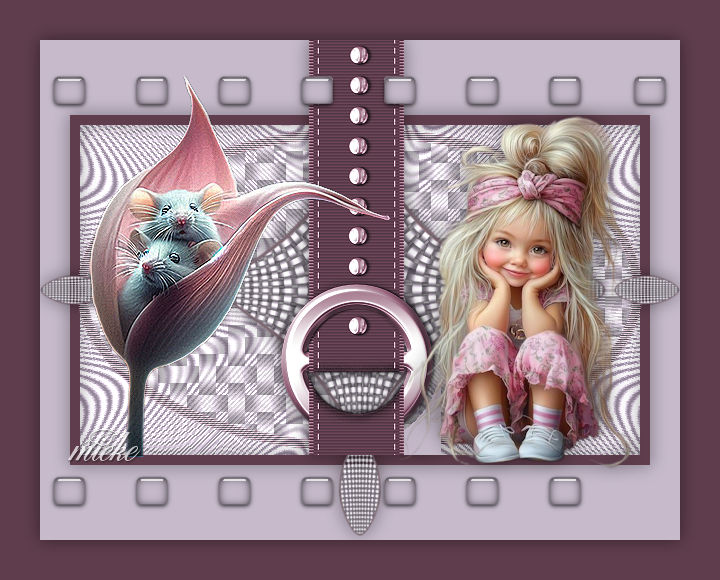
Greetings Mieke
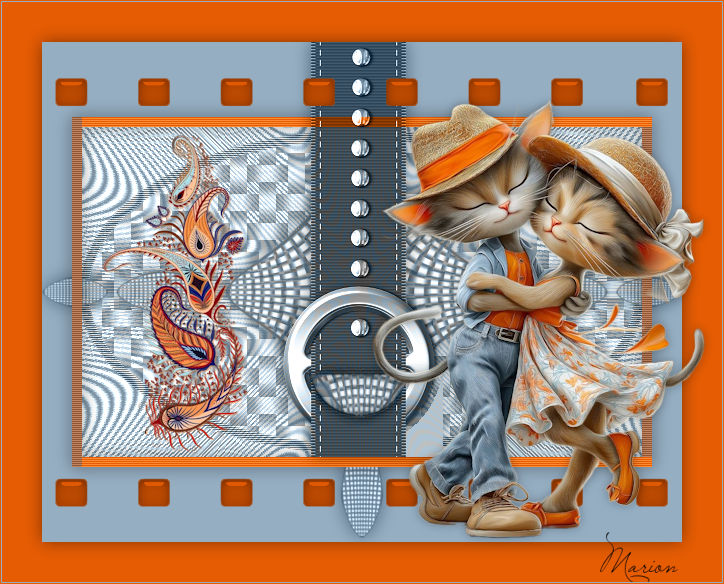
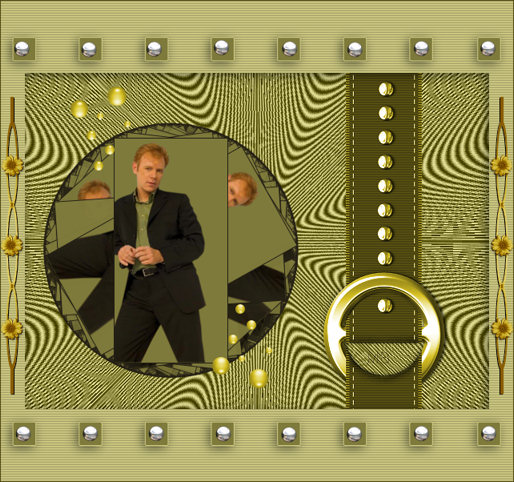
Examples created by Kamalini and Hennie and Marion


