LESSON---268

Translation made by MARION
Material/Supplies
The tube comes from Liriani Silva---Tubes MulHeres---Tubes are shared at Tubespack@groups.io.
Plugins
Plugins---Adjust---Variations
Plugins I C Net Software> Filters Unlimited 2.0>---Simple---4 Way Average---Apply
Material

Material Properties:
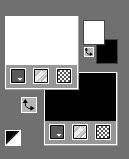
Set your foreground color to color #ffffff—
Set your background color to color #000000
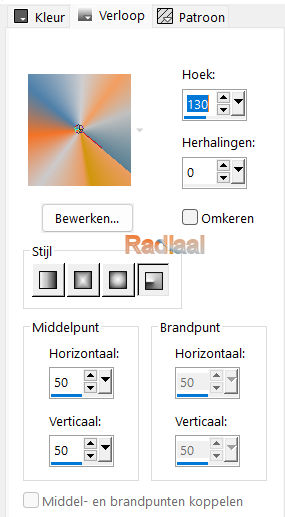
Copy the gradient MGBR in the gradient folder of psp
Set your foreground to gradient and select gradient …
--- MGBR --- Style Radial—130---0---Center Point ---Horizontal 50 ---Vertical---50.
Invert not checked
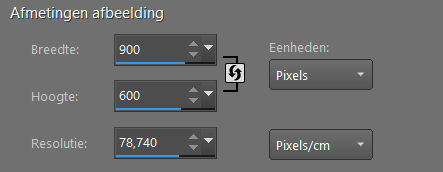
1. File: Open a transparent image in this size:
Width---900---Height---600.
2.
Flood Fill Tool – Fill the layer with the gradient
3.
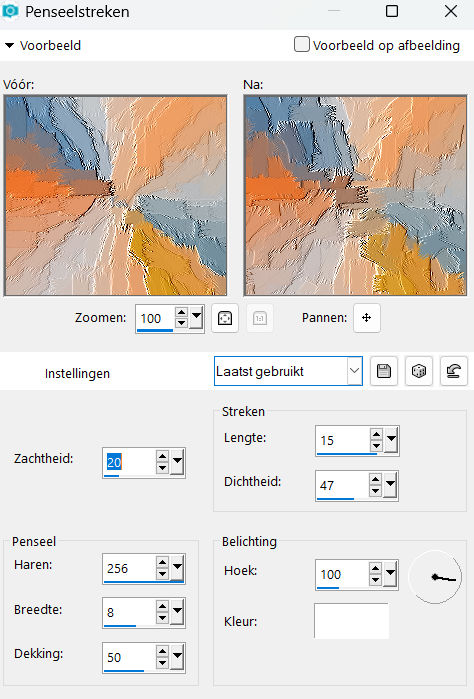
Effects---Art Media Effects---Brush Strokes with these settings: 20---256---8---50---15---47---100---Color White.
4.
Effects---Plugins---Adjust---Variations---Click 1x on Original--and 1x on Darker.
5.
Layers- New Raster Layer
Properties Foreground- Set the foreground color to color #ffffff
Flood Fill Tool-Fill the layer with #ffffff
Layers- New Mask Layer -From Image and select Mask -268.jpg

6.
Layers- Merge- Merge Group
7.
Effects---Edge Effects---Enhance.
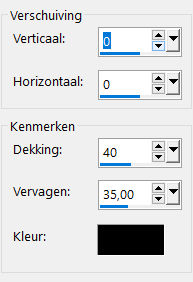
Effects---3D-effects---Drop Shadow with these settings:---0---0--40---35. Color Black
8.
Open-- the-Tube---deco-268-1.png
Edit---Copy
Activate your work -Edit - Paste as a new layer
9.
Effects---3D-effects---Drop Shadow with these settings :---0---0--40---35. Color Black.
10.
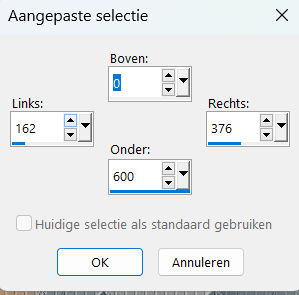
Activate Selection Tool -Custom Selection (S) with these settings
---Top 0---Left 162--- Right 376---Bottom-600
11.
Layers- New Raster Layer
Flood Fill Tool-Fill the selection with #ffffff
12.
Layers-Properties-Reduce the Opacity of this layer to 50 %.
13.
Selections---Select None .
14.
Effects---Plugins---<I C Net Software> Filters in Unlimited 2.0>---Simple---4 Way Average---Apply
15.
Open the Tube--- bloem-12.png
Edit---Copy
Activate your work -Edit - Paste as a new layer
Move to the left--see example..
16.
Open the Tube--- MULHERES_1563.pspimage
Edit---Copy
Activate your work -Edit - Paste as a new layer
.
Move to the right
17.
Image - Add borders-Symmetric checked ---1 Pixel with your dark color
Selecties---Alles selecteren
Image - Add borders-Symmetric checked ---50 Pixels with your light color
Selections---Invert.
18.
Properties Foreground -Set your foreground color to gradient and select gradient --- MGBR
Settings as before.
Flood Fill Tool – Fill the selection with the gradient.
Adjust---Blur---Gaussian Blur-Radius ---20%.
Selections---Invert.
19.
Effects---3D-effects---Drop Shadow with these settings:----0---0--40---35. Color Black
20.
Selections---Select None
21.
Image - Add borders-Symmetric checked ---1 Pixel with your dark color
Add you watermark on new layer.
Save as JPG.
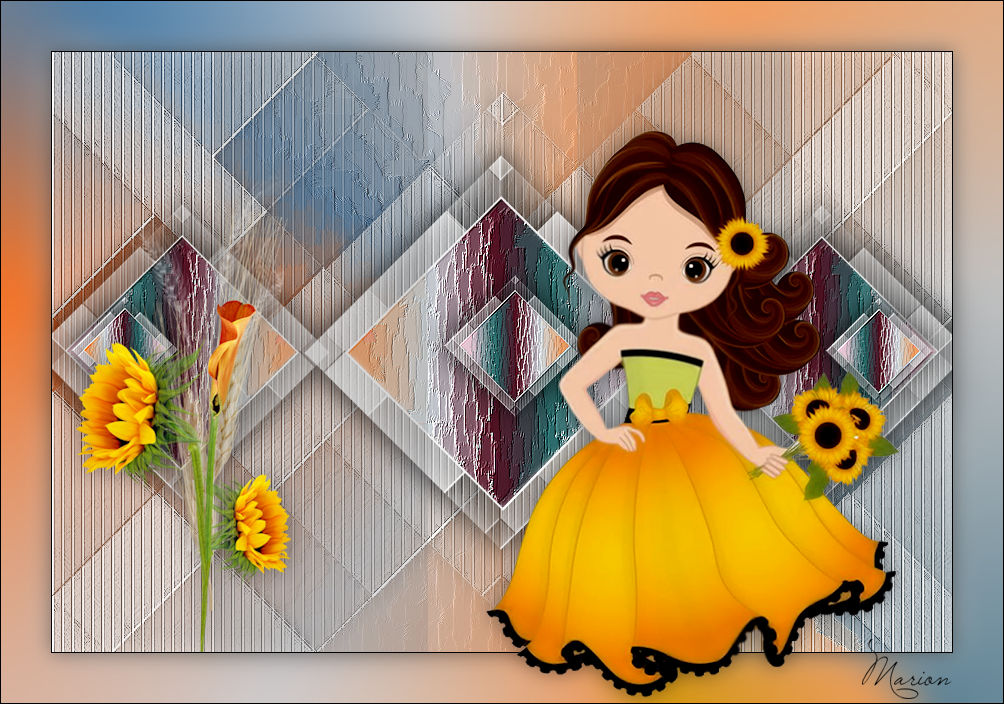
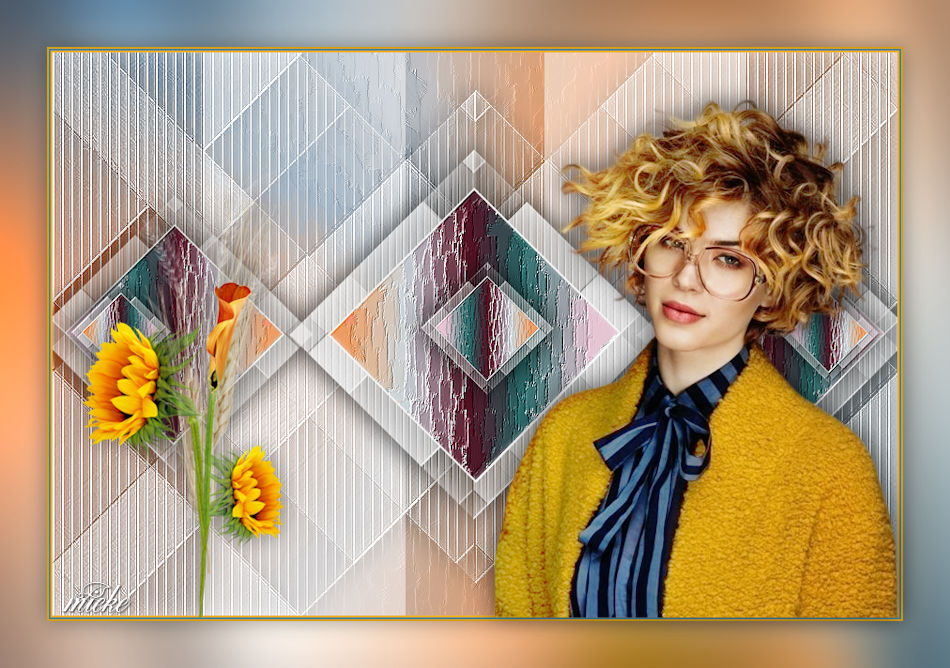
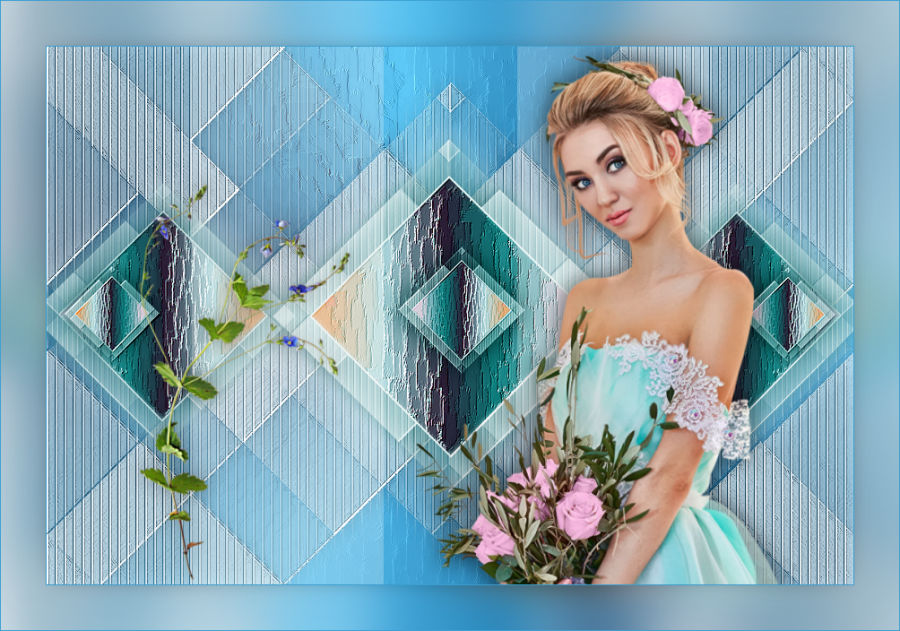
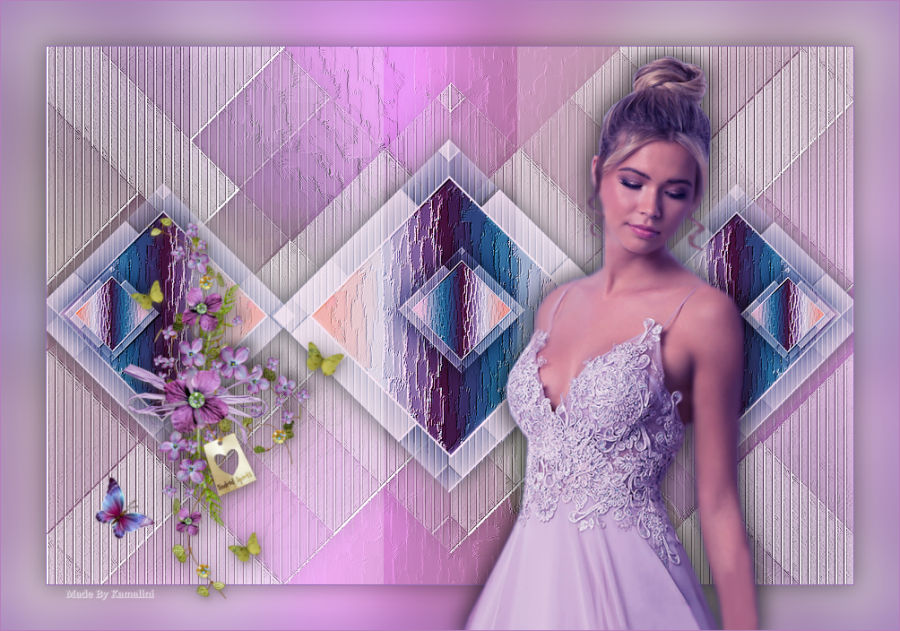
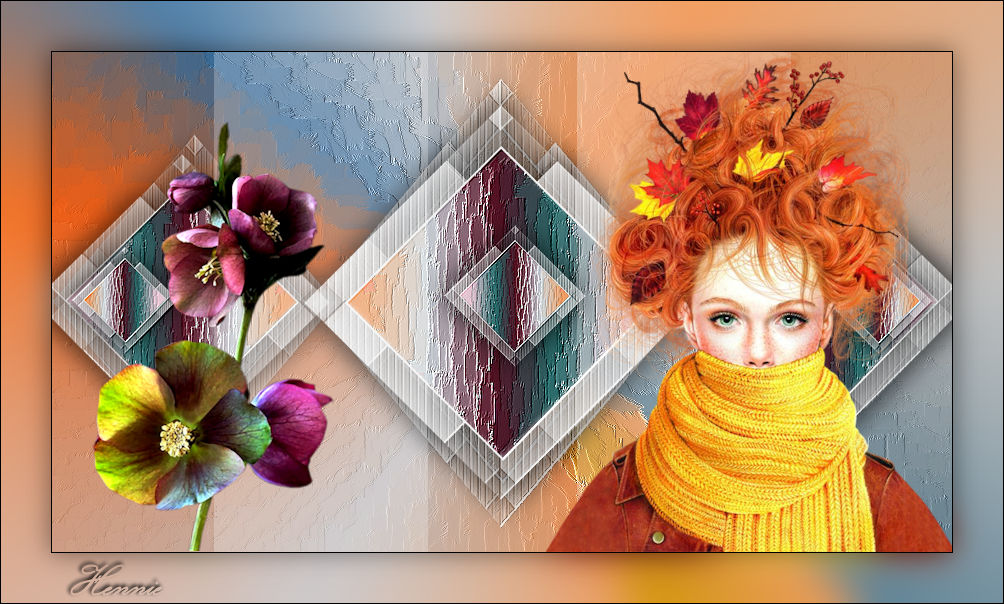
Voorbeelden gemaakt door Kamalini---Hennie---Corrie---Marion

|