Lesson---266

Translation made by MARION
Material/Supplies

Filters
filter---Mehdi ---Sorting Tiles
filter--- Flaming Pear---Flexify 2
filter---<I C Net Software> Filters Unlimited 2.0>---Simple
Material Properties:
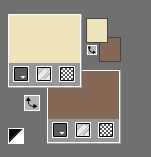
Set your foreground color to color #efe3bb---Set your background color to color # 866857
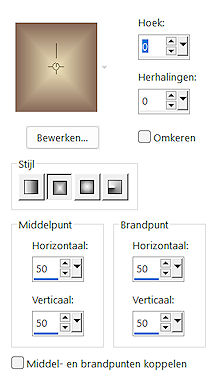
Set your foregroundcolor to foreground/background rectangular gradient with these settings---0---0---50---50---50---50.
1.
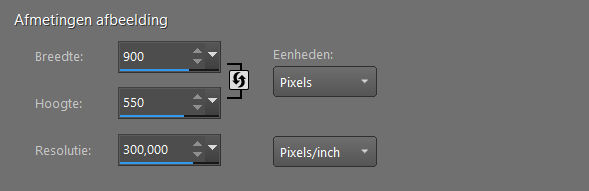
File-Open a new transparent image in this size:
Width---900---Height---550.
Flood Fill Tool-Fill the layer with the gradient.
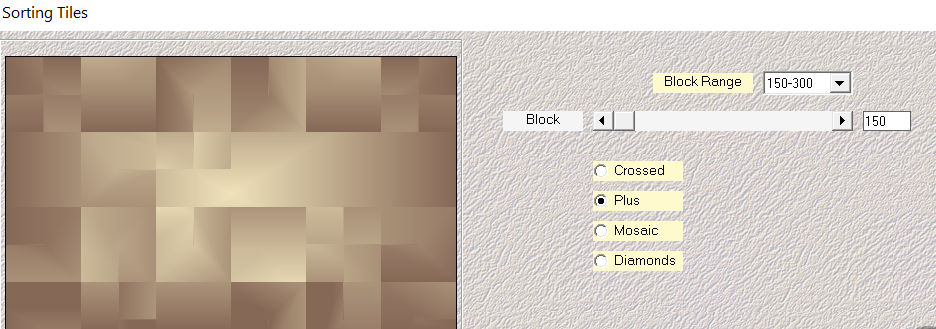
2.
Effects---Plugins---Mehdi---Sorting Tiles---Block Range 150-300---Block-150---Plus
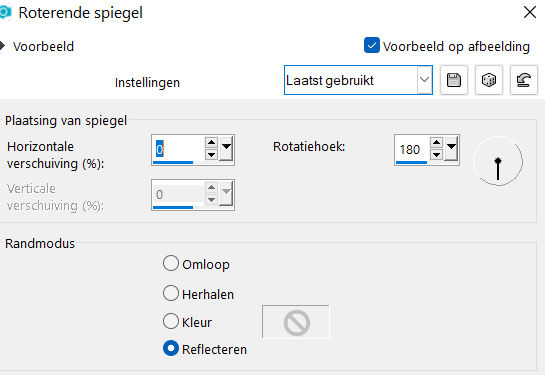
Effects--Reflection effects—Rotating Mirror use the settings below
3.
Image –Rotate Left
4.
Effects--Reflection effects—Rotating Mirror with the same settings
---0---180
5.
Image –Rotate Right
6.
Activate Selection Tool -Custom Selection (S) with these settings
---150---0---900---400.


Selections---Promote selection to layer
7.
Selections---Select none
8.
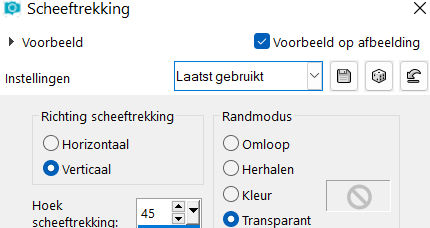
Effects---Geometric Effects---Skew---Vertical---45---Transparent
9.
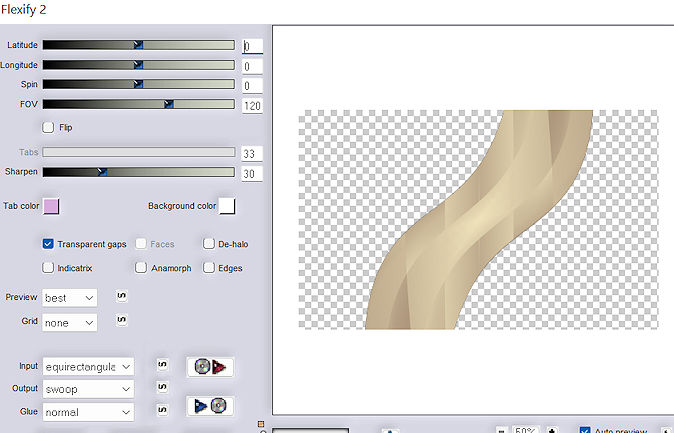
Effects---Plugins---Flaming Pear---Flexify 2---Input---equirectangular---Output---SWOOP--- the rest by default.
10.
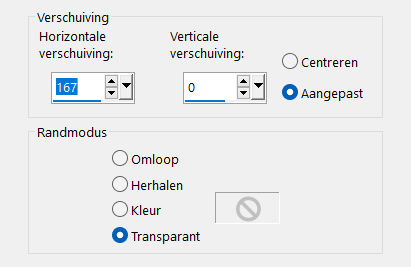
Effects---Image Effects---Offset---167---0---Custom checked..
11.
Layers---Duplicate
Image - Mirror - Mirror Horizontal (Image - Mirror in older versions of PSP)
Layers---Merge---Merge Down.
12.
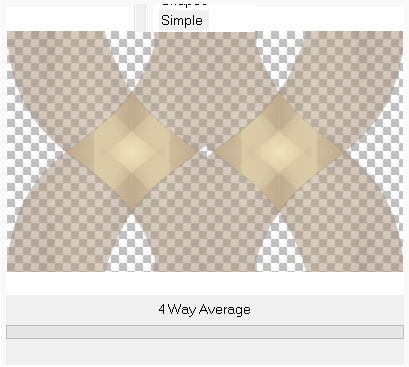
Effects---Plugins---<I C Net Software> Filters in Unlimited 2.0>---Simple---4 Way Average---Apply
13.
Repeat this filter with the same setting.
Effects---Plugins---Flaming Pear---Flexify 2---Input---equirectangular---Output---swoop--- the rest by default.
14.
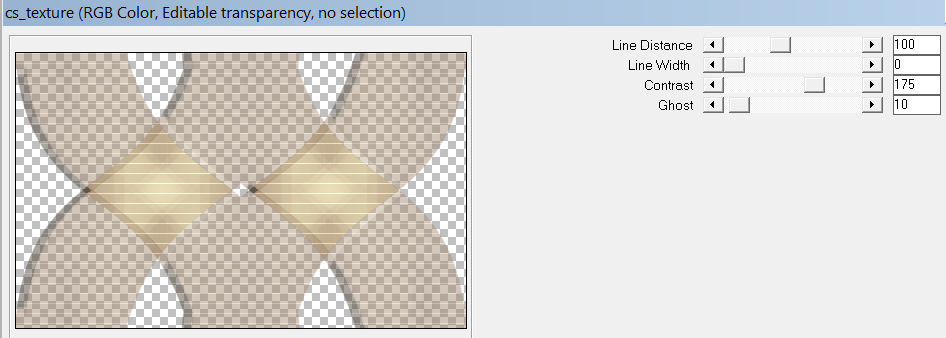
Effects---Plugins---Carolaine and Sensibility---cs texture---100---0---175---10
15.
Effects---Edge Effects---Enhance More.
16.
Layers-Properties-Change the Blend Mode to " Screen " ---Reduce the opacity of this layer to 60
(at your discretion)
17.
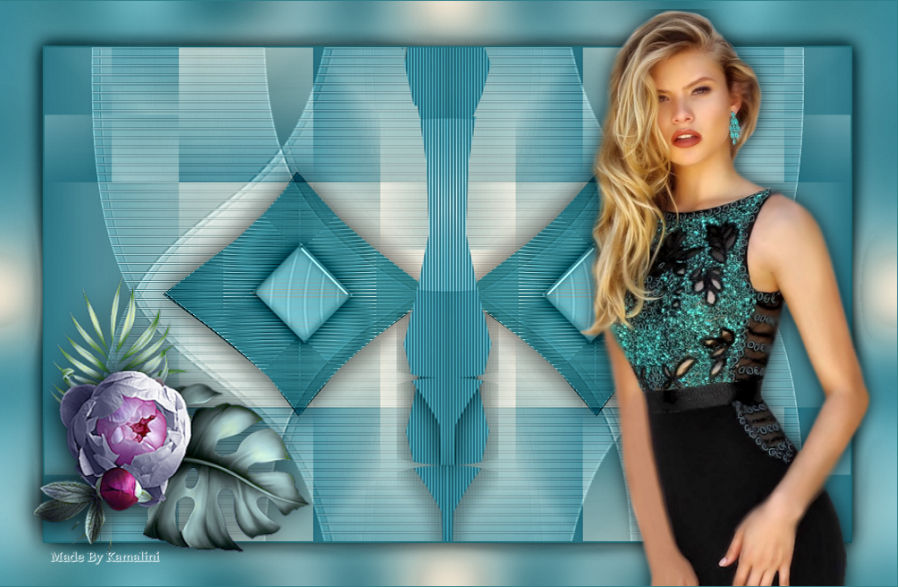
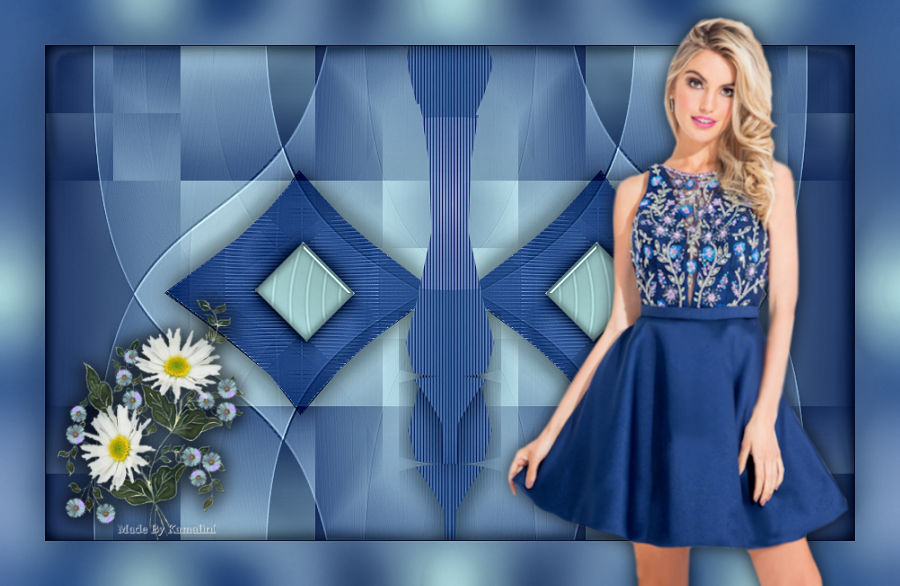
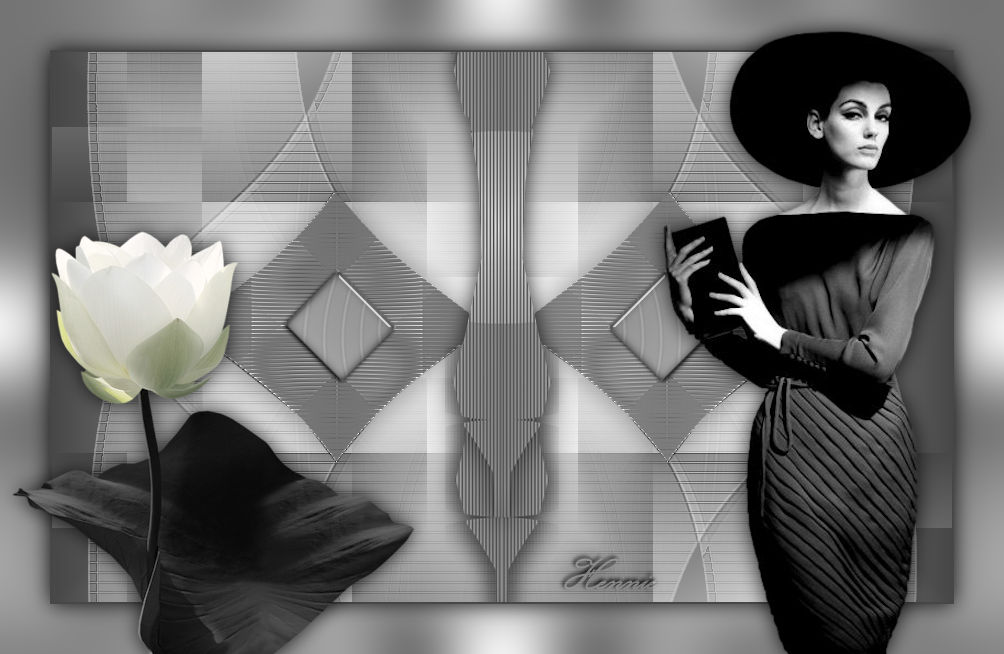
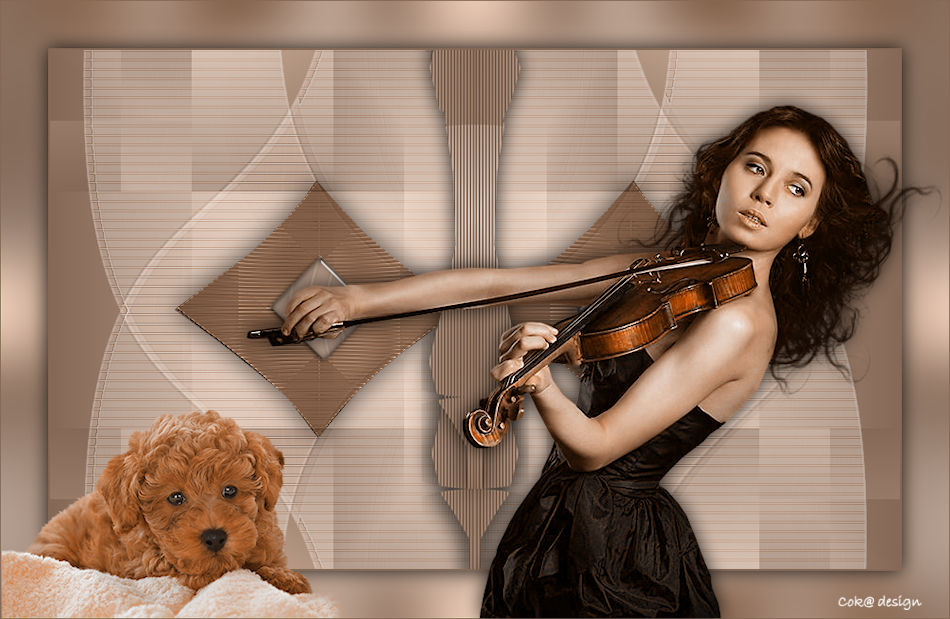
Open—the Tube- deco-1-266.png
Edit---Copy---
Activate your work -Edit - Paste as a new layer
Effects---Image Effects---Offset ---167---0---Custom checked
Layers---Duplicate
Image - Mirror - Mirror Horizontal (Image - Mirror in older versions of PSP)
18.
Open- the Tube -- deco-266-2.png
Edit---Copy---
Activate your work -Edit - Paste as a new layer
19.
Effects---3D-Effects---Drop Shadow with these settings---0---0--80---30. Color black.
20.
Open the Tube deco--- deco-266-3.png
Edit---Copy---
Activate your work -Edit - Paste as a new layer, do not move
21.
Image - Add Borders-Symmetric checked---2 Pixels with your dark color
Selections---Select All.
Image - Add Borders-Symmetric checked ---50 Pixels with your light color
Effects---Image Effects---Seamless Tiling---
---using the default settings
Selections---Invert
Adjust---Blur---Gaussian Blur ---Radius ---30.
Selections---Invert
Effects---3D-Effects---Drop Shadow with these settings ---0---0--80---30.Color black
Selections---Select None
22.
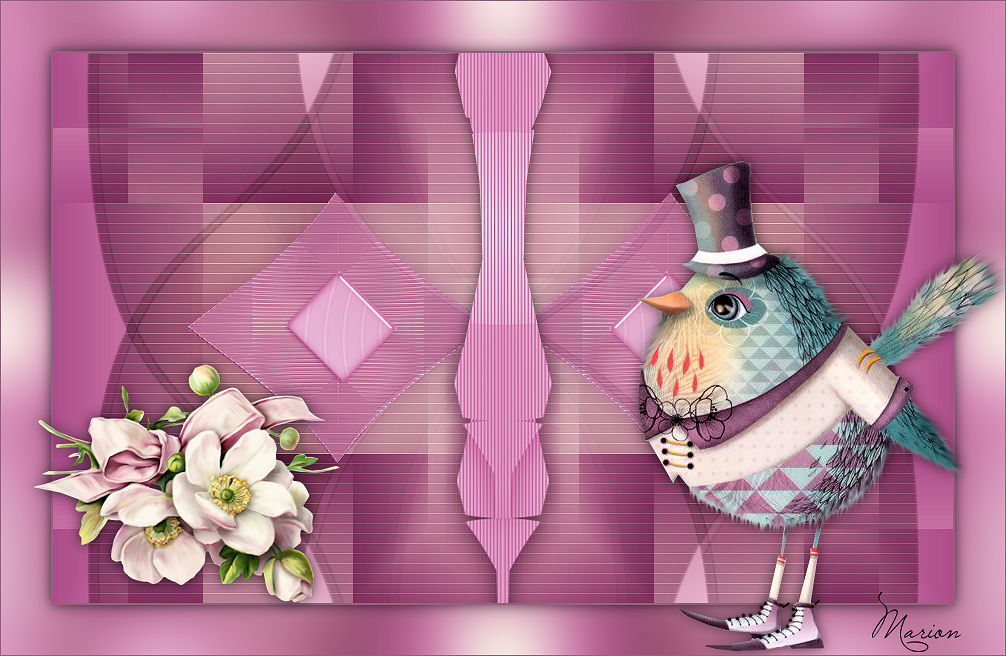
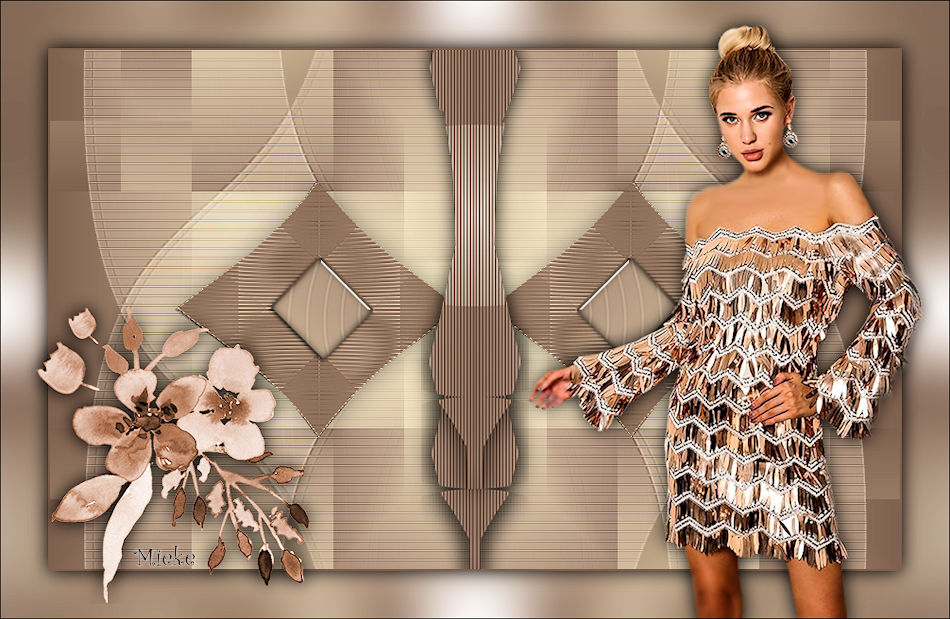
Open- the Tube -- Kamalini-1020 .png
Edit ---Copy
Activate your work -Edit - Paste as a new layer
Move to right----see example.
Effects---3D-Effects---Drop Shadow with these settings ---0---0--80---30. Color black
23.
Open—the Tube - waterbloem.png
Edit ---Copy
Activate your work -Edit - Paste as a new layer
Move to the left below----see example.
24.
Image - Add Borders-Symmetric checked ---1 Pixel with your dark color
25.
Adjust---One Step Photo Fix ---
Add you watermark on new layer.
Save as JPG.
Voorbeelden gemaakt door Kamalini---Hennie---Corrie---Marion

|