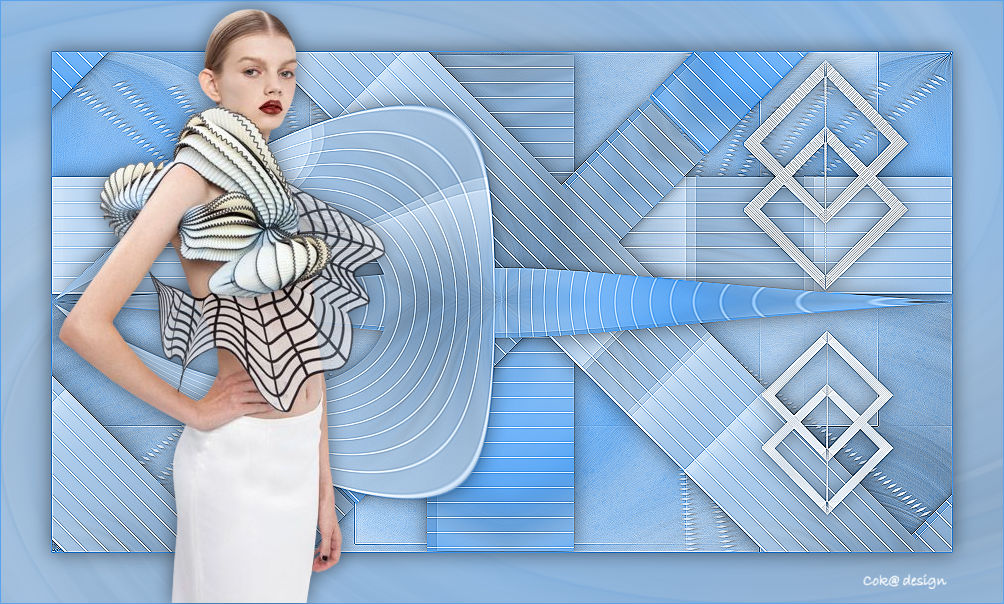
Lesson -263

Translation made by MARION
Supplies/Material
Plugins
Filter---Carolaine and Sensibility---cs texture
filter---Flaming Pear---Flexify 2
Filter---Unlimited 2.0>---Simple---Diamonds
These colors are used for this lesson
Material Properties

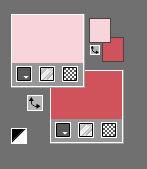
Foreground color # fad4db---Background color # d0525a
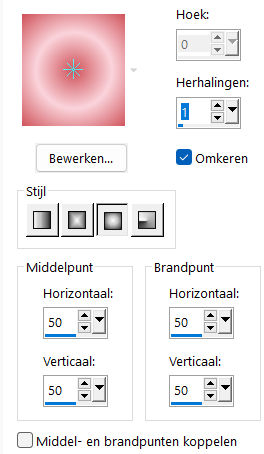
Set your Foregroundcolor to Foreground/Background Sunburst Gradient with these settings
1.
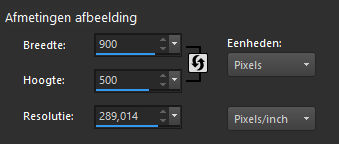
File-Open -New Transparent Image with these settings
Width---900--- Height---500.
2.
Flood Fill Tool-Fill the layer with the gradient
3.
Selections---Select All
4.
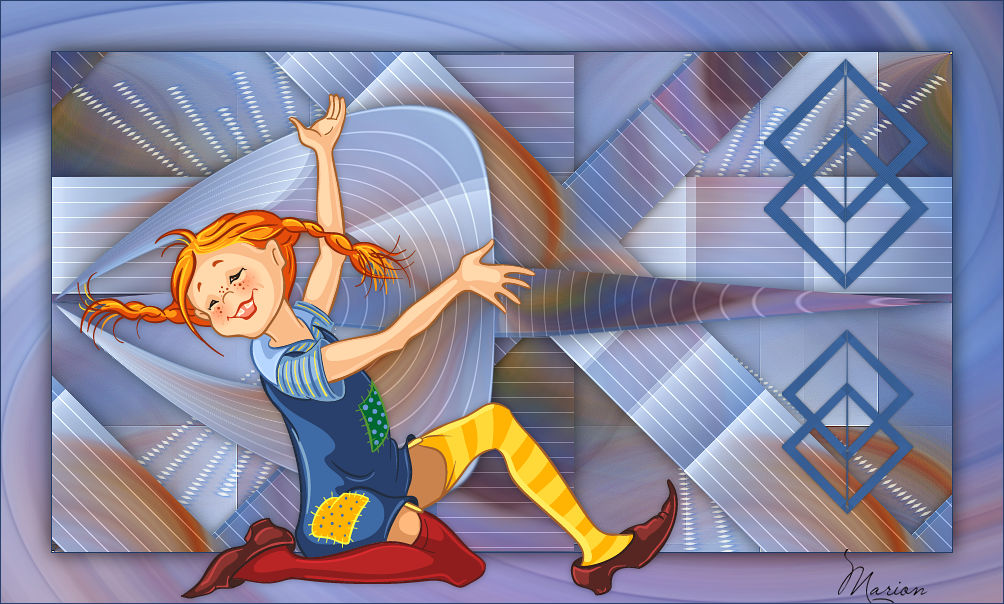
Open—the Tube -Kamalini-1014.png
5.
Activate your work -Edit - Paste into Selection..
Selections---Select None
6.
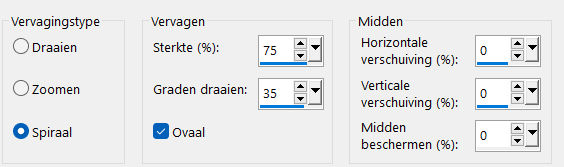
Adjust---Blur---Radial Blur use the settings below
7.
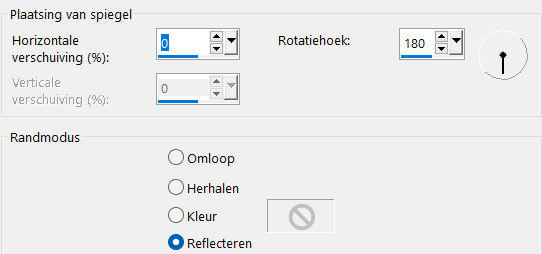
Effects---Reflection-Effects---Rotating Mirror use the settings below
8.
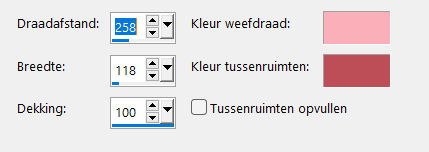
Effects---Texture-Effects---Weave---258---118---100---Color Weave color--- # fad4db—Gap color # d0525a--- Fill gaps no checked
9.
Selections –load/save selection –load selection from disc and select my selection:--- sel.mb-263-1
Selections-Promote selection to layer
Selections---Select none
10.
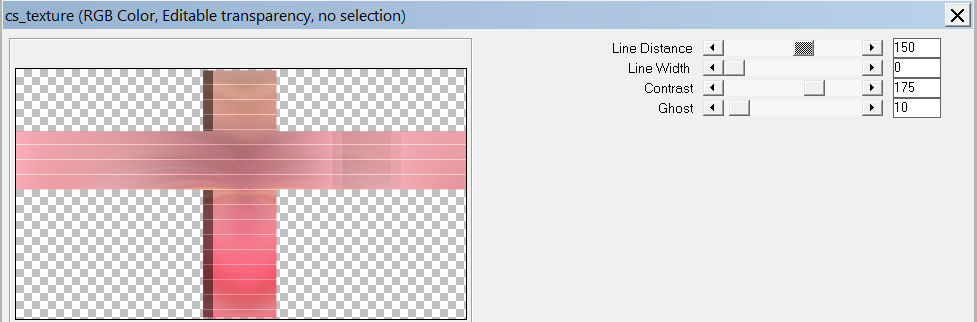
Effects---Plugins---Carolaine and Sensibility---cs texture with these settings:---150---0---175---10
11.
Layers- Duplicate
12.
Effects---Plugins---Flaming Pear---Flexify 2 use the settings below
---Input---polar---Output---trecunx---Glue normal--- remainder standard
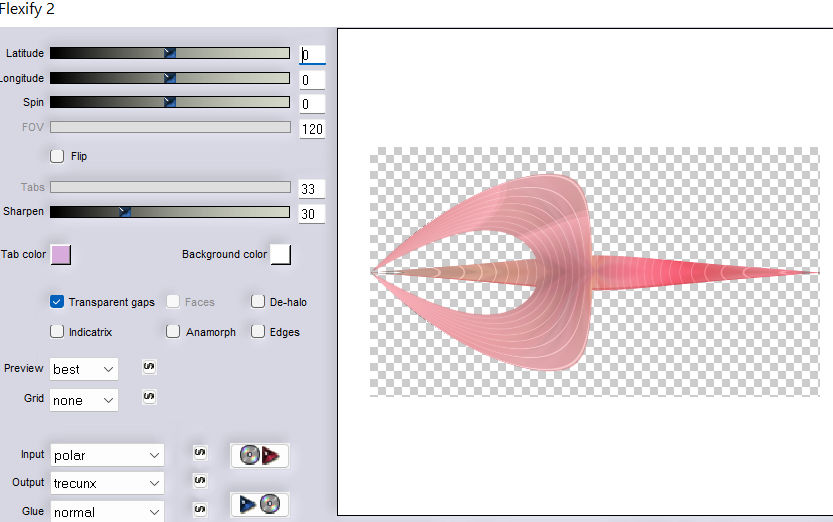 . .
13.
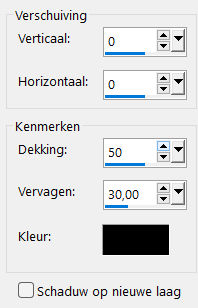
Effects- 3D-Effects - Drop Shadow with these settings: ---0---0---50—30---Color black
14.
Activate the layer underneath---(Promoted selection)
Effects- 3D-Effects - Drop Shadow with these settings: ---0---0---50---30---Color black
15.
Layers---Duplicate
Effects-Plugins-Filter---<I C Net Software> Filter- Unlimited 2.0>---Simple---Diamonds

16.
- Activate the bottom of the layer palette -Raster 1
17.
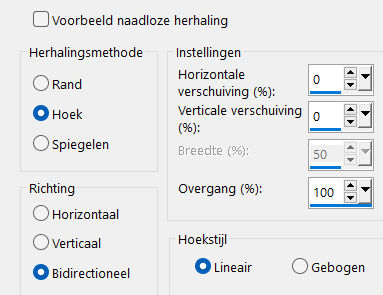
Effects---Image Effects---Seamless Tiling with these settings: ---Corner---Bidirectional---0---0---Transition 100---Linear
18.
Effects---Edge Effects---Enhance.
19.
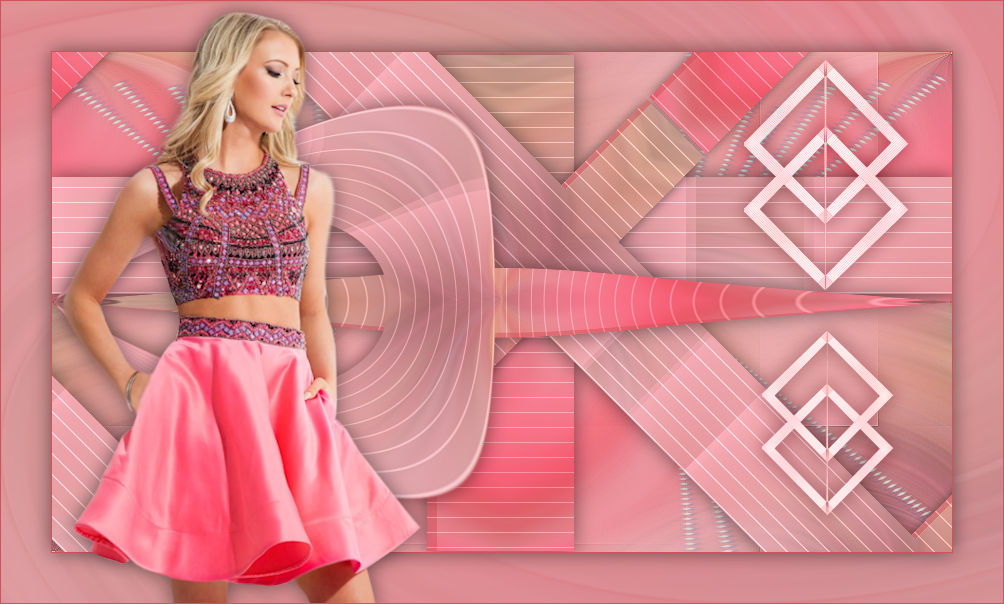
Open—the Tube -Deco---2.
Edit---Copy
Activate your work -Edit - Paste as a new layer
20.
Open—the Tube -Deco---1
Edit---Copy
Activate your work -Edit - Paste as a new layer
Layers---Arrange---Bring to Top
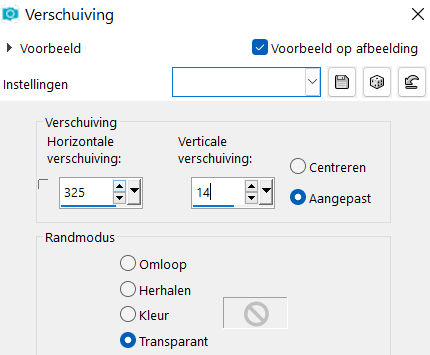
Effects---Image Effects---Offset with these settings:---325---14---Custom checked.
21.
Effects- 3D-Effects - Drop Shadow with these settings: ---0---0---50—30—Color black
22.
Image - Add Borders-Symmetric checked ---1 Pixel---Dark color.
23.
Edit---Copy
24.
Selections---Select All
25.
Image - Add Borders-Symmetric checked ---50 Pixels---Color white
Selections---Invert.
Edit - Paste into Selection
Adjust---Blur---Radial Blur---(with the same settings
Selections---Invert.
26.
Effects- 3D-Effects - Drop Shadow with these settings: ---0---0---50—30---Color black
27.
Effects---Edge Effects---Enhance.
28.
Selections---Select none
29.
Open—the Tube - kamalini---1014-klein.png
Edit---Copy
Activate your work -Edit - Paste as a new layer
Make to size-Move to left.
Drop shadow----According to your own discretion.
30.
Image - Add Borders-Symmetric checked ---1 Pixel---Dark color
Add you watermark on new layer.
Save as JPG.
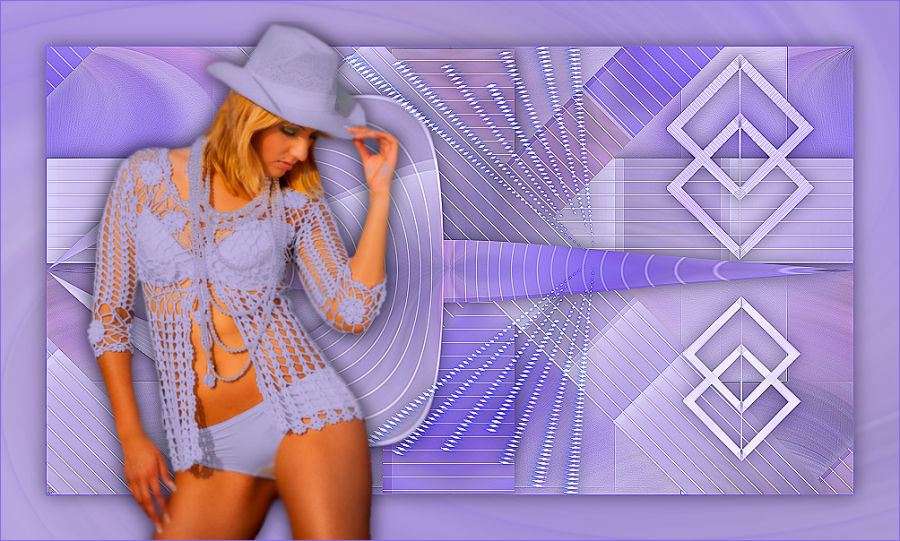
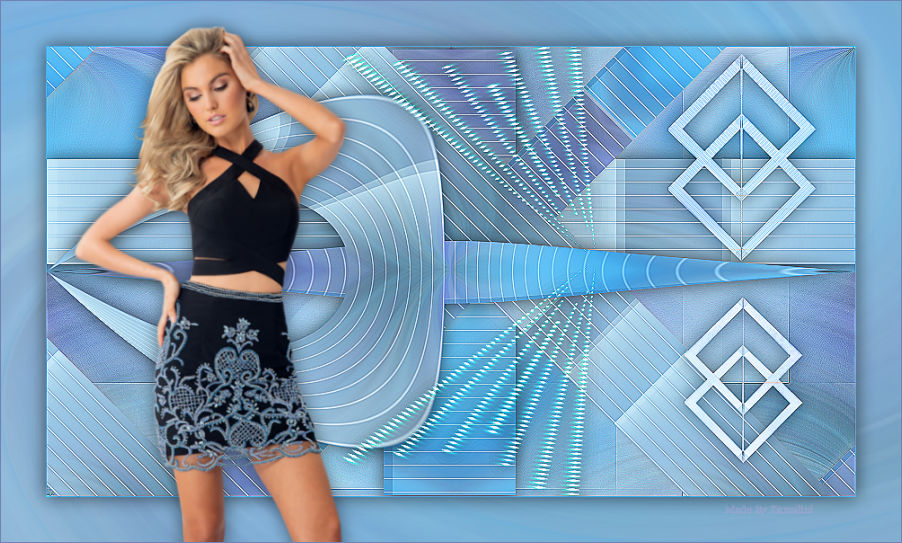
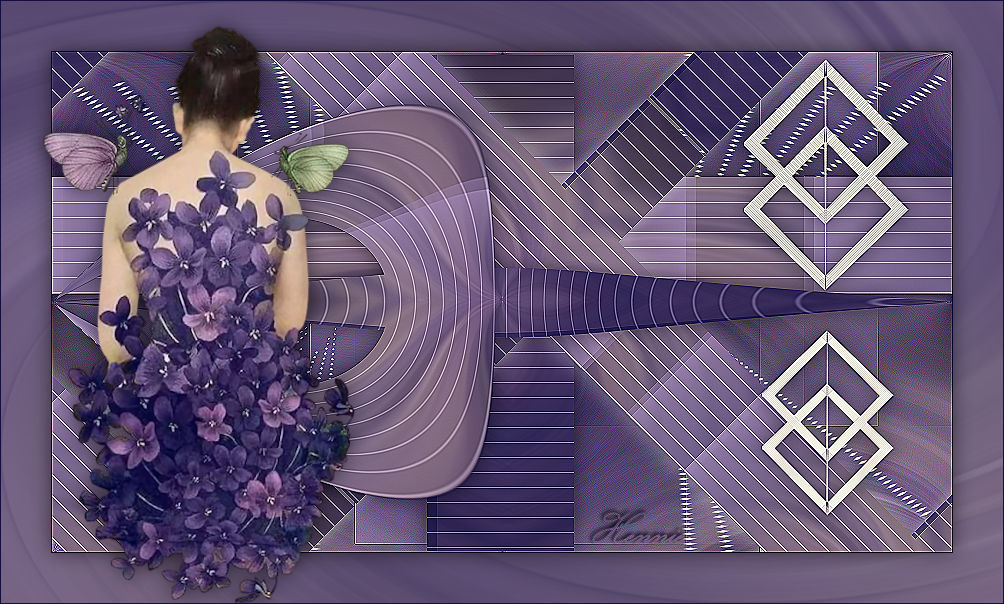
Voorbeelden gemaakt door Kamalini-Hennie-Corrie-Marion

|