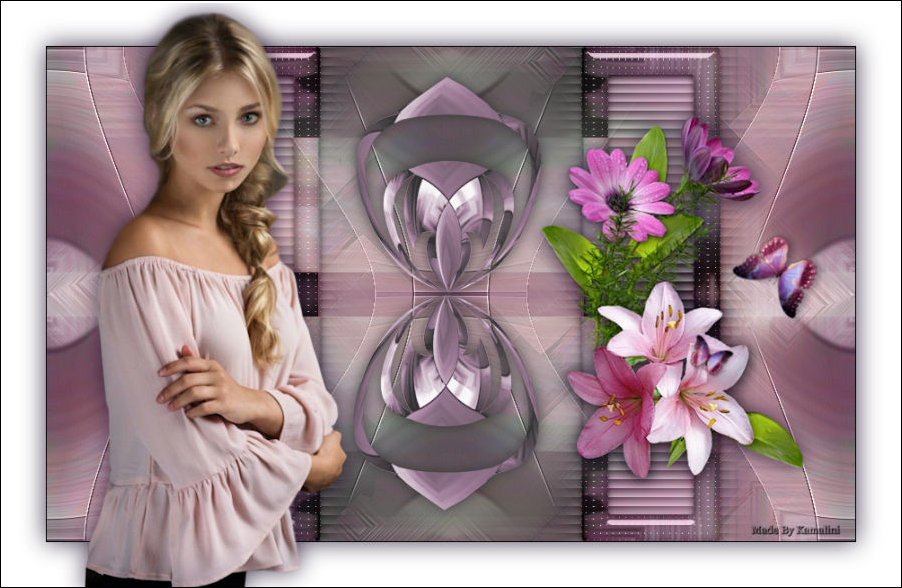
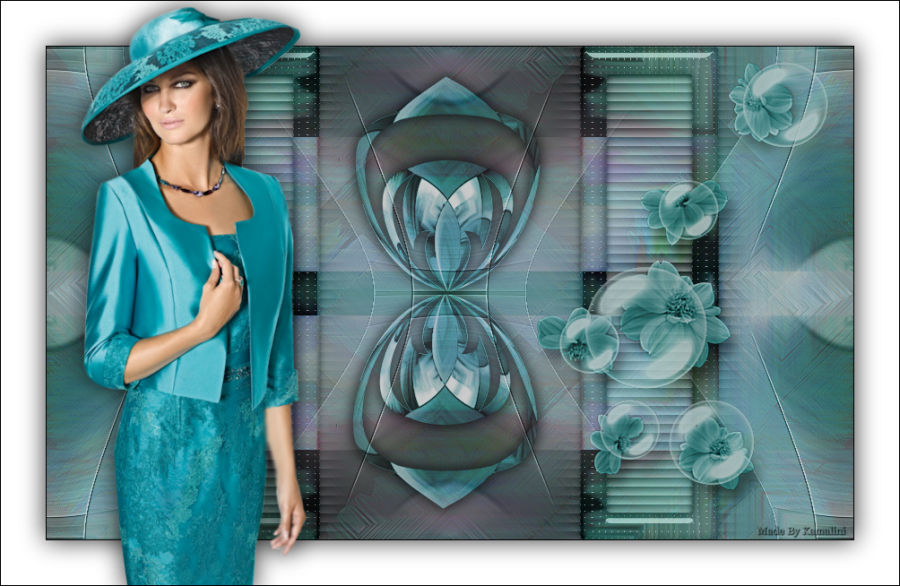
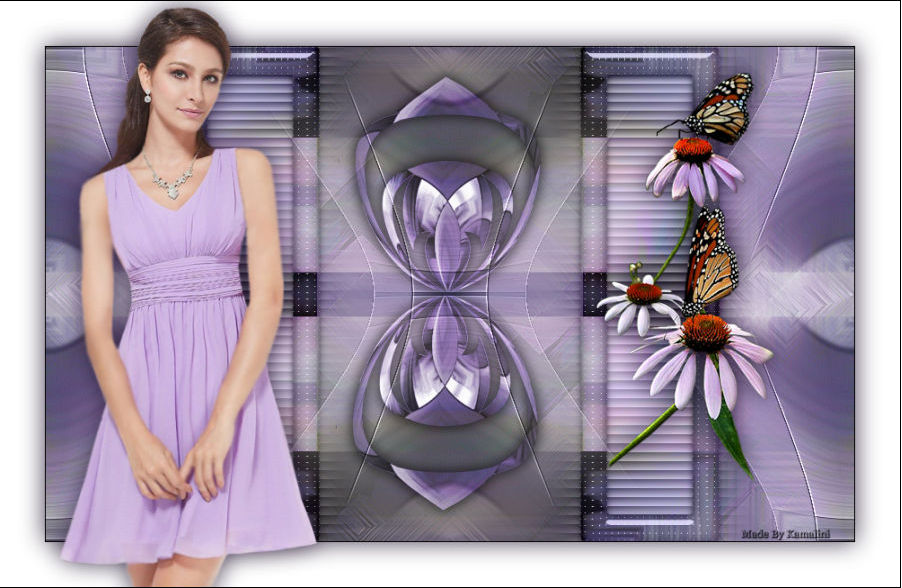
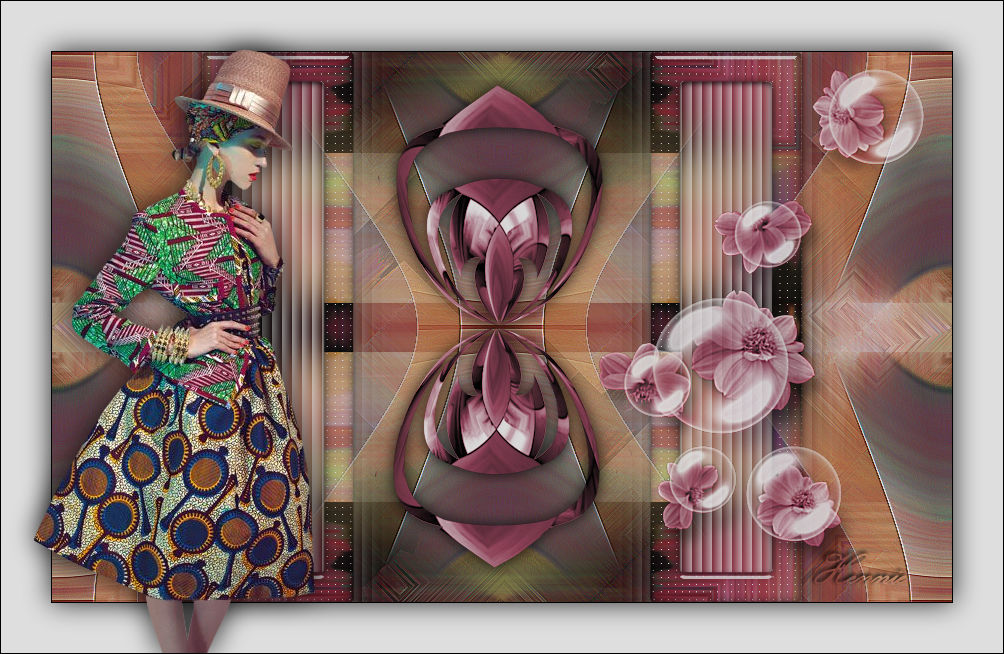
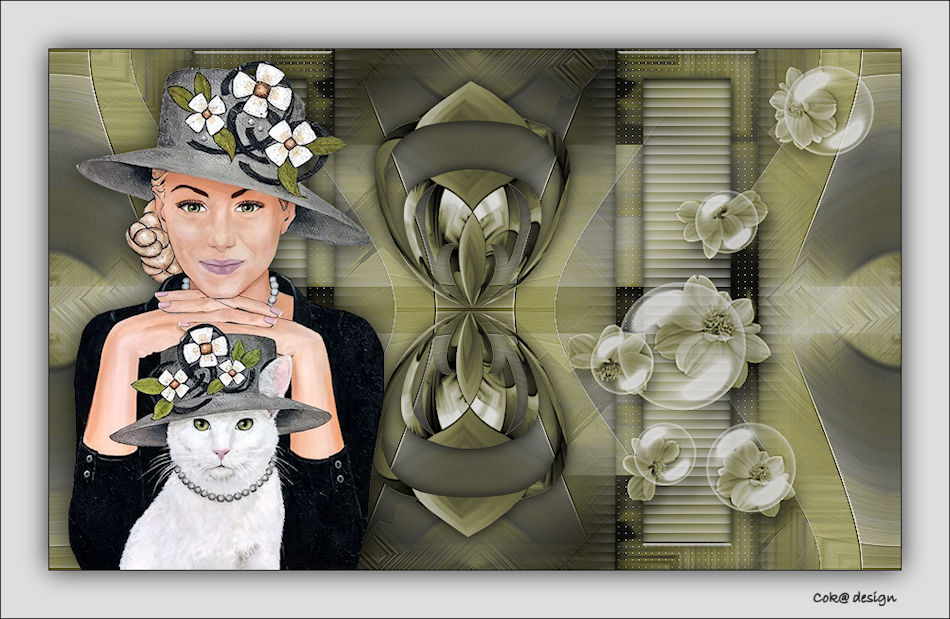
Lesson 261.

Translation made by MARION
Benodigdheden
Matriaal

Supplies
Plugins
Filter---Mehdi ---Sorting Tiles
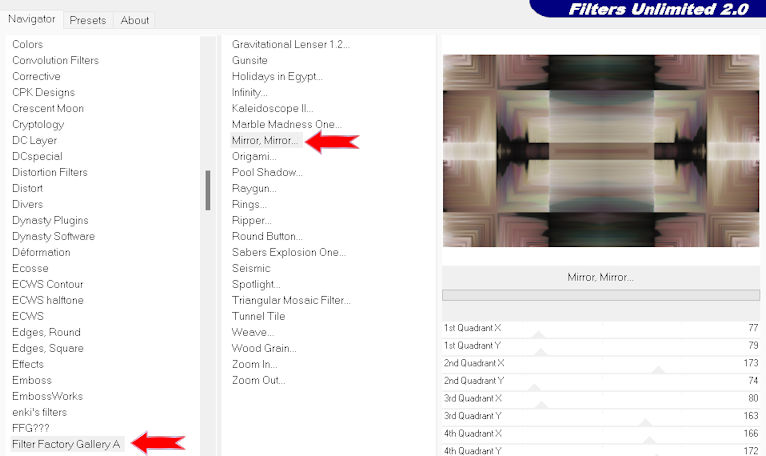
Filters Unlimited 2.0---&<Filter Factory Gallery A
Filters Unlimited 2.0---&<Background Designers IV---sf10 Slice N Dice
Filter--- AP 01 (Innovations)-lines-Silverlining---Dotty Grid
Filter ---Alien Skin Eye Candy 5: Impact---Glass----Clear
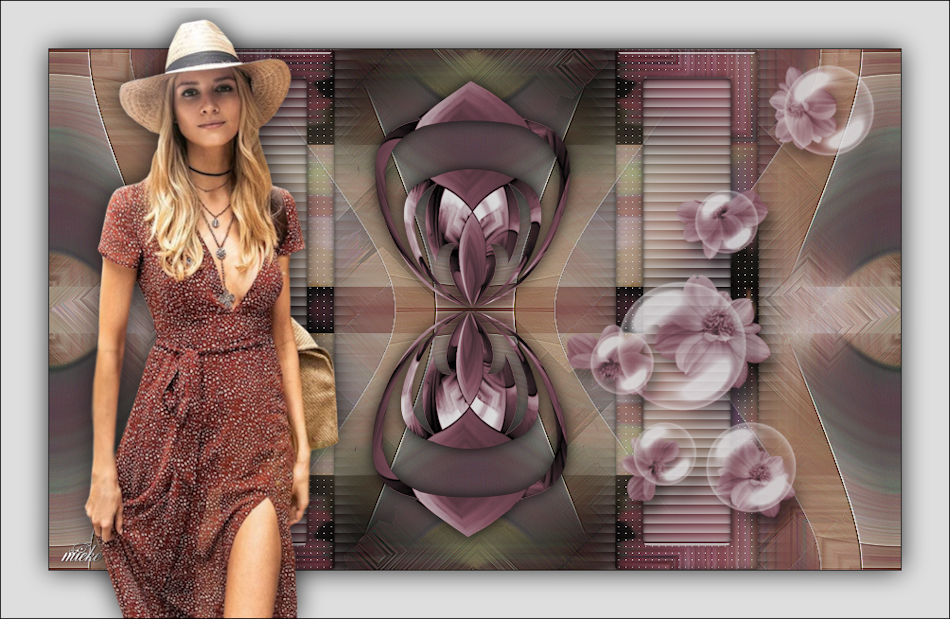
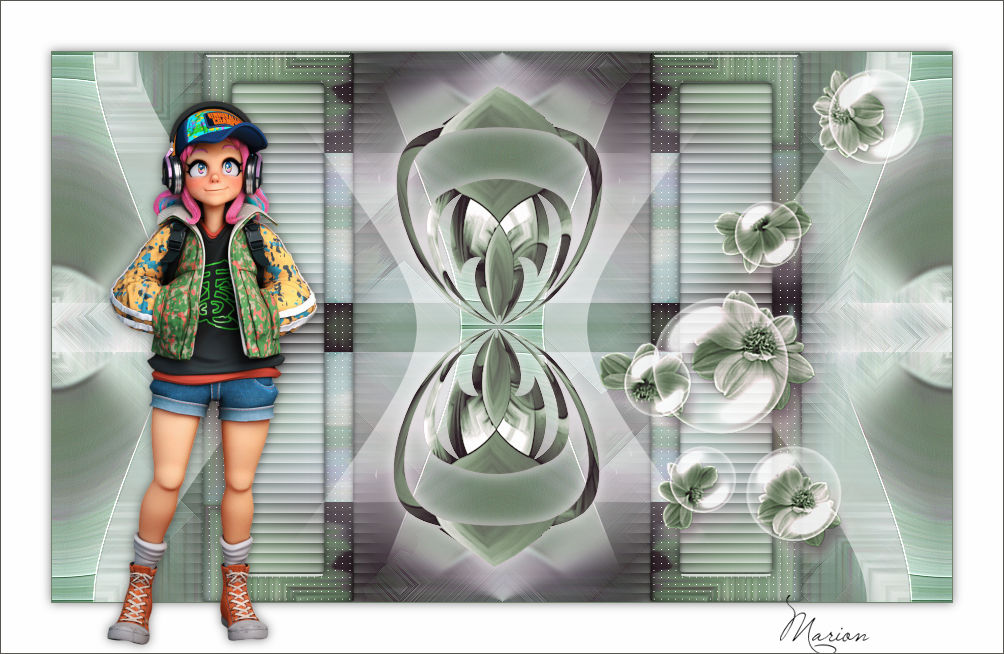
1.
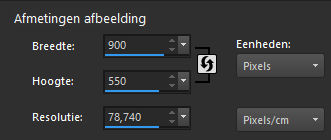
File- New Transparent Image ---in this size
Width---900---Height 550.
2.
Selections---Select All
3.
Activate the Tube --- achtergrond-1.jpg
Edit---Copy
4.
Activate your work -Edit - Paste into Selection..
Selections---Select None
5.
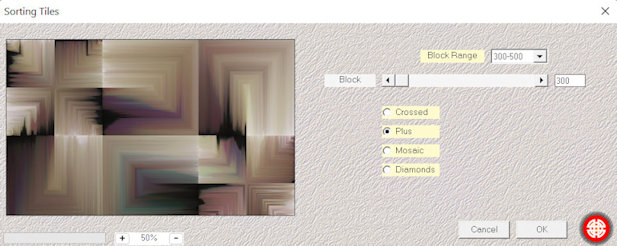
Effects---Plugins---Mehdi ---Sorting Tiles –Block Range 300--500----Block---300---Plus
6.
Effects---Plugins---<I C Net Software> Filters Unlimited 2.0---Filter Factory Gallery A---Mirror---Mirror---Default settings.
7.
Layers ---Duplicate
8.
Effects---Plugins---<I C Net Software> Filters Unlimited 2.0---&<Background Designers IV---sf10 Slice N Dice
9.
Layers-Properties-Lower the Opacity to 25%
10.
Effects---Edge Effects---Enhance More.
11.
- Activate the bottom of the layer palette =Raster 1
12.
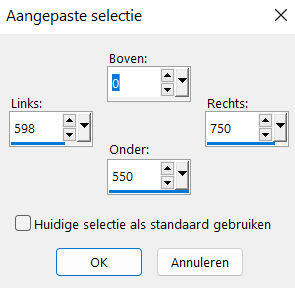
Activate Selection Tool -Custom Selection (S) -Rectangle with these settings ---0---598---750---550.
Selections-Promote selection to layer
Layers- Arrange-Bring to Top
Layers-Duplicate
13.
Selections- Modify - Contract ---30 pixels.
Delete on your keyboard
Selections –Select none
14.
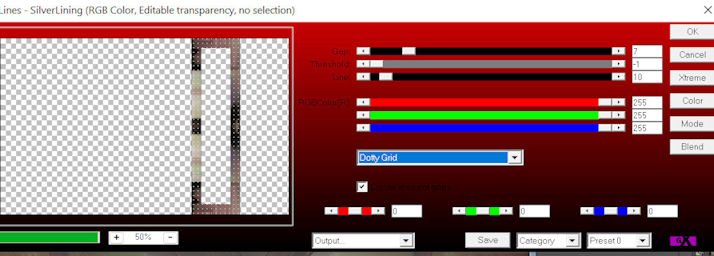
Effects---Plugins--- AP 01 (Innovations)-lines-Silverlining
---Dotty Grid---7---min 1---10-3x-255
15.
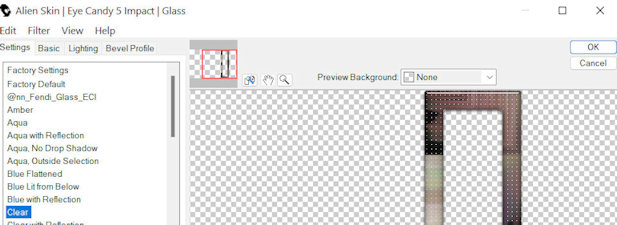
Effects---Plugins---Alien Skin Eye Candy 5: Impact---Glass---Clear
16.
Activate the layer underneath---(Promoted selection)
Adjust- Blur- Gaussian Blur -Radius ---20.
17.
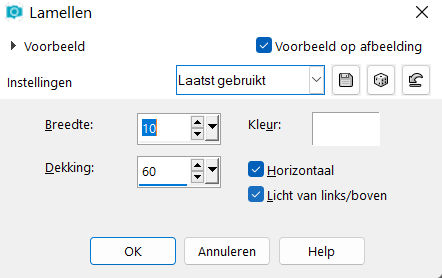
Effects---Texture-Effects---Blinds---10---60---Color White
--- Horizontal and Light from left/top checked
18.
To replace the top of the layer-palette.(Copy of promoted selection)
Layers- Merge-Merge Down.
19.
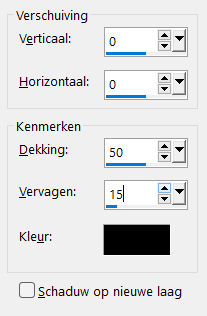
Effects- 3D-Effects - Drop Shadow with these settings:---0---0---50---15. Color black .
20.
Layers---Duplicate---
Image - Mirror - Mirror Horizontal (Image - Mirror in older versions of PSP)
Layers- Merge-Merge Down.
.
21.
Open the Tube --- deco-1.png
Edit---Copy
Activate your work -Edit - Paste as a new layer
22.
Open- the tube -- deco-2.png
Edit---Copy
Activate your work -Edit - Paste as a new layer
23.
Open the Tube --- deco-3.png
Edit---Copy
Activate your work -Edit - Paste as a new layer
26. Pick Tool: (K) on your keyboard -Enter these parameters on the toolbar-- Position X 544---Positition Y 17

Press ( M ) to close the Pick Tool
24.
Image - Add Borders-Symmetric checked ---1 Pixel---Black
Selections- Select All
Image - Add Borders-Symmetric checked ---50 pixels---White
Effects- 3D-Effects - Drop Shadow with these settings:---0---0---80---40. Color black
Selections- Select none
25.
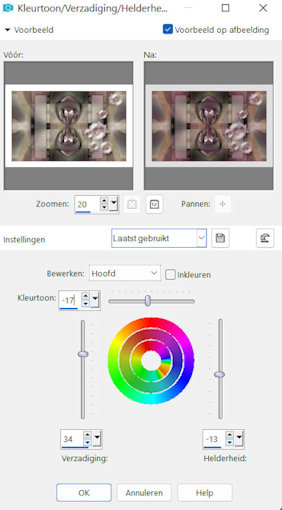
Adjust-Hue and Saturation
Hue/Saturation/lightness use the settings below
(or choose your own colors by moving the sliders)
26.
Open-the Tube --kamalini---1018.png
Edit---Copy
Activate your work -Edit - Paste as a new layer
Place the tube to the left.
27.
Drop shadow----According to your own discretion.
28.
Image - Add Borders-Symmetric checked ---1 Pixel---Black
Add you watermark on new layer.
Save as JPG
Gemaakt door Kamalini---Henny---Corry---Marion

|