Lesson-258

Translation made by MARION
Supplies.

Plugins
These filters are used
Filter---Mehdi---Sorting Tiles
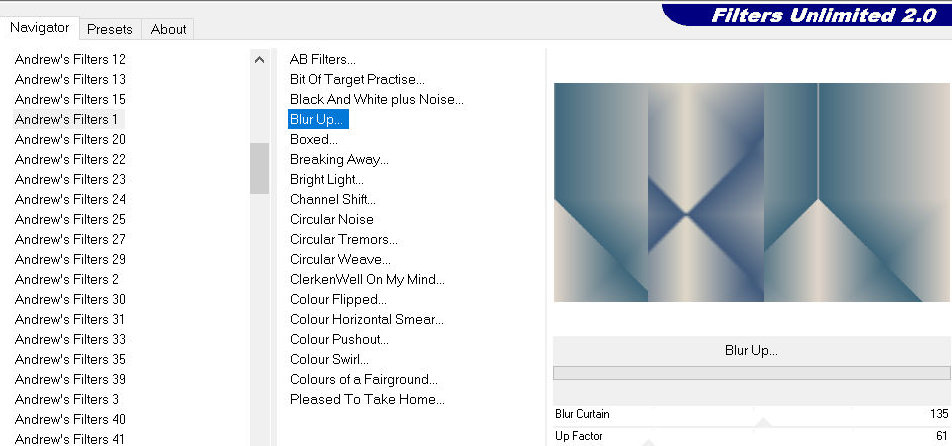
Filter---Andrews Filters---1---Blur Up
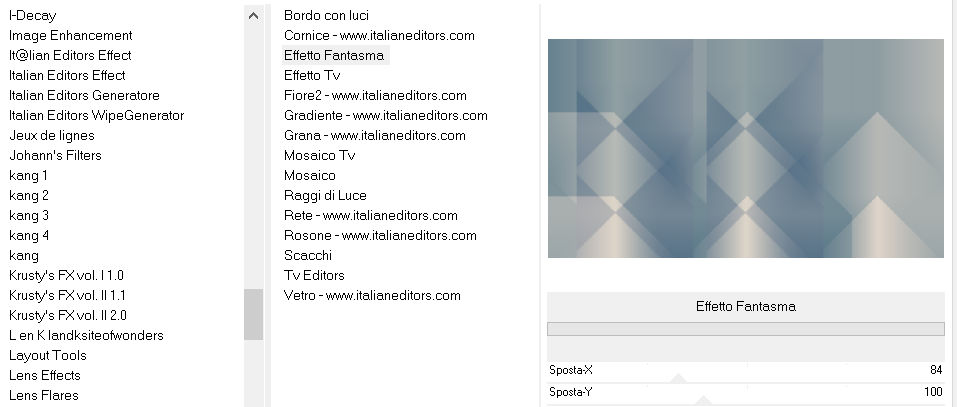
Filter---Italian Editors Effects---Effetto Fantasma
Filter---Flaming Pear---Flexify 2
Preparation-Material Properties-
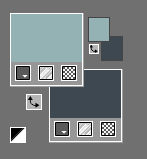
Set your Foreground color to color #94B1B4---Set your Background color to color #3F4851
Attention
1. When using other colors, the filters may give different results.
2. Filters can give different results as in my examples.
Gradient.
Replace your Foreground color with a Foreground/Background Gradient with these settings:--- Style Linear---90---5---
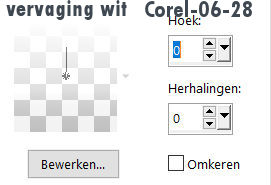
Replace your Background color with a
Background Gradient---Fading White- Corel 06-028---Style Linear---0---0
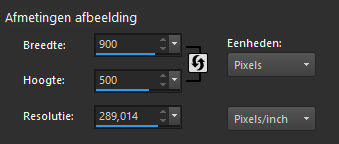
1. File-Open a new transparent Image---in this size. 900---500.
2.
Flood Fill Tool--- fill the layer with the Foreground gradient
3.
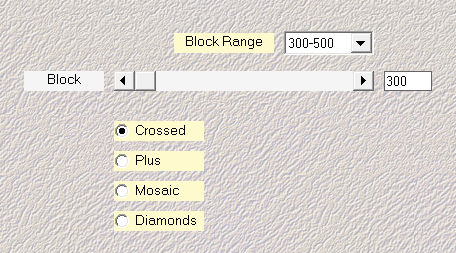
Effects---Plugins---Mehdi---Sorting Tiles---Block Range 300---500---Block-300---Crossed
3.
Effects---Plugins--- Filter---<I C Net Software> Filters Unlimited 2.0---Andrews Filters---1---Blur Up---135-61
4.
Effects---Plugins---<I C Net Software> Filter Unlimited 2.0>---Italian Editors Effects---Effetto Fantasma---84---100.
5.
Effects---Edge Effects---Enhance more.
6.
Activate Selection Tool---Custom Selection (S)---Rectangle with these settings---0---64---361---500.


7.
Layers- New Raster Layer
Flood Fill Tool-Fill the selection with the Background gradient
Selections---Select none
8.
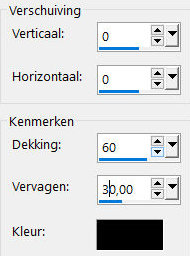
Effects---Plugins---Filter---<I C Net Software> Filters Unlimited 2.0>---Italian Editors Effects---Effetto Fantasma---41---41. (STANDAARD)
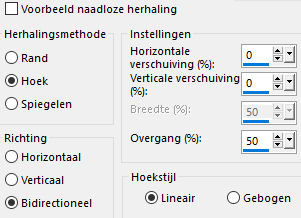
9.
Effects---Image Effects---Seamless Tiling--- Corner----Bidirectional---Horizontal offset---0---Vertical offset --0---Transition 50---Linear.
10.
Layers-Properties---Change the Blend Mode to " Overlay “.
11.
Layers---Duplicate
12.
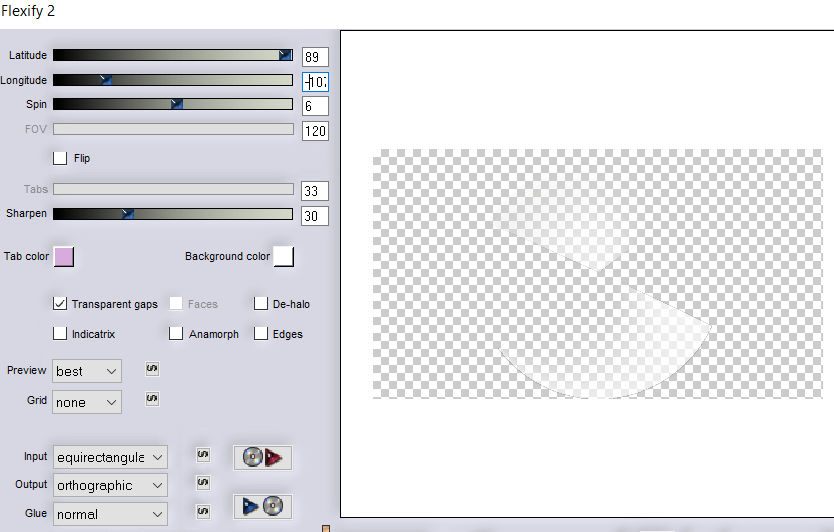
Effects---Plugins---Flaming Pear---Flexify 2---89---min 107---6---120— Input---equirectangule---Output ---orthographic.
13.
Effects---Image Effects---Seamless Tiling
---Corner---Bidirectional--- Horizontal offset 0--- Vertical offset 0--- Transition 50—Linear.
14.
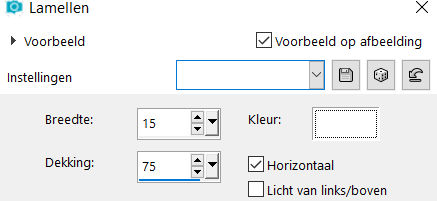
Effects---Texture Effects---Blinds 15---75---Color white---Horizontal checked
15.
Layers-Properties---Blend Mode remains on ---“ Overlay “
16.
Open---Tube deco-1-258.png
Edit---Copy
Activate your work ---Edit---Paste as a new layer (do not move)
Layers-Properties---Change the Blend Mode to " Overlay “.
.
17.
Open---Tube---deco-2-258.png
Edit---Copy
Activate your work -Edit ---Paste as a new layer
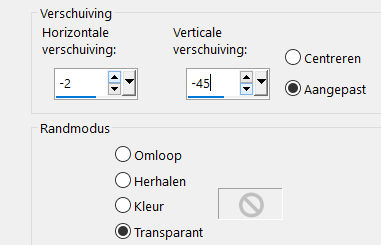
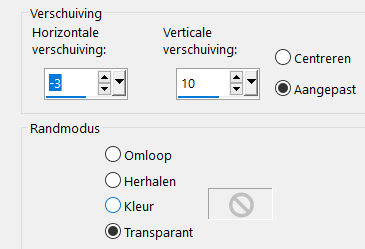
Effects---Image Effects---Offset---min 2---min 45
Custom and Transparent checked
18.
Effects---3D-Effects---Drop Shadow 0---0---60---30---Color #000000
19.
Open---Tube deco-3-258.png
Edit---Copy
Activate your work -Edit - Paste as a new layer
Effects---Image Effects---Offset---min 3---10
Custom and Transparent checked
20.
Open-Tube deco-4-258.png
Edit---Copy
Activate your work---Edit--- Paste as a new layer
(now you can change your colors with coloring, or after adding the borders)
21.
Image - Add borders-Symmetric checked---2 pixels---with the dark color
Selections---Select All.
Edit---Copy
Image - Add border---Symmetric checked---50 pixels with your light color
Selections-Invert
Activate your work---Edit---Paste into Selection
Adjust---Blur---Gaussian Blur---Radius 20.
Selections-Invert
Effects---3D-Effects---Drop Shadow ---0---0---60---30---Color #000000
Selections---Select none
22.
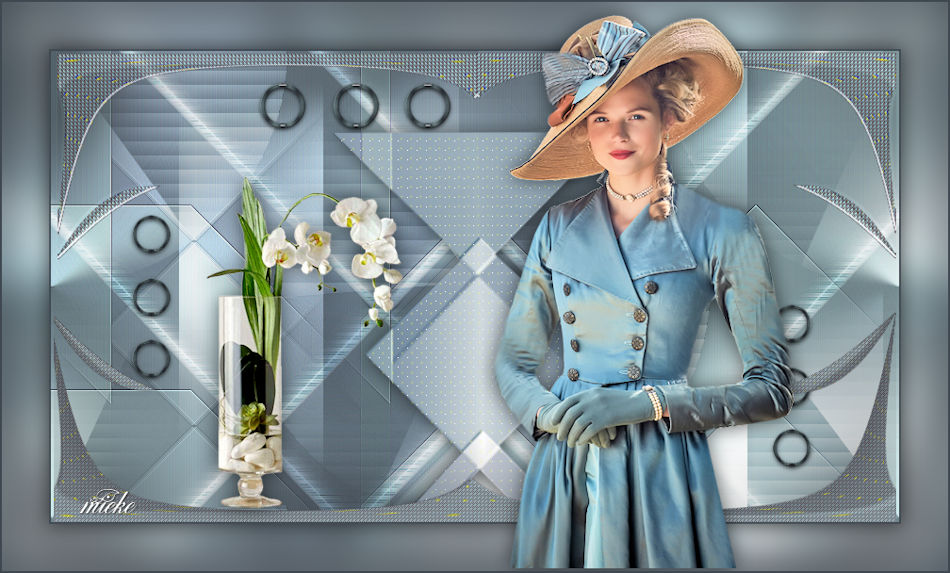
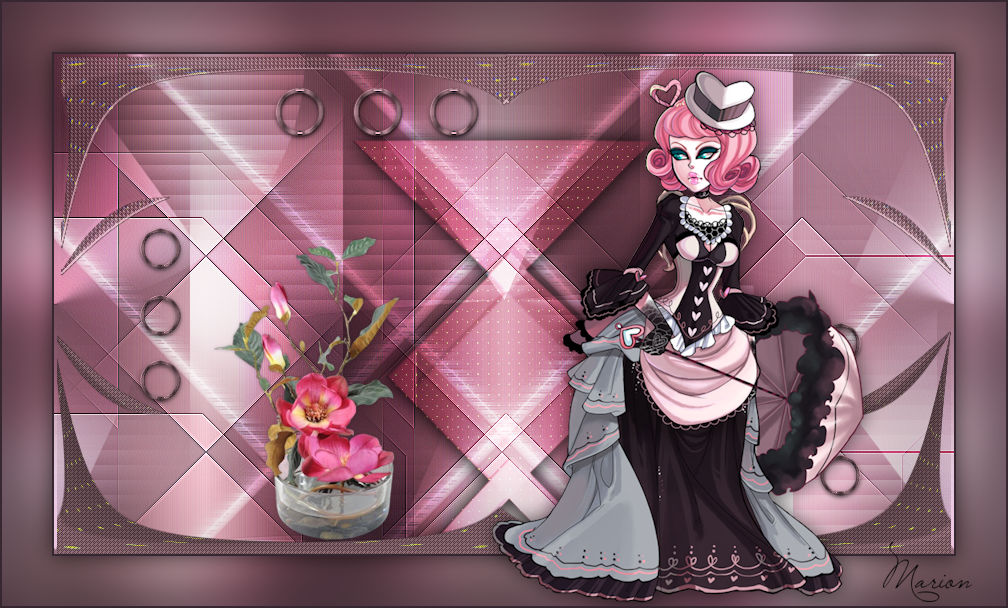
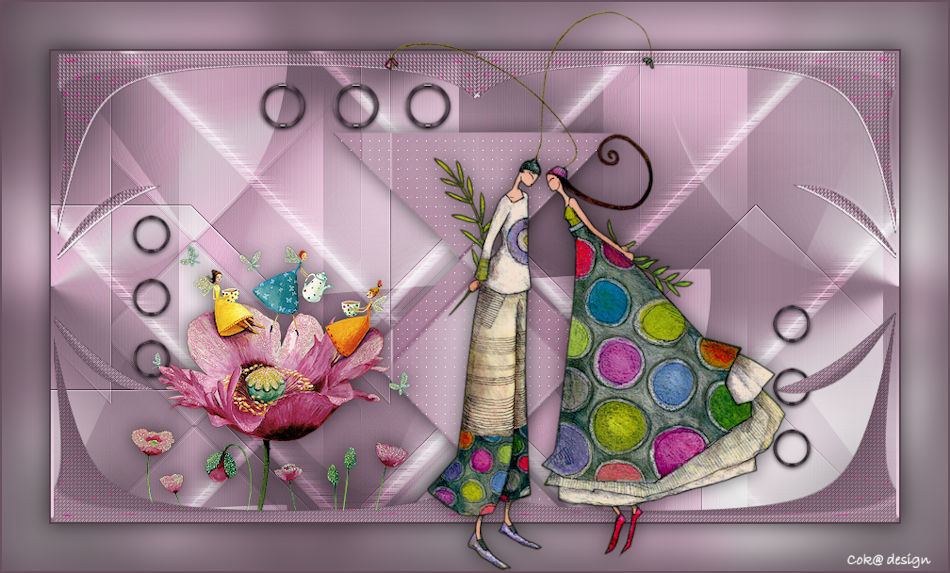
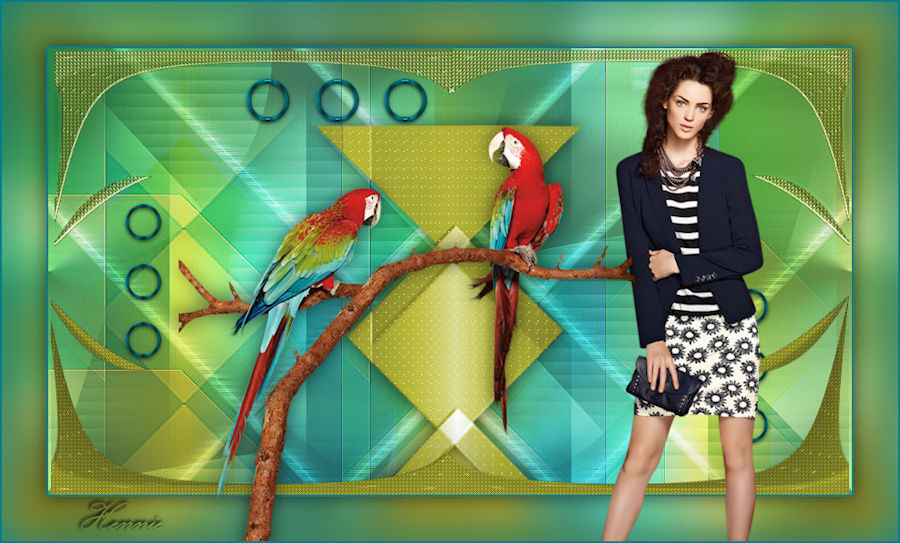
Open---Tube---Kamalini---983 .png
Edit---Copy
Activate your work---Edit---Paste as a new layer
Pick Tool: (K) on your keyboard---Enter these parameters on the toolbar
(Position---X 52--2-Position Y 20)
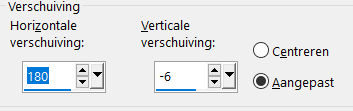
(Or Effects---Image Effects---Offset 180--- min 6)
Effects---3D-Effects---Drop Shadow ----0---0---60---30---Color #000000
23.
Open--- vvs-floral0652.png (klein)
Edit--- Copy
Activate your work -Edit - Paste as a new layer
Move to the left---(see finished image)
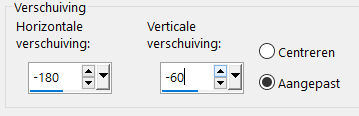
(Or Effects- Image Effects- Offset---min 180---min 60.)
Effects---3D-Effects---Drop Shadow---0---0---60---30---Color #000000
24.
Image - Add borders-Symmetric checked---2 pixels with your dark color
Add you watermark on new layer.
Save as JPG
Voorbeelden gemaakt door Kamalini, Hennie, Corrie, Marion

|