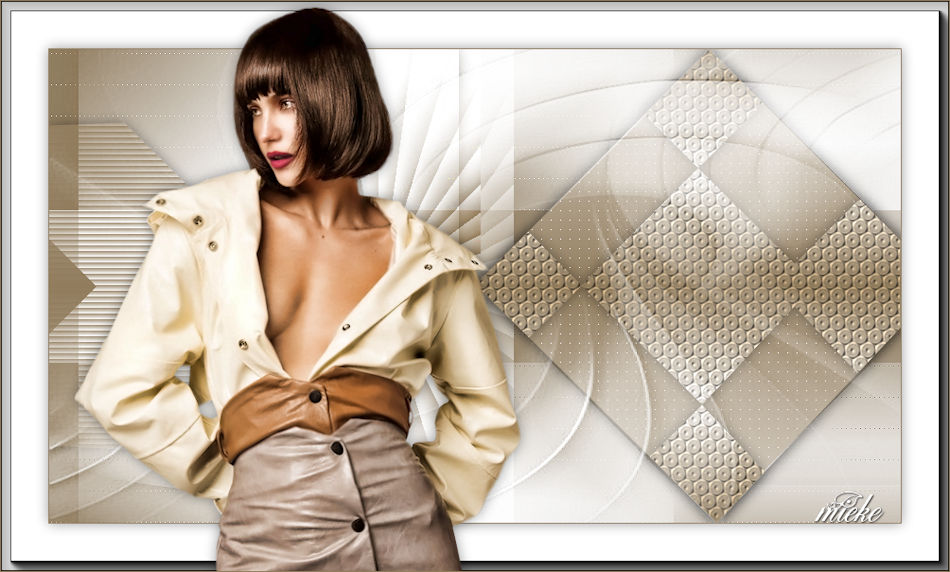
Lesson 254

Translation made by MARION

Supplies
Material

Plugins
Filter---Mehdi ---Sorting
Filter---<I C Net Software> Filters Unlimited 2.0>---Simple
Filter--- AP 01 (Innovations)-Lines-SilverLining---Dotty
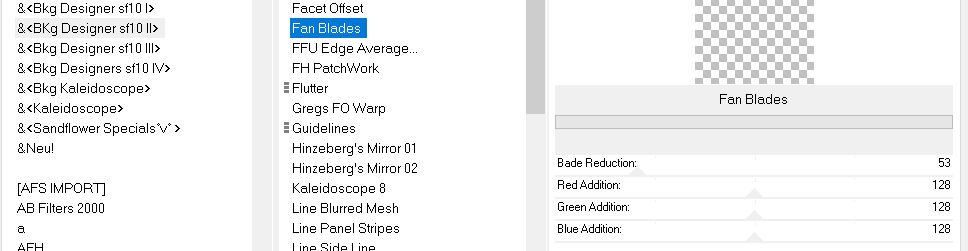
Filter---<I C Net Software> Filters Unlimited 2.0---&<Bkg Designer sf10 II >---Fan Blades
Filter---<I C Net Software> Filters Unlimited 2.0>---Toadies
Filter---AAA Frames---Foto Frame
Material Properties: Set your Foreground color to color # 917c5d
Set your Background color to color # dde0cd

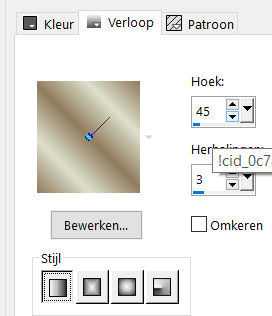
Set your foreground color to a Foreground/Background Gradient, style Lineair configured like this
---45-3.
1.
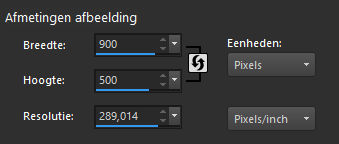
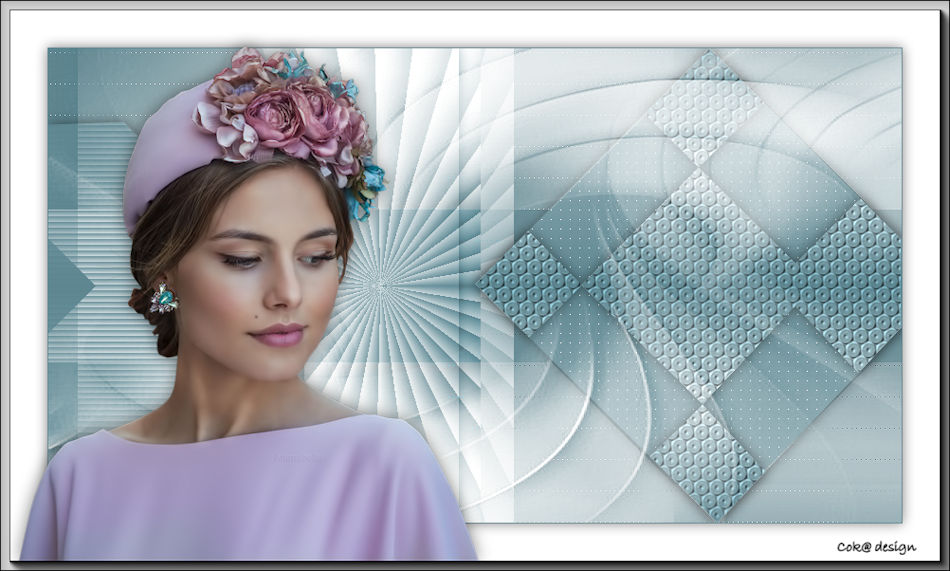
File: Open a transparent image of
Width---900---Height---500.
2.
Activate your Flood Fill Tool - Fill the layer with the gradient
3.
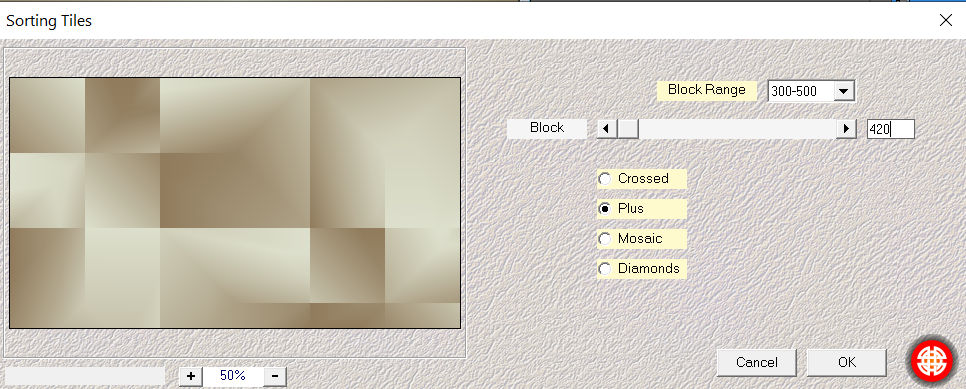
Effects---Plugins -Mehdi ---Sorting Tiles –Block Range---300-500---Block-420---Plus---Ok.
4.
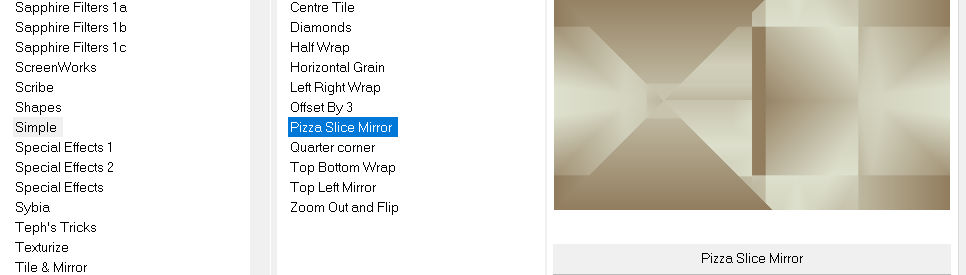
Effects---Plugins---filter---<I C Net Software> Filters Unlimited 2.0>---Simple---Pizza Slice Mirror
5.
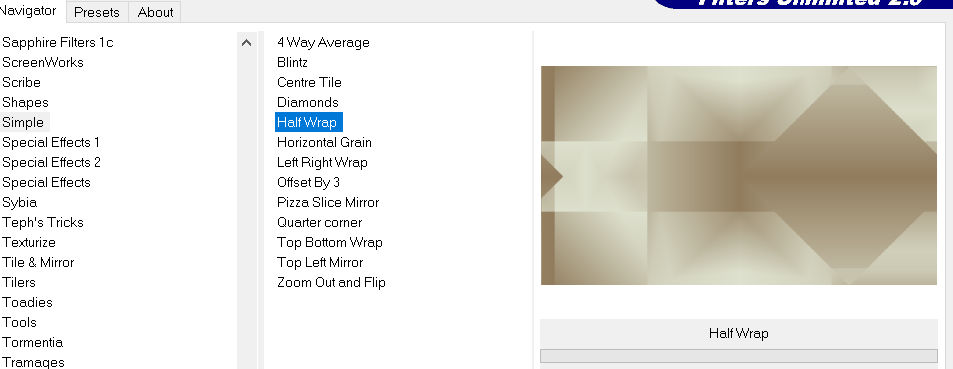
Effects---Plugins---<I C Net Software> Filters Unlimited 2.0>---Simple---Half Wrap
6.
Selections –load/save selection –load selection from disc and select my selection:mb-254-1.PspSelection
Selections-Promote selection to Layer
7.
Layers---Duplicate (Copy of promoted selection)
8.
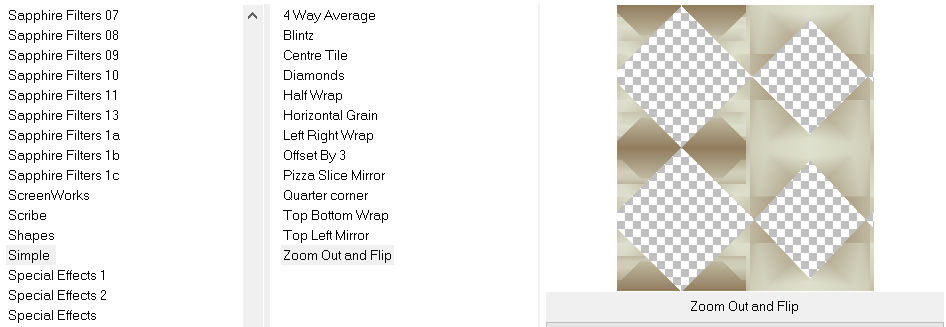
Effects---Plugins- C Net Software> Filters Unlimited 2.0>---Simple---Zoom Out and Flip
9.
Effects---Texture Effects --- Texture---select Cogs 02 with these settings:
---30---0---1---0---0---315---wit---50---30. (or choose your own texture)

10.
Selections- Deselect All
Effects- 3D-Effects - Drop Shadow with these settings: 0---0---50---20. Color Black
11.
Activate the layer underneath
---(promoted selection layer)
Activate this layer.
12.
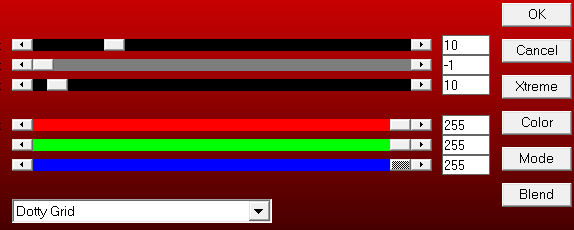
Effects---Plugins---Filter--- AP 01 (Innovations)-Lines-SilverLining---Dotty Grid---10 ---min 1---3x 255
13.
Effects- 3D-Effects - Drop Shadow with these settings: 0---0---50---20. Color Black
14.
Activate the bottom of the layer palette =Raster 1
Selections –load/save selection –load selection from disc and select my selection:mb-254-2.PspSelection
Selections- Promote Selection to Layer
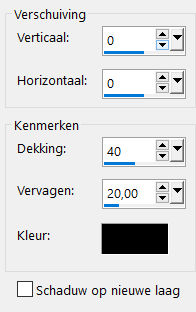
Effecten---Texture Effects Blinds with these settings:
---6-80-Dark Color—Horizontal checked.
15.
Effects---3D-Effects-Drop Shadow with these settings
0---0---50---20. Color Black
16.
Selections- Deselect All
17.
Activate the bottom of the layer palette =Raster 1
Activate Selection Tool

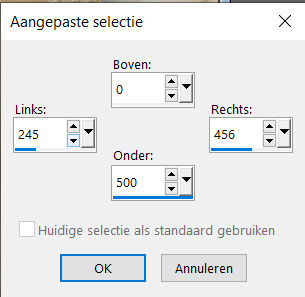
-Custom Selection (S) -Rectangle with these setting —Top 0---Left 245---Right 456---Bottom 500.
Selections- Promote Selection to Layer.
18.
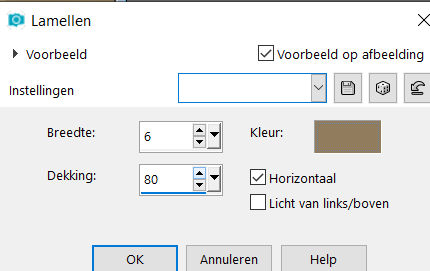
Effects---Plugins---<I C Net Software> Filters Unlimited 2.0---&<Bkg Designer sf10 II >---Fan Blades---53---3x-128.
Selections- Deselect All
19.
Layers- Duplicate
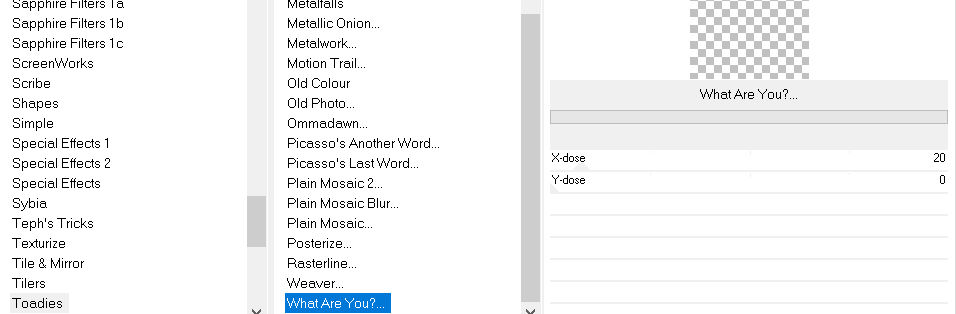
Effects---Plugins- C Net Software> Filters Unlimited 2.0>---Toadies---What Are You---20---0.---Apply
20.
Layers -Arrange- Move ---Down
21.
Activate the layer above , (promoted selection layer 2)
Activate Selection Tool- Custom Selection (S) -Rectangle with these setting
Top 0---Left 270---Right 433---Bottom 500.

22.
Effects- 3D-Effects - Drop Shadow with these settings: 0---0---50---20. Color Black
32.
Layers- Merge- Merge Down
33.
Layers- Arrange-Move Up
Selections- Deselect All
34.
Layers-Properties-Change the Blend Mode to " Luminance "
35.
To replace the top of the layer-palette
36.
Layers- New Raster Layer
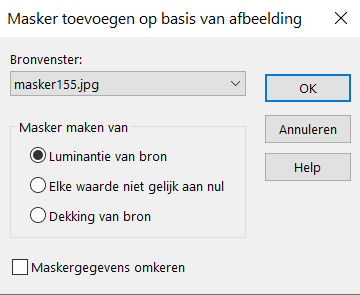
Activate your Flood Fill Tool - Fill the layer with #ffffff (white)
Layers- New Mask Layer ---From Image and select Mask -- masker155.jpg
Layers- Merge- Merge Group
37.
Adjust---Sharpness---Sharpen
38.
Activate the bottom of the layer palette =Raster 1 Effects---Plugins--- L en K landssiteofwonders---L en K`s Zitah using the default settings
Adjust---Sharpness---Sharpen
39.
Image - Add borders-Symmetric checked:1 pixel---Dark Color
Selections-Select All
Image - Add borders-Symmetric checked:---50 pixels---Color White
Effects---3D-Effects-Drop Shadow with these settings
0---0---50---20. Color Black
Selections---Deselect All
40.
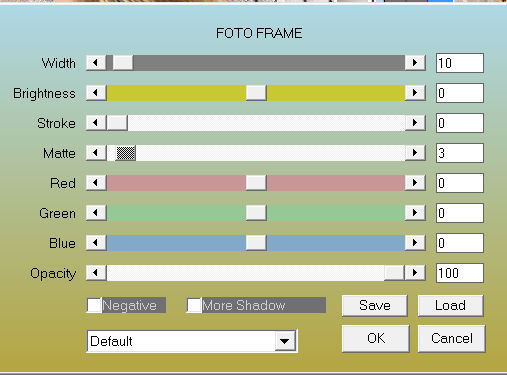
Effects---Plugins AAA Frames---Foto Frame use the settings below
41.
Open the tube--- Beauty_Shiloh_by_CibiBijoux.png
Remove watermark.
Edit ---Copy
Activate your work -Edit - Paste as a new layer
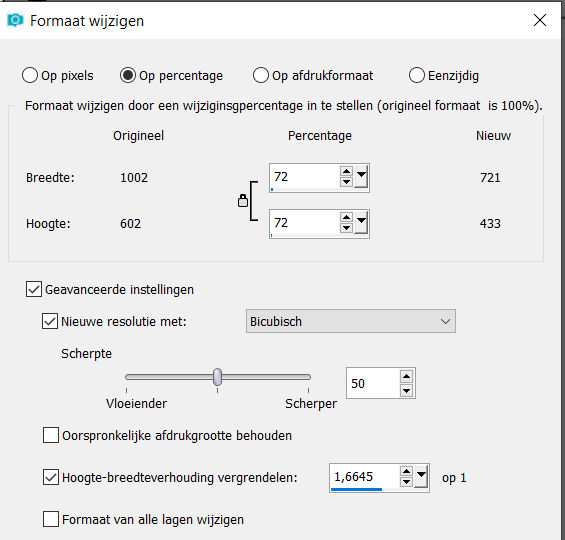
Image ---Resize with 72%. --- Resize all layers not checked
42.
Pick Tool: (K) on your keyboard -Enter these parameters on the toolbar
Position X 77---Position Y 6

-Press ( M ) to close the Pick Tool
43.
Effects---3D-Effects-Drop Shadow with these settings
0---0---50---20. Color Black
Place your watermark on a new layer
Save as JPG.
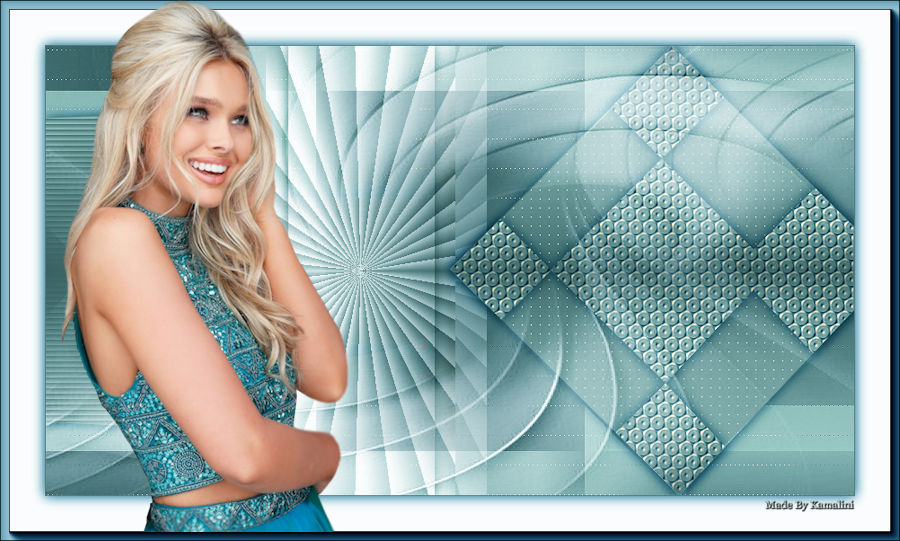
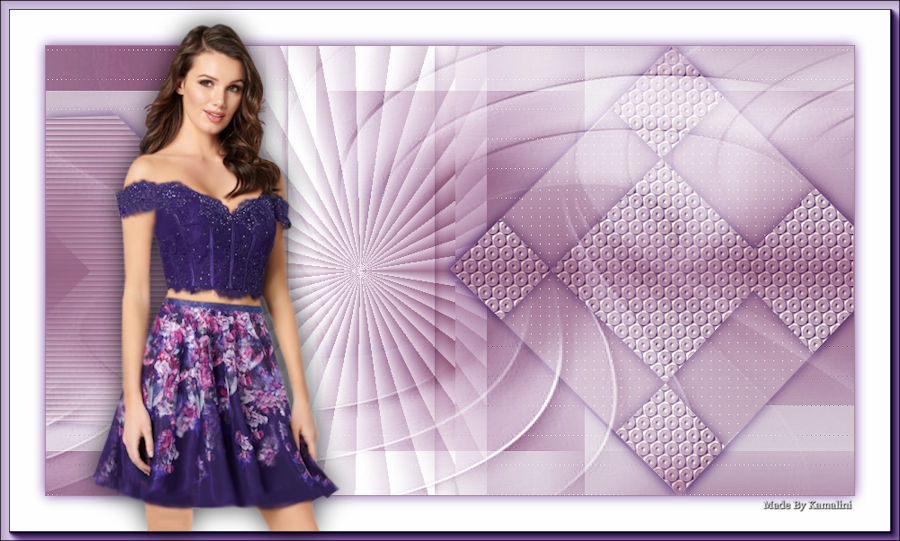
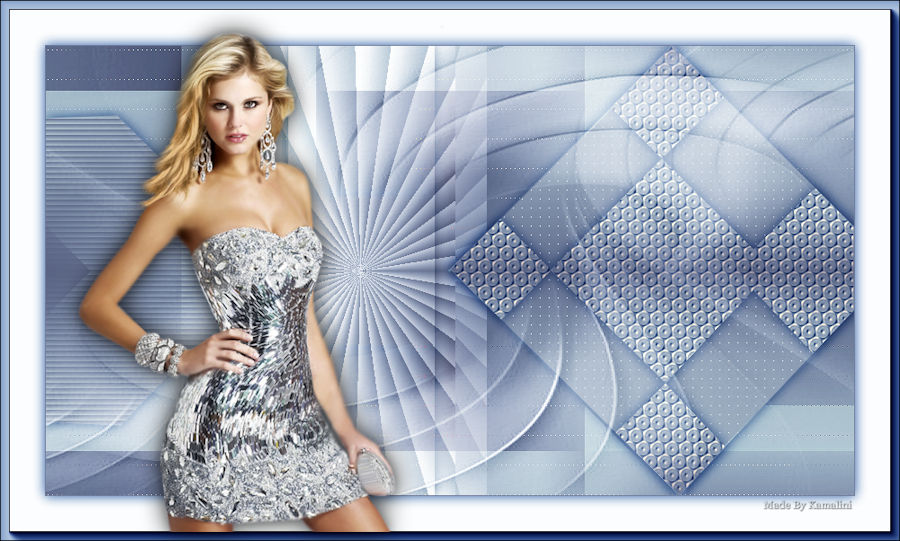
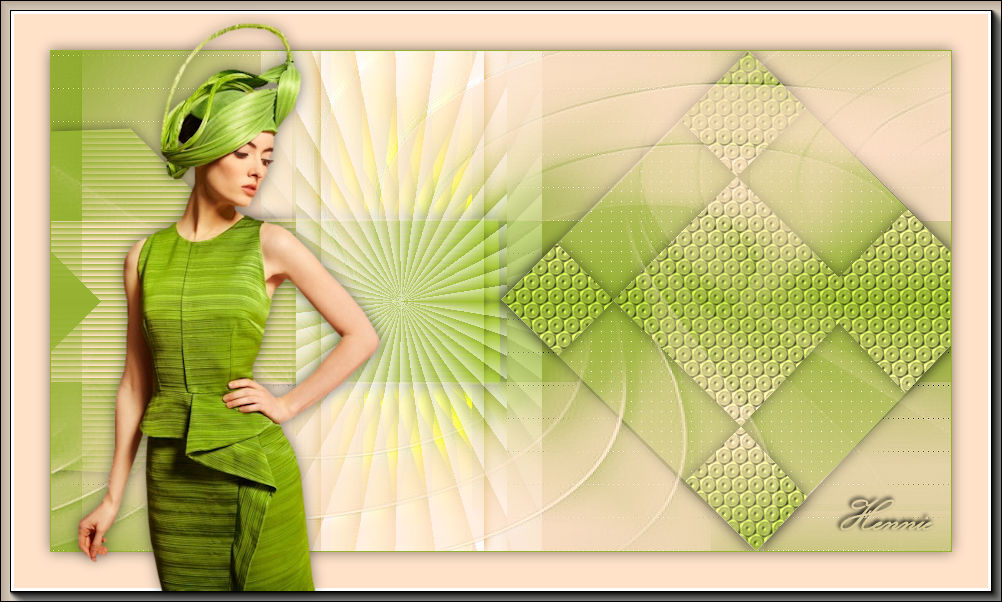
Voorbeelden gemaakt door Kamalini Hennie en Corrie

|