Lesson 251

Translation made by MARION
Supplies
Tube---van Kamalini--- Thank you for your
permission to share.
Vlindertube--- Tubster unidentified.
Material

Plugins
Filter---<I C Net Software> Filters Unlimited 2.0---
Filter Factory Gallery N---Circulator
Filter---Mehdi ---Sorting Tiles
Filter—Flaming Pear---Flexify 2
Filter---<I C Net Software> Filters Unlimited 2.0
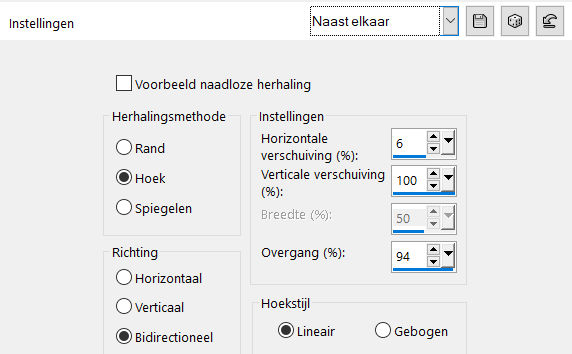
&<Bkg Kaleidoscope>---Kaleidoscope 8
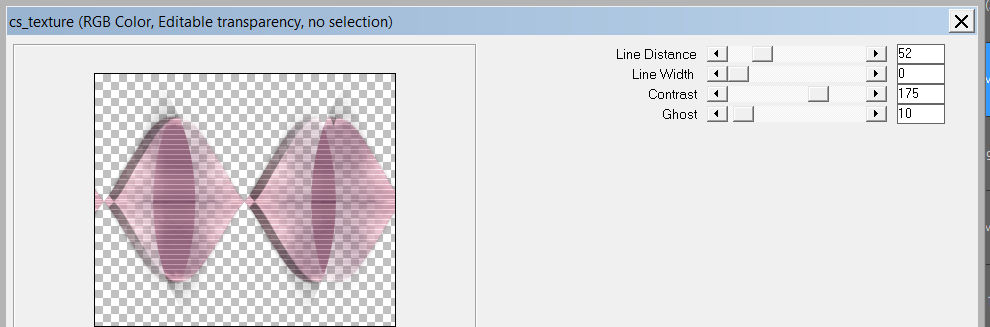
Filter—Carolaine and Sensibility---cs texture
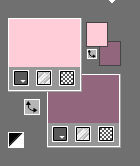
-Material Properties: Set your Foreground color to color #fdcdd8—
Set your Background color to color -# 92667c
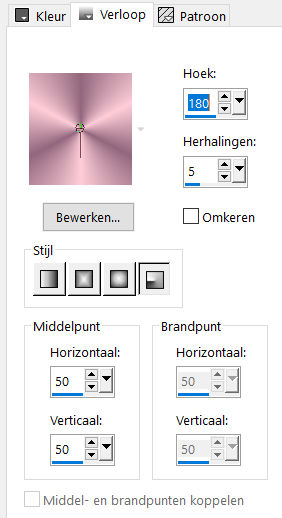
Foreground/Background Gradient---Style Radial---180---5--- Centerpoint ---50---50 Invert unchecked.
1.
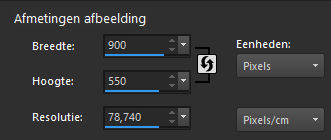
File: Open a transparent image of 900 x 550
2.
Activate your Flood Fill Tool - Fill the layer with the gradient
3.
Effects----Edge Effects---Enhance More
4.
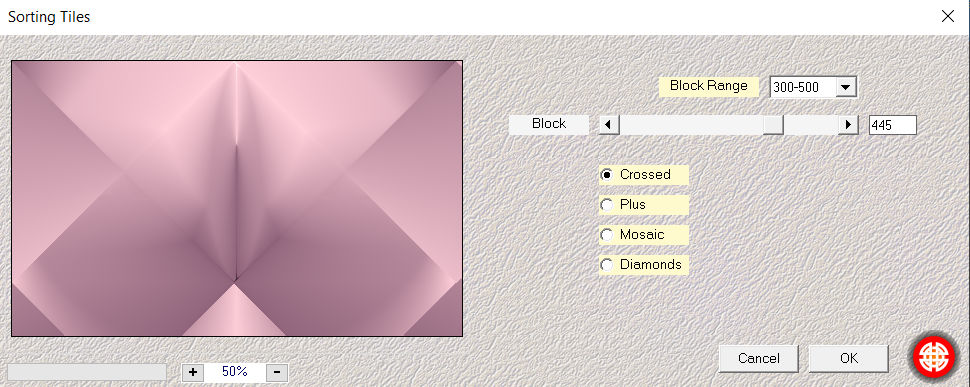
Effects---Plugins---Mehdi ---Sorting Tiles –Block Range 300-500----Block-445---Crossed use the settings below
5.
Layers---Duplicate
6.
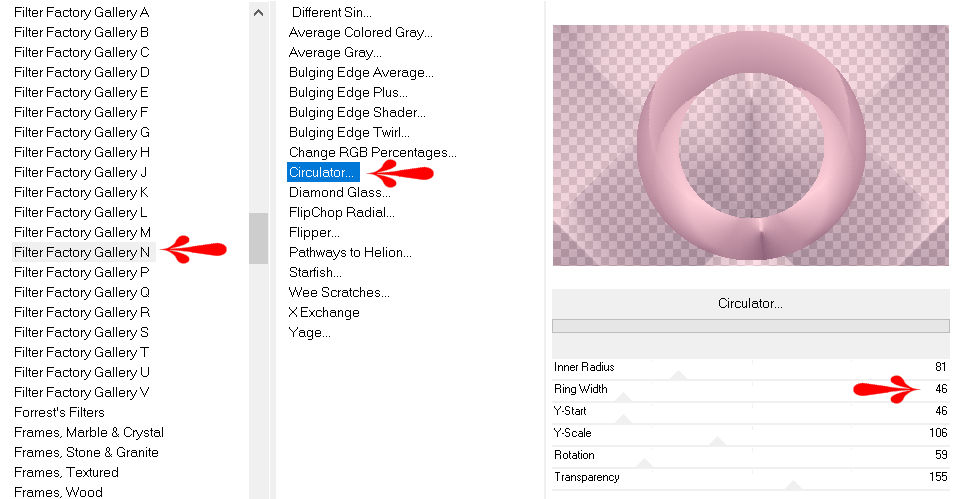
Effects-Plugins -Filter---<I C Net Software> Filters Unlimited 2.0---Filter Factory Gallery N(of B)---Circulator—Ring width op 46--- rest default
7.
Selections –load/save selection –load selection from disc and select my selection:
SEL-mb-251-2021.PspSelection
Activate the bottom of the layer palette =Raster 1 Selections- Promote selection to layer
Layers---Arrange-Bring to Top
8.
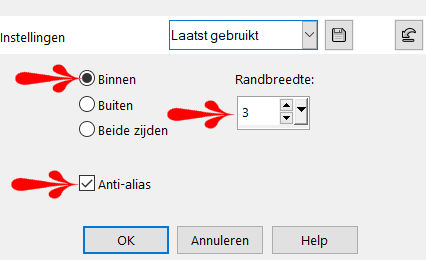
Selections-Modify-Select Selection Borders --- Inside---3---Anti-alias checked
Flood Fill Tool-Fill the selection with the gradient (match mode none)

9.
Selections- Deselect all
10.
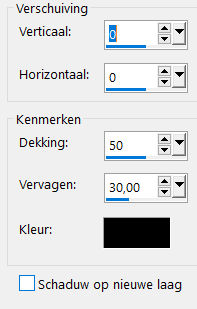
Effects---3D-Effects-Drop Shadow with these settings:0---0---50---30. Color Black
11.
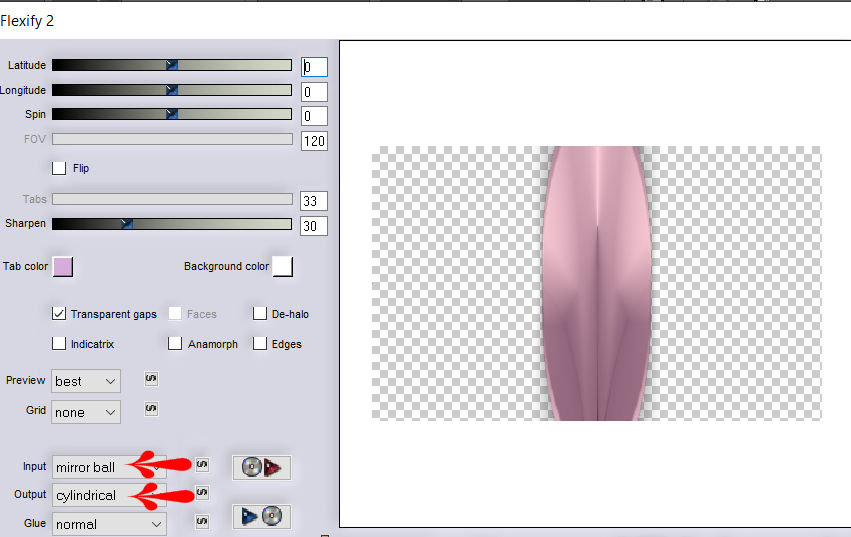
Effects---Plugins—Flaming Pear---Flexify 2---Mirror bal—Cylindrical---rest default.
12.
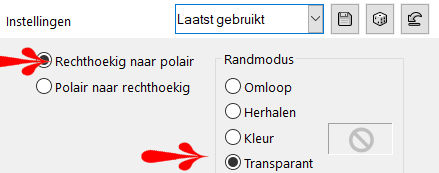
Effects---Distortion Effects ---Polar coordinates---Rectangular to Polar---Transparent.
13.
Layers---Duplicate
14.
Image - Mirror - Mirror vertical ( Image - Flip in older versions of PSP)
Layers---Merge---Merge Down.
Layers-Properties-Change the Blend Mode to "Overlay "
15.
Layers---Duplicate
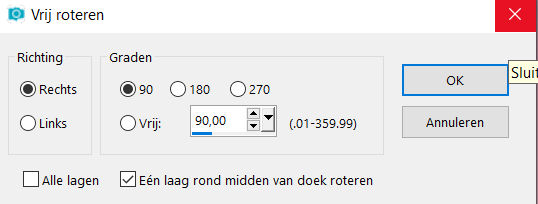
Image----Free Rotate---90% Right—
One layer around center of canvas rotate checked.
16.
Layer palette – Activate Copy of Promoted Selection Layer
Layers---Duplicate
17.
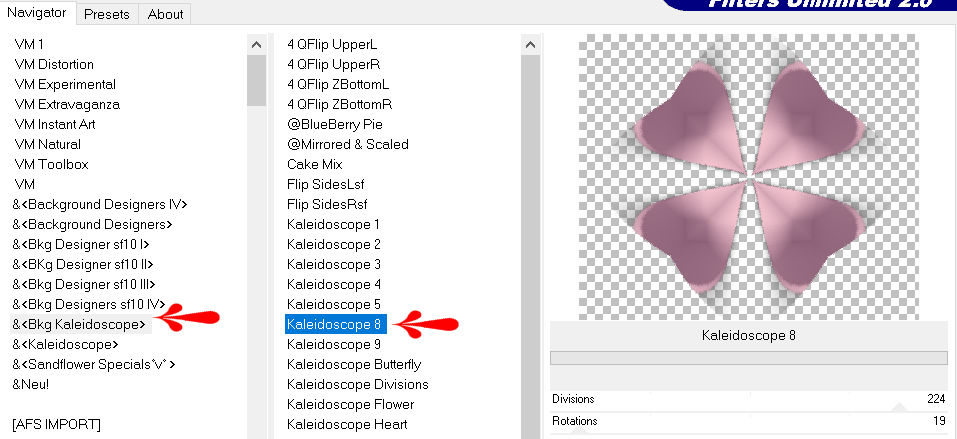
Effects---Plugins---<I C Net Software> Filters Unlimited 2.0
&<Bkg Kaleidoscope>---Kaleidoscope 8---224-19
Layers-Properties-Change the Blend Mode to "Multiply" - Lower the Opacity to 70%.
18.
Layer palette – Activate Copy of Promoted Selection Layer
(one Layer underneath)
Effects---Image Effects –Seamless tiling
---Settings---Side by Side
19.
Effects---Plugins—Carolaine and Sensibility---cs texture----using the default settings
20.
Layers-Properties-Change the Blend Mode to "Overlay " - Lower the Opacity to 70 %.
21.
Layers- New raster Layer
Layers---Arrange---Bring to Top
Flood Fill Tool: Fill with your light color #fdcdd8.
22.
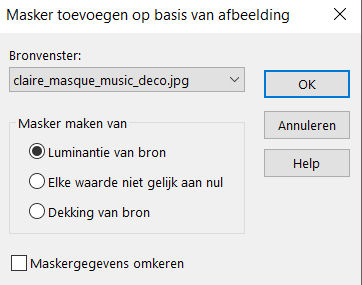
Open- -- claire_masque_music_deco.jpg--- Click on the minus sign at the top right.
Layers---New Mask Layer---From Image and select Mask
--- claire_masque_music_deco.jpg
Luminance of source checked .
23.
Layers -Merge---Merge Group
24.
Adjust---Sharpness---Sharpen More
********************
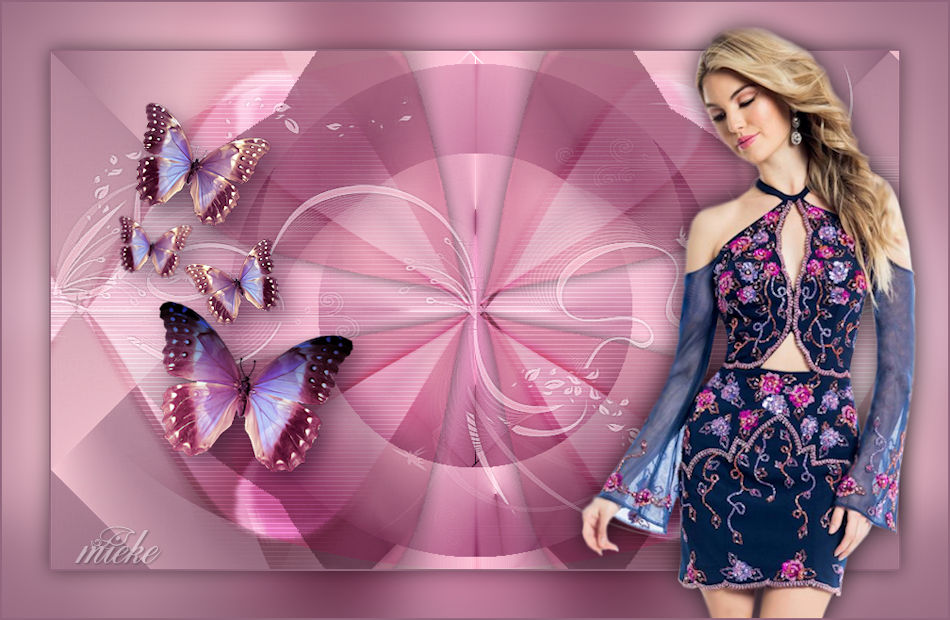
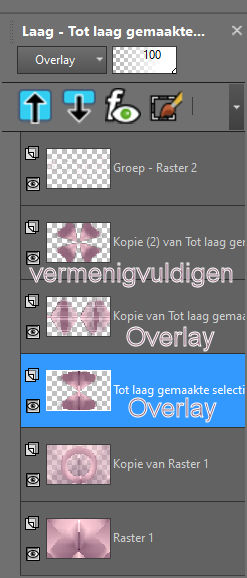
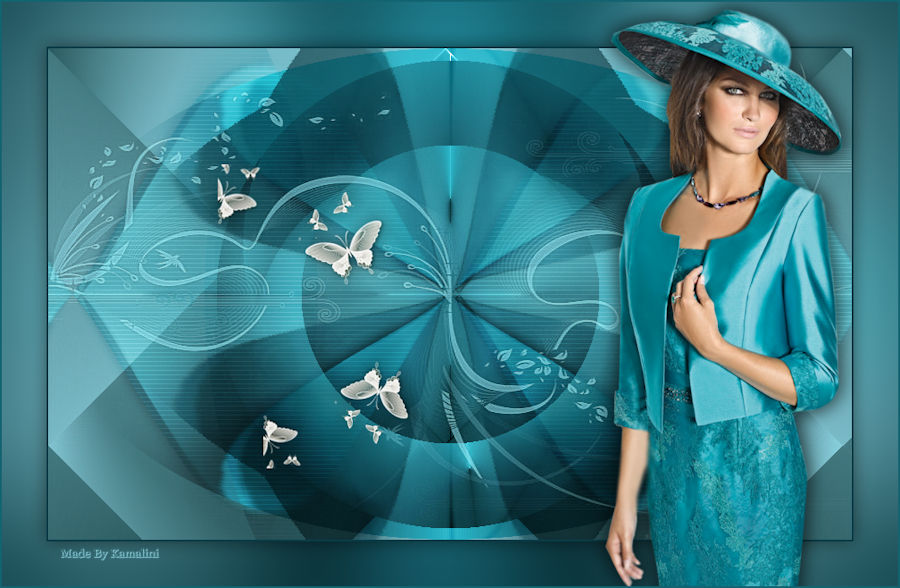
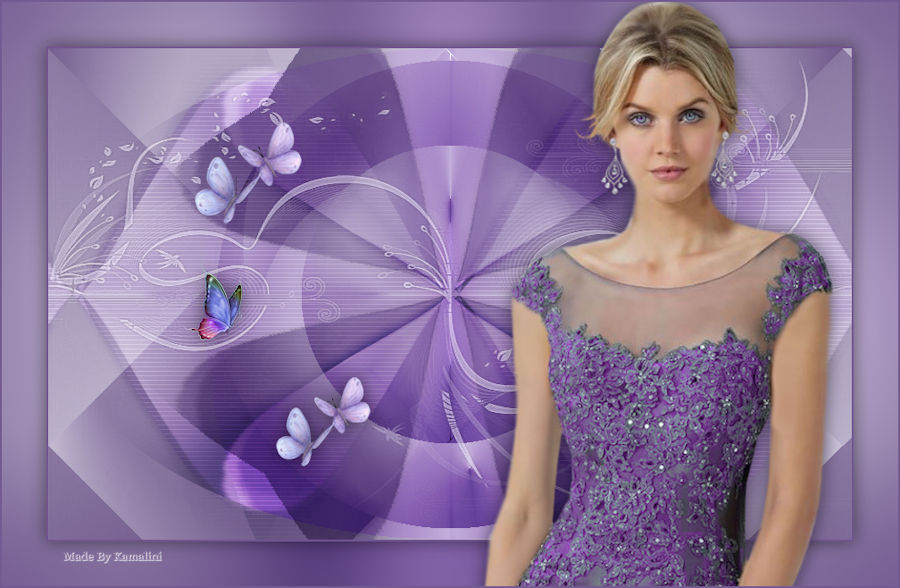
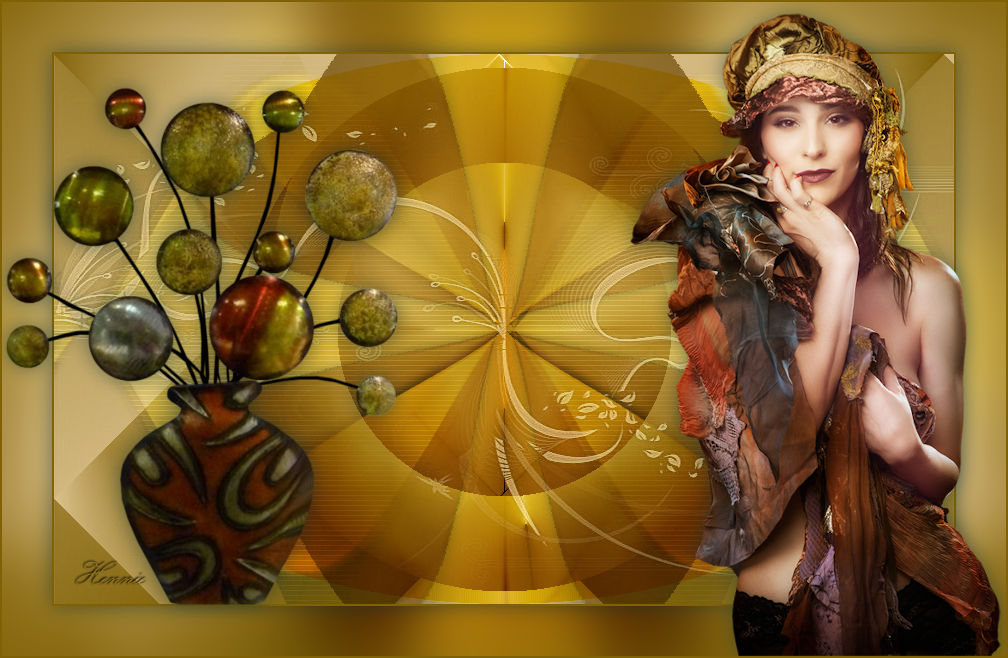
Your Layer Palette look like this now-You should have this result
**************
25.
Image - Add borders-Symmetric checked:---2 pixels--- Background color.
Edit---Copy
Selections---Select All
Image - Add borders-Symmetric checked:---50 pixels---Color white
Selections---Invert
Activate your work -Edit - Paste into selection.
Adjust---Blur---Gaussian Blur---Radius 25.
Selections---Invert.
26.
Effects---3D-Effects--- Drop Shadow with these settings: 0---0---50---30. Color Black
27.
Selections---Deselect All
28.
Open the tube--- 0_68e1b_7c3fb28_L.png
Edit-Copy
Activate your work -Edit - Paste as a new layer Move to the left.
29.
Open Tube--- Kamalini-935 .png
Edit---Copy
Activate your work -Edit - Paste as a new layer Move to the right.
Effects---3D-Effects--- Drop Shadow with these settings: 0---0---80--40. Color Black
30.
Image - Add borders-Symmetric checked:------2 pixels--- Background color.
Layers- New Raster Layer
Place your watermark.
Save as JPG.
Voorbeelden gemaakt door Kamalini Hennie en Corrie

|