Lesson-247

Translation made by MARION
Supplies
Material

Filters
Effects-Plugins-Filter Unlimited 2.0---<Bkg Kaleidoscope---Kaleidoscope 2
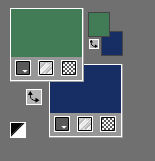
Material Properties: FG-Color #427c57-BG-Color #192e65
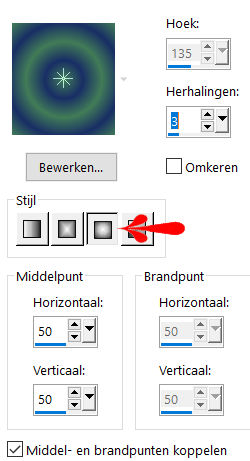
Set your Foregroundcolor to foreground-background sunburst gradient with these settings
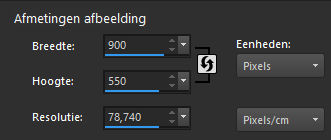
File-Open a new transparent Image with these settings.
 Gebruik de aanwijzer om aan te geven waar je bent gebleven.
1.
Flood Fill Tool – fill the layer with the gradient
2.
Layers---Duplicate
3.
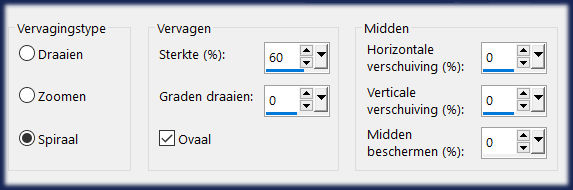
Adjust---Blur--Radial Blur---
Twirl---Strength 60---Twirl degrees 0---Oval checked---Horizontal offset 0---
Vertical offset 0---Protect center 0.
5.
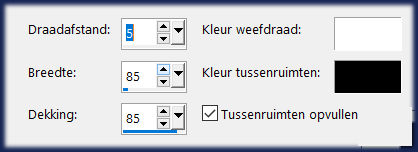
Effects---Textureffects---Weave with these settings:
---5---85---85---Weave color --- #ffffff—Gap color #000000 ---Fill gaps checked
6.
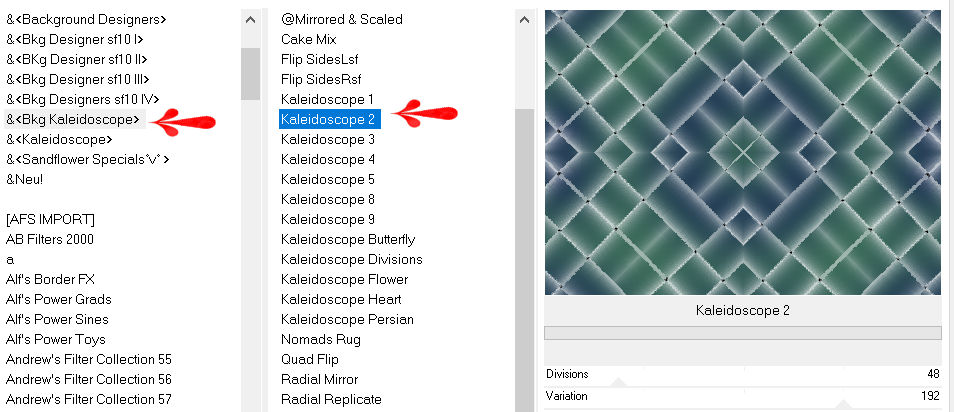
Effects---Plugins---<I C Net Software> Filters Unlimited 2.0
&<Bkg Kaleidoscope---Kaleidoscope 2---48---192
7.
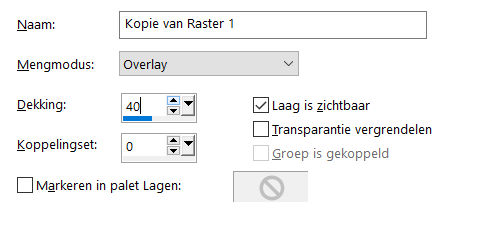
Layers-Properties-Change the Blend Mode to " Overlay " Lower the Opacity to 40 %
8.
Adjust---Scharpness -Sharpen
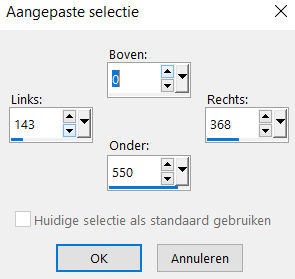
Activate Selection Tool-Custom Selection (S) -Rectangle with these settings ---0---143---368---550
9.
Activate the bottom of the layer-palette (Raster 1)
10.
Selections---Promote selection to layer.
Layers---Arrange---Bring to Top
11.
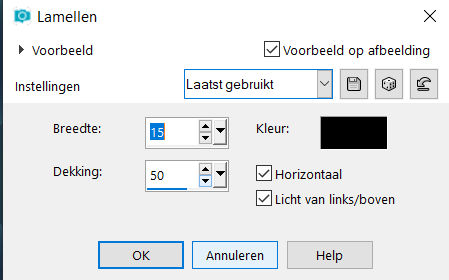
Effects---Textureffects---Blinds---15---50---Color Black --- Horizontal ---Light from left/top checked
12.
Selections –Deselect All
13.
Layers- New Raster Layer
14.
Color Palette-Set the Foreground color to color #ffffff
Flood Fill Tool- fill the layer with #ffffff
15.
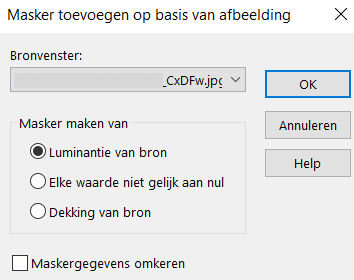
Layers---New Mask Layer---From Image---Select Mask CxDFw.
Source Luminance checked .
16.
Layers---Merge---Merge Group
17.
Layers-Properties-Change the Blend Mode to "Soft Light"
18.
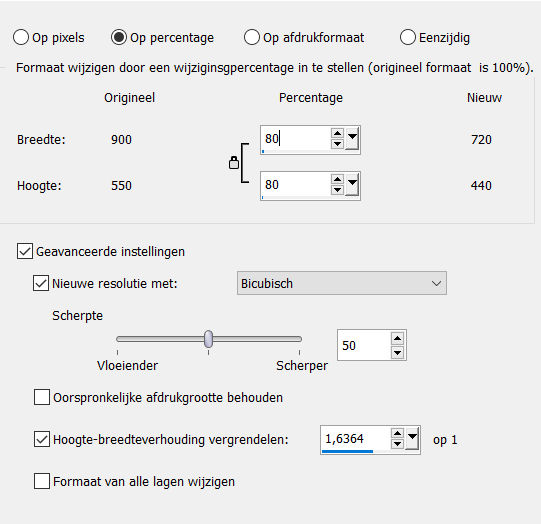
Layers---Duplicate---
Image---Resize 80 %---Resize all layers NOT checked.
19.
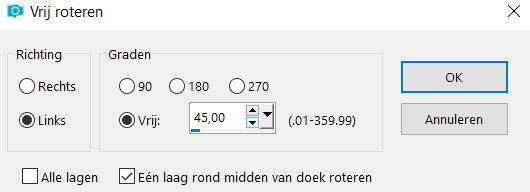
Image---Free Rotate---45% Left—Rotate single layer around canvas checked.
20.
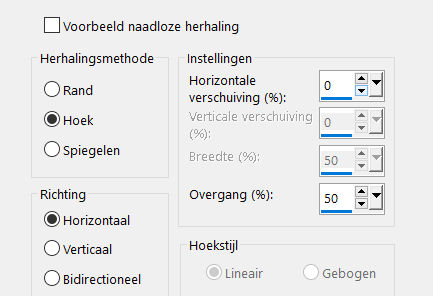
Effects---Image Effects---Seamless Tiling---Corner---Horizontal---
Horizontal offset 0--- Vertical offset 0---Transition 50
21.
Open the tube---blooming_yucca_by_lilipilyspirit-d4zfzhm.png
Edit---Copy
Activate your work -Edit - Paste as a new layer
22.
Layers---Duplicate
Layers---Merge---Merge- Down
23.
Image---Resize 80 %---Resize all layers NOT checked.
Repeat once with the same settings
24.
Effects-Image Effects---Offset---min 400---20---Custom---Transparent

25.
Open the tube--- tekst
Edit---Copy
Activate your work -Edit - Paste as a new layer
26.
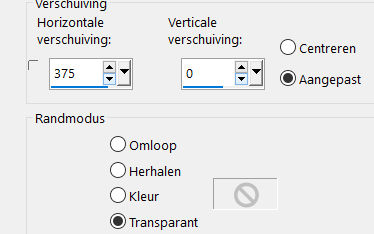
Effects- Image Effects---Offset---375---0---Custom---Transparent
27.
Image - Add borders-Symmetric checked ---1 Pixel---FG-Color
Image - Add borders-Symmetric checked ---3 Pixels---BG-Color
Image - Add borders-Symmetric checked ---1 Pixel---FG-Color
Selections---Select All
Image - Add borders-Symmetric checked ---50 Pixels---Color #fffffff
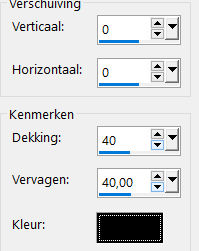
Effects---3D-Effects---Drop Shadow with these settings
---0---0---40---40---Color Black
Selections-Deselect.
28.
Open the Tube--- Kamalini-216
Edit---Copy
Activate your work -Edit - Paste as a new layer
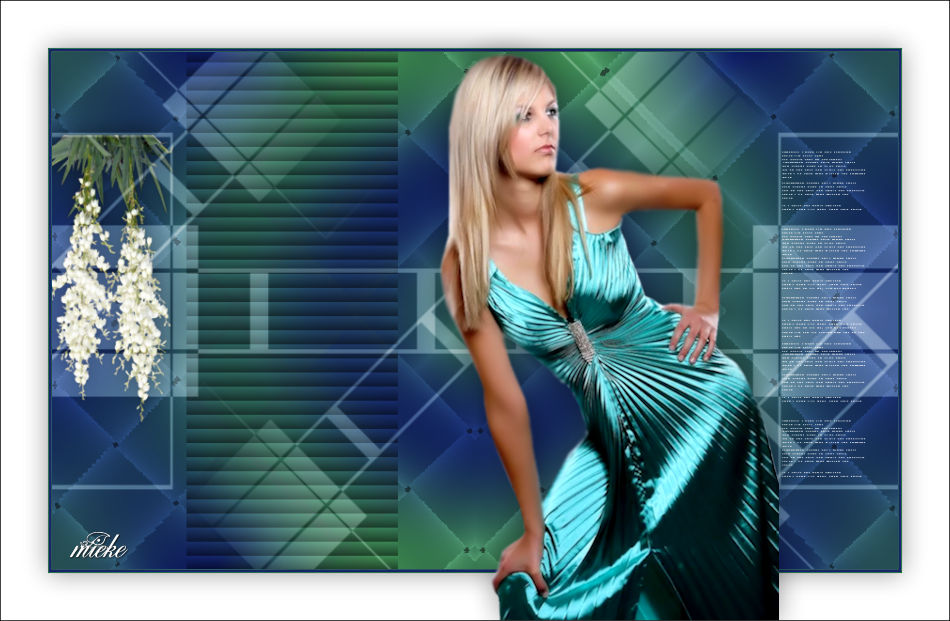
Put your tube in a nice place..
Effects---3D-Effects---Drop Shadow with these settings
---0---0---40---40---Color Black
Image - Add borders-Symmetric checked ---1 pixel---Color #000000
Add you watermark on new layer.
Save as JPG
Voorbeelden gemaakt door Kamalini. Hennie en Corrie
Dank voor het controleren van de les.

|