Lesson 242

Translation made by MARION

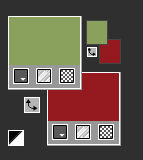
Materiaal

Printles
Material
These Plugins are used for the tutorial
Plugins---<I C Net Software> Filters Unlimited 2.0>---Toadies---weaver
Plugins---Mehdi ---Sorting
Plugins--- AP 01 (Innovations)-lines-Silverlining ---Dotty Grid
Plugins---AAA Frames---Foto Frame
Colors
Foreground color #89a15d---Background color #941b21
 Gebruik de aanwijzer om aan te geven waar je bent gebleven.
1.
File---New---Open a new transparent Image
Image Size ---Width---900--- Height---550.
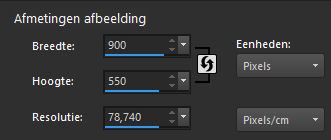
Activate Flood Fill Tool- Fill the layer with the FG-Color
2.
Layers- New Raster Layer
3.
Selections- Select All
4.
Open the Tube--- 44_orig.png
Edith- Copy
Activate your work -Edit - Paste into Selection
Selections- Deselect All
5.
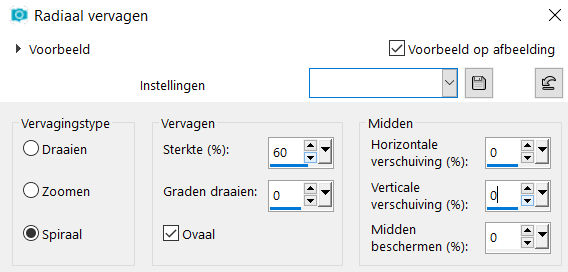
Adjust---Blur –Radial Blur ---Twirl---60---0---0---0---0
6.
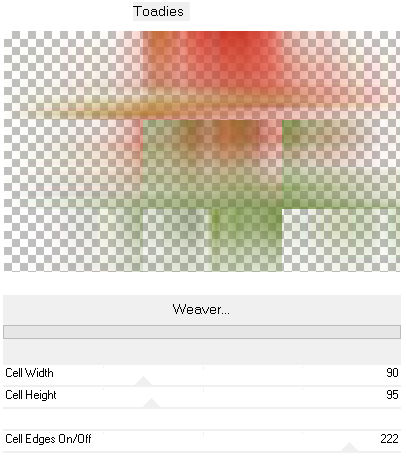
Effects---Plugins---<I C Net Software> Plugins- Unlimited 2.0>---Toadies---weaver---90---95---222.
7.
Effects---Edge Effects---Enhance More
8.
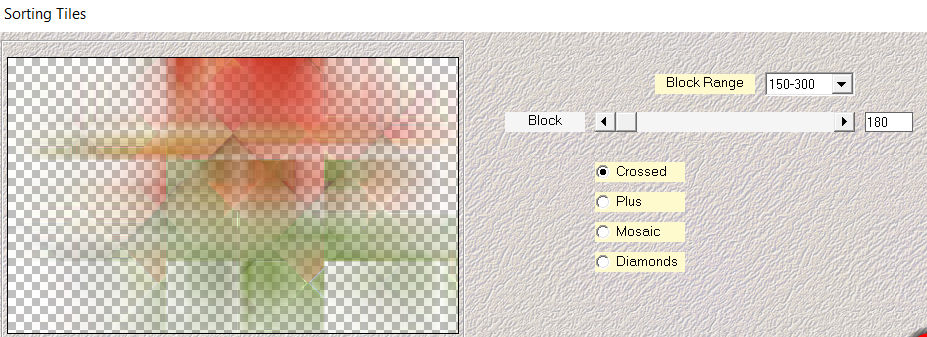
Effects---Plugins---Mehdi ---Sorting Tiles –Crossed---150---300---180
9.
Layers- Merge –Merge Visible
10.
Selections –load/save selection –load selection from disc and select my selection:
les-242-1-mb.PspSelection
11.
Selections- Promote Selection to Layer
Selections---Deselect All
Effects---3D-effects---Drop Shadow with these settings: 0---0---80---45. Color Black.
12.
On this Layer
Selections –load/save selection –load selection from disc and select my selection:
--- les-242-2-mb.PspSelection
Selections- Promote Selection to Layer
Effects---3D-effects---Drop Shadow with these settings: 0---0---80---45. Color Black
13
Selections---Deselect All
14.
Layers---Merge---Merge Down
15.
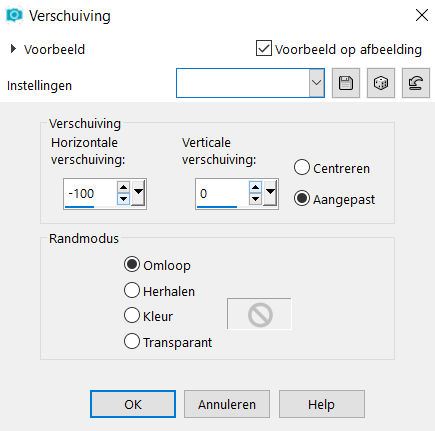
Effects---Image Effects---Offset with these settings:---min 100---0
16.
Open—the tube - deco-1-142.png
Edit---Copy
Activate your work -Edit - Paste as a new layer
17.
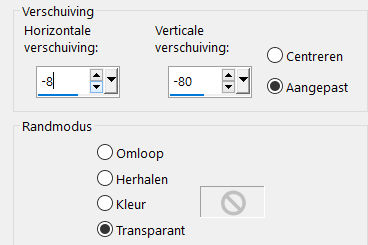
Effects---Image Effects---Offset with these settings:---min 8---min 80
18.
Open the tube--- 44_orig.png
Edit---Copy
Activate your work -Edit - Paste as a new layer
19.
Image---Resize ---70 %.
Resize all layers not checked
20.
Effects---3D-effects--- Drop Shadow with these settings:
0---0---80---45. Color Black
21.
Open—the tube -deco-3
Edit---Copy
Activate your work -Edit - Paste as a new layer
22.
Pick Tool (K) Enter these parameters for the X: 607---for the Y: 20 positions on the Toolbar

23.
Layers-Properties-Change the Blend Mode to " Luminance -Legacy " and Lower the Opacity to 60 %
24.Open—the tube -deco-4
Edit- Copy
Activate your work -Edit - Paste as a new layer
25.
Pick Tool (K) Enter these parameters for the: X: 21---for the Y: 2 positions on the Toolbar
Press ( M ) to close the Pick Tool.

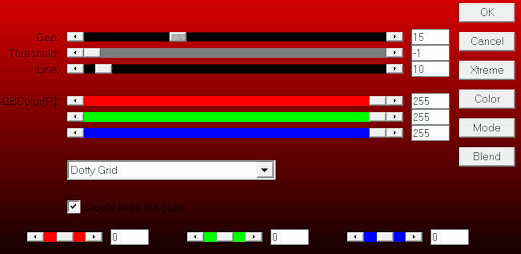
26.
In the Layer Palette---Activate the bottom layer (merged layer)
Effects---Plugins AP 01 (Innovations)-lines-Silverlining
---Dotty Grid---15----min 1---10---255---255---255.
27.
Image - Add borders-Symmetric checked ----3 pixels ---BG-Color
Selections---Select All
Image - Add borders-Symmetric checked ----50 pixels ---FG-Color
Effects---3D-effects--- Drop Shadow with these settings :0---0---80---45. Color Black
Selections---Deselect All
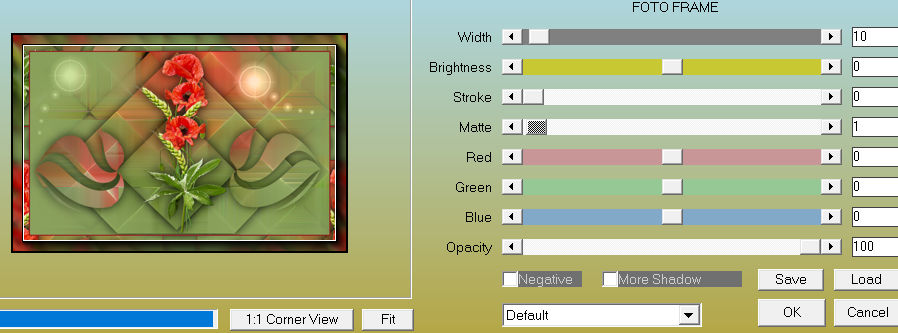
28.
Effects---Plugins---AAA Frames---Foto Frame---Width op 10
Matte op 1---OK
.
On a new layer add your watermark
Save as JPG
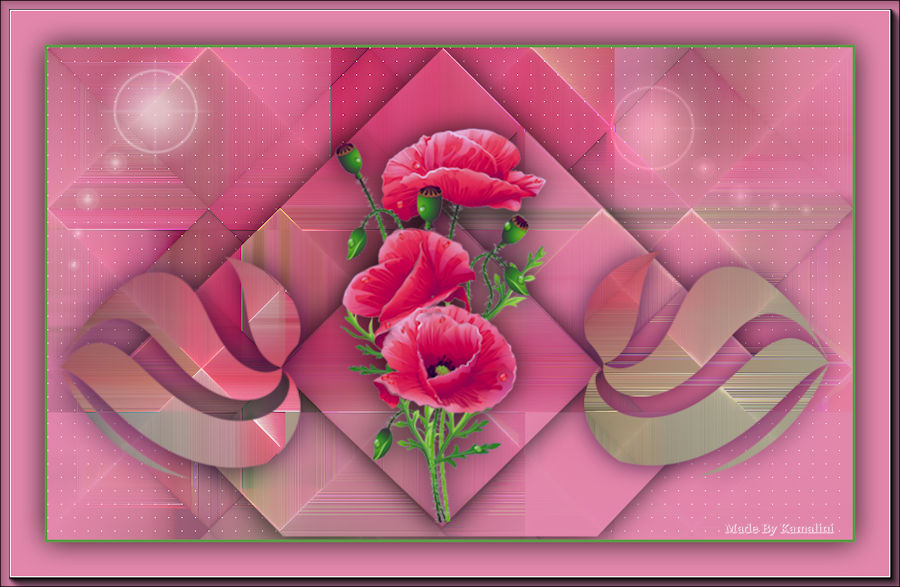
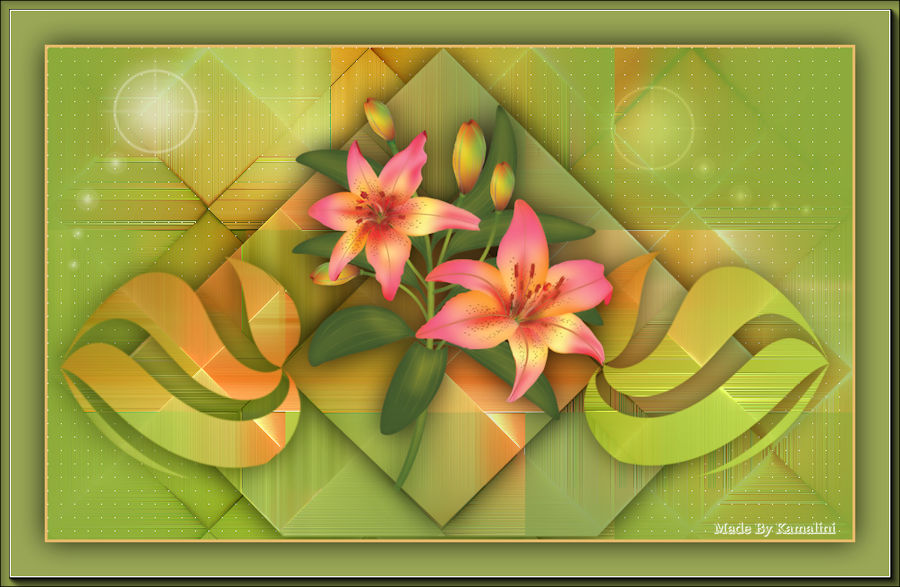
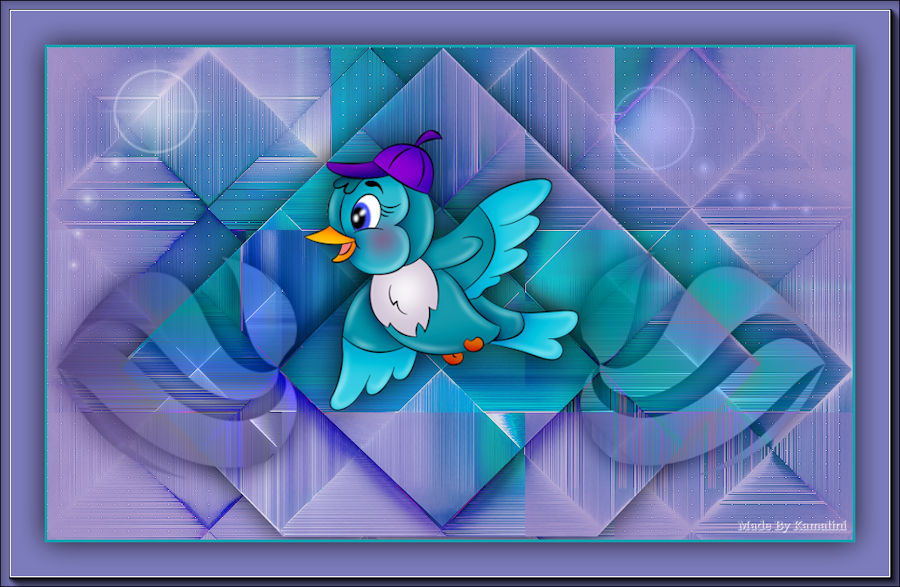
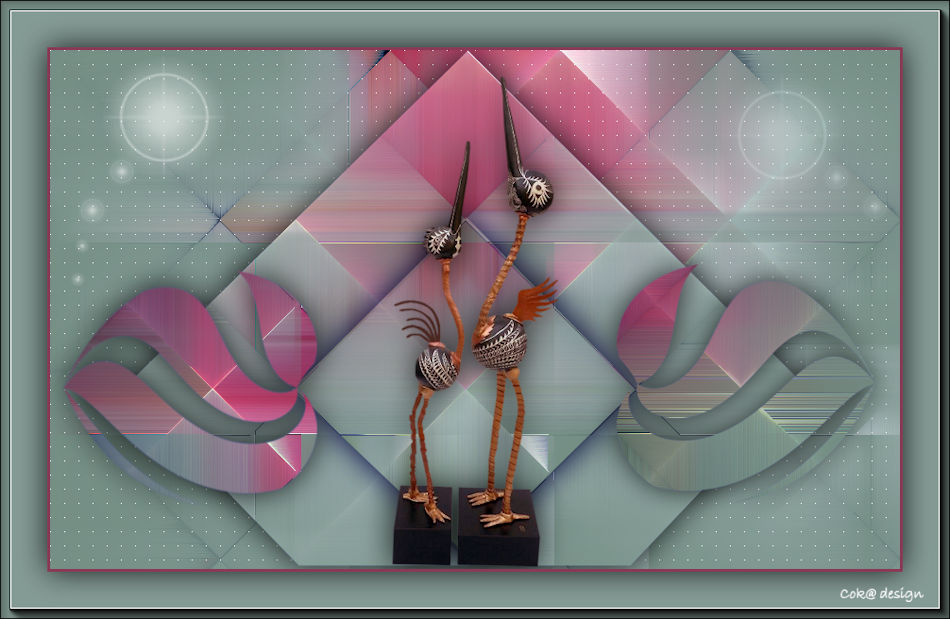
Voorbeelden gemaakt door Kamalini---Hennie en Corry
Dank voor het testen.

|