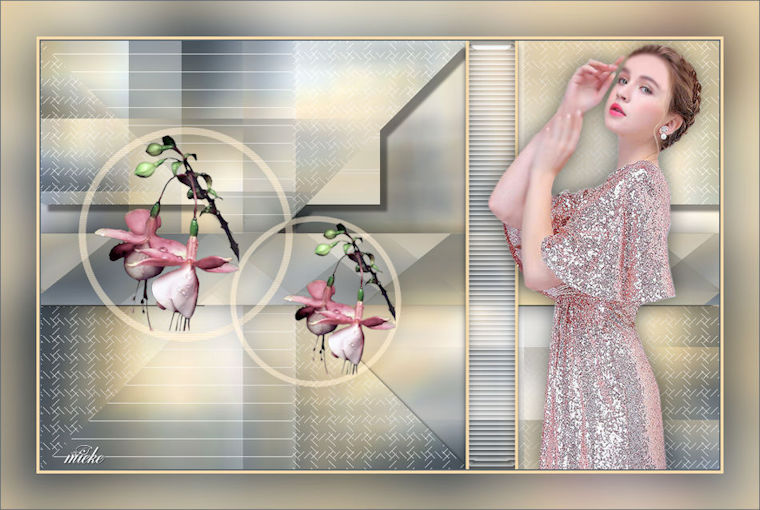
Lesson-241
Translation made by MARION

Material

Filters
Plugins--Mehdi---WavyLab 1.1
Plugins---Mehdi---Sorting Tiles
Plugins--- AP 01 (Innovations)-Lines-SilverLining
Plugins---<I C Net Software> Filters Unlimited 2.0---Toadies
Plugins---<I C Net Software> Filters Unlimited 2.0>---Simple
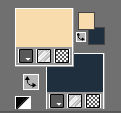
Colors #f8dcad---#202f3f
1.
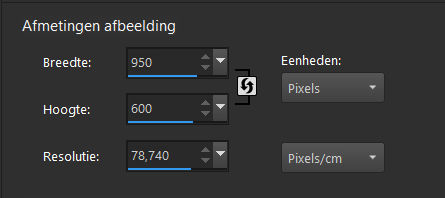
File---New---Open a new transparent Image
Width 950-Height 600 Pixels
2.
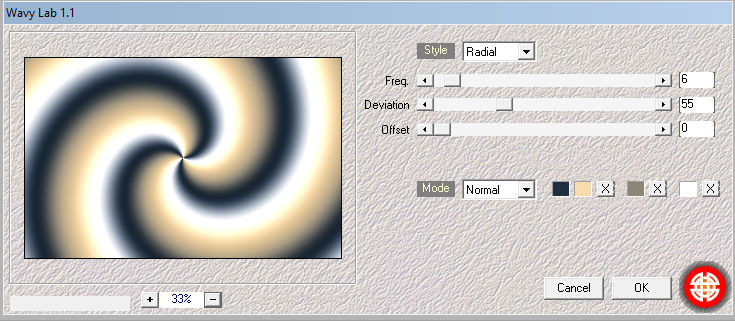
Effects---Plugins---Mehdi---WavyLab 1.1---Radial---6---55---0---color 4 change into #ffffff
3.
Effects---Edge Effects---Enhance More.
4.
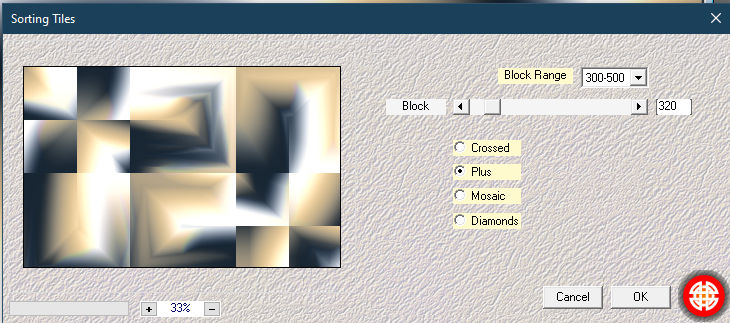
Effects---Plugins---Mehdi---Sorting Tiles---300---500---320---Plus
5.
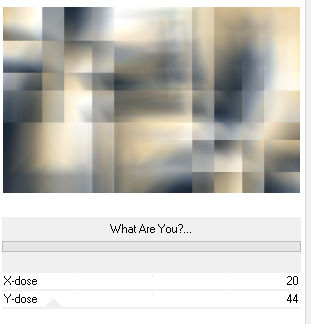
Effects---Plugins---<I C Net Software> Filters Unlimited 2.0---Toadies---What Are You---20---44
6.
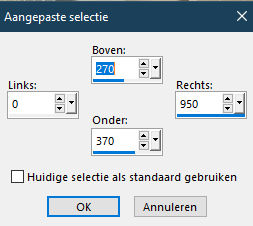
Activate Selection Tool -(S)

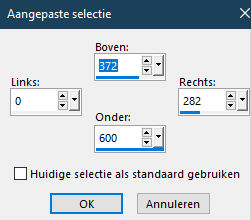
Custom Selection -Rectangle with these settings ---Top 372---Left 0---Right 282---Bottom 600
Selections---Promote selections to Layer
7.
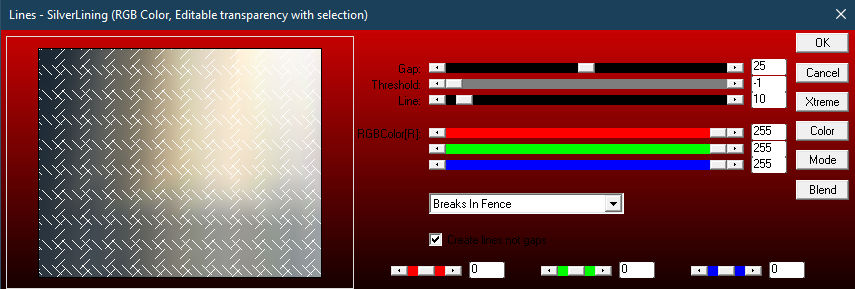
Effects- Plugins--- AP 01 (Innovations)-Lines-SilverLining----Break in Fence---25-----3x 255.
8.
Selections---Deselect All
9.
Effects-Plugins---<I C Net Software> Plugins Unlimited 2.0>---Simple---Pizza Slice Mirror
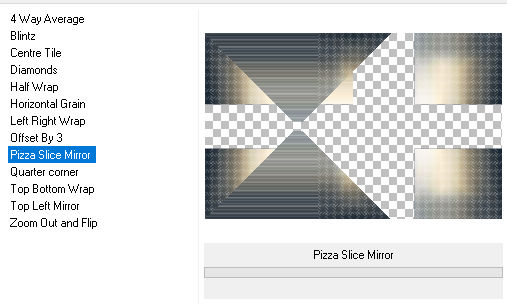
(The result will not be the same as Mieke,s, that's normal)
10.
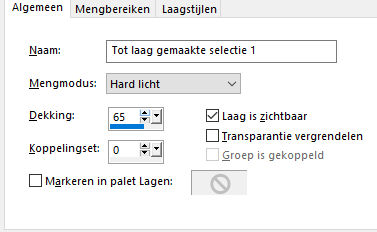
Layers-Properties-Change the Blend Mode to " Hard Light " and Lower the Opacity to 65
11.
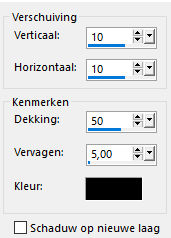
Effects---3D-effects--- Drop Shadow with these settings: 10--- 10---50---5. Color Black
If you use your own colors
then adjust shade color to your liking.
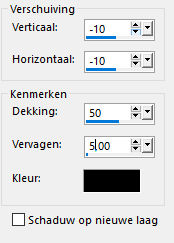
Effects---3D-effects—
Repeat: Drop Shadow---minus 10---minus 10---50---5.Color Black
12.
Activate the bottom layer in the layer palette (Raster 1)
Activate Selection Tool (S)
Custom Selection -Rectangle with these settings ---Top 270---Left 0---Right 950---Bottom 370.
Selections- Promote selection to layer.
Layers- Arrange- Bring to Top
Selections---Deselect All
13.
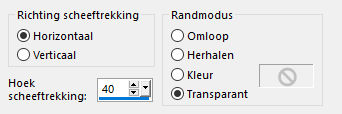
Effects---Geometric Effects---Skew
Horizontal--- 40---Transparent
14.
Layers---Duplicate
15.
Image - Mirror - Mirror Horizontal (Image - Mirror in older versions of PSP)
16.
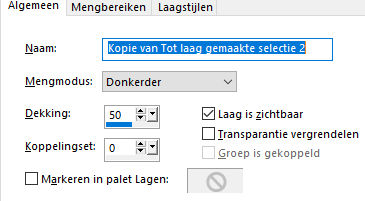
Layers-Properties-Change the Blend Mode to " Darken " and Lower the Opacity to 50
17.
Layers---Merge-Merge Down
18.
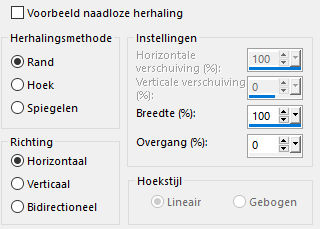
Effects---Image Effects---Seamless tiling---Edge---Horizontal---Width 100---Transition ---0
19.
Effects---3D-effects--- Drop Shadow with these settings:---0---0---50---45---Color Black
20.
Open the tube --- deco-1-241.png
Edit---Copy
Activate your work -Edit - Paste as a new layer
Pick Tool (K) Enter these parameters--- for the X 583---for the Y min 4 positions on the Toolbar
21.
Open- the tube --deco-2-241-png
Edit---Copy
Activate your work -Edit - Paste as a new layer
Pick Tool (K) Enter these parameters--- for the X 19---for the Y 87 positions on the Toolbar
22.
Open- the tube --Bloem 1
Edit---Copy
Activate your work -Edit - Paste as a new layer
Pick Tool (K) Enter these parameters--- for the --- X 340---for the Y 255 positions on the Toolbar
23.
Open- the tube--Bloem 2
Edit---Copy
Activate your work -Edit - Paste as a new layer
Pick Tool (K) Enter these parameters--- for the X 75---for the Y 132 positions on the Toolbar
24.
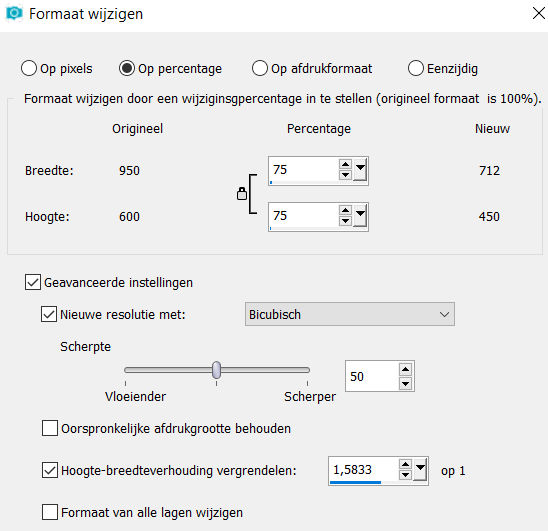
Open-the tube-- kamalini-881.png
Image---Resize ---75 %---Resize all layers not checked
Edit---Copy
Activate your work -Edit - Paste as a new layer
Pick Tool (K) Enter these parameters--- for the --- X 624---for the Y 4.00 positions on the Toolbar
Press ( M ) to close the Pick Tool
Effects---3D-effects--- Drop Shadow with these settings:0---0---50---40---Color Black
25.
Image - Add borders-Symmetric checked ----2 pixels ----BG-Color.
Image - Add borders-Symmetric checked ----4 pixels ----FG-Color
Selections---Select All
Edit------Copy
Image - Add borders-Symmetric checked ----50 pixels ----BG-Color.
Selections---Invert
Activate your work -Edit - Paste into Selection
Adjust---Blur---Gaussian Blur--- Radius 30.
Selections---Invert
Effects---3D-effects--- Drop Shadow with these settings ---0---0---40---80---Color Black
Selections---Deselect All
Image - Add borders-Symmetric checked ----1 pixels ----BG-Color
26.
On a new layer add your watermark
Save as JPG

|