Lesson-189
Translation made by MARION

Supplies
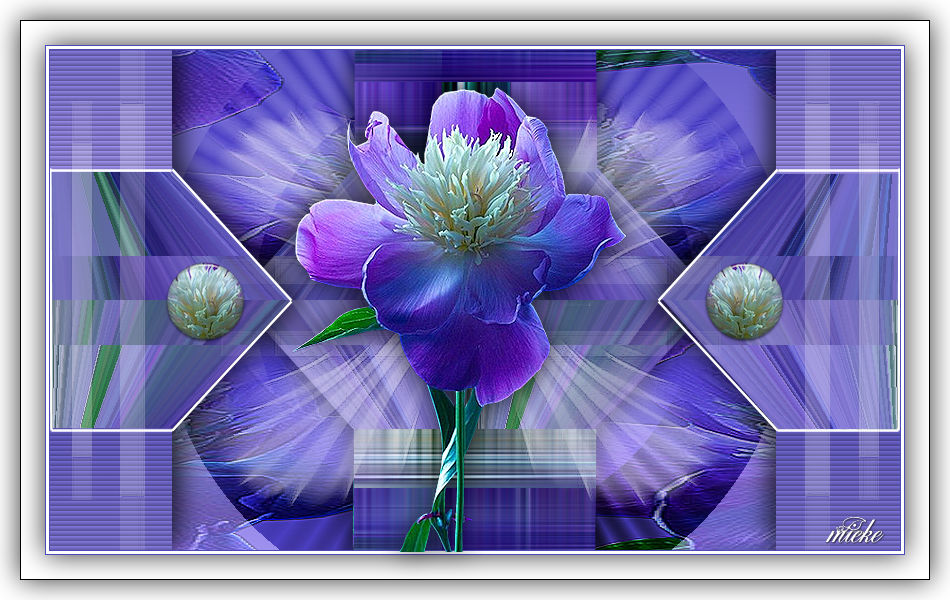
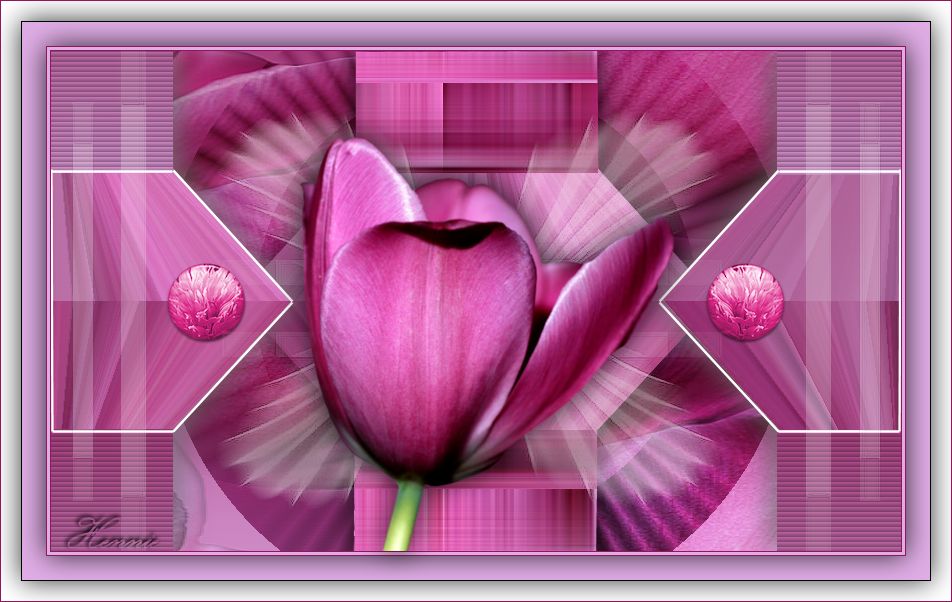
A beautiful flower tube was used for this lesson by Gerrie.
Thanks Gerrie.
Material

Printlesson
Mieke has used the following filters
Filter---It@lian Editors Effect
Filter---Toadies
Filter Factory Gallery B
Filters—Simple
Filter--- AAA Frames---Foto Frame
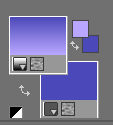
Colors
Foreground color #b9a7ff --- Background color #4c49b9.
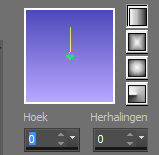
Gradient---Linear---Angle 0---Repeats 0.
 You can use my arrow to follow your work
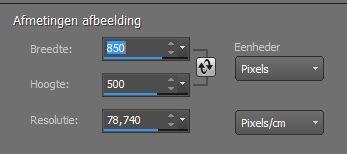
1.
File-Open a new transparent image in this size:---850---500 Pixels
2.
Flood fill the layer with the gradient
3.
Layers---Duplicate
4.
Selections---Select All.
5.
Open--- tube-gerry-bloemen.
6.
Edit---Copy
7.
Activate your work -Edit - Paste into Selection.
8.
Selections---Select none
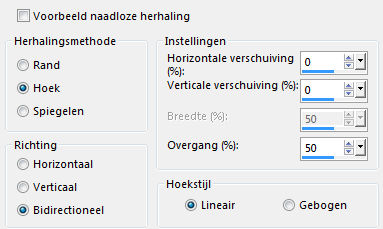
9.
Effects- Image Effects- Seamless Tiling
Corner---Bidirectional---0---0---x---Transition 50---linear.(default settings)
10.
Efefcts---Edge Effects---Enhance
11.
Layers---Duplicate
Edit---Repeat-- Layers---Duplicate
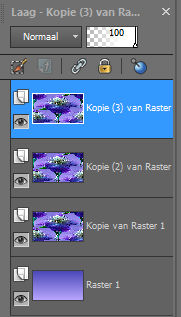
12.
Your layers palette looks like this.
13.
Activate in your layer palette ---Copy of Raster 1.
14.
Layers---Properties---Reduce the opacity of this layer to 50%.
15.
Activate in your layer palette--Copy ( 2) of Raster 1.
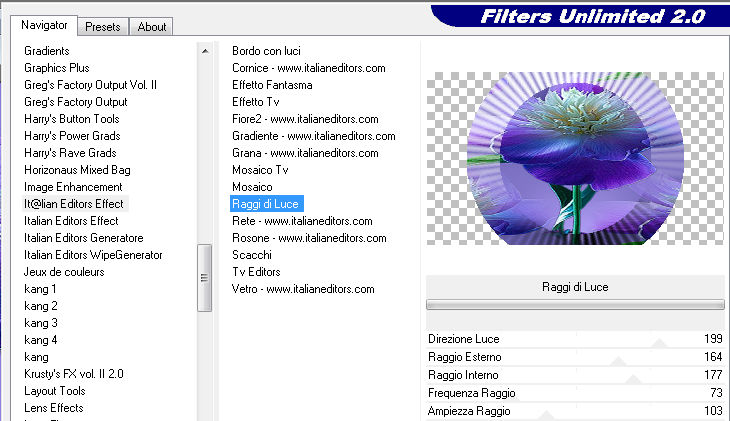
16.
Effects---Plugins---<I C Net Software> Filters in Unlimited 2.0---
It@lian Editors Effect---Raggi di Luce.
16.
Layers---Properties---Change the blend mode of this layer to Multiply.
17.
Activate in your layers palette---Copy (3) of Raster 1.
18.
Effects---Plugins---<I C Net Software> Filters in Unlimited 2.0---
Toadies---Weaver.
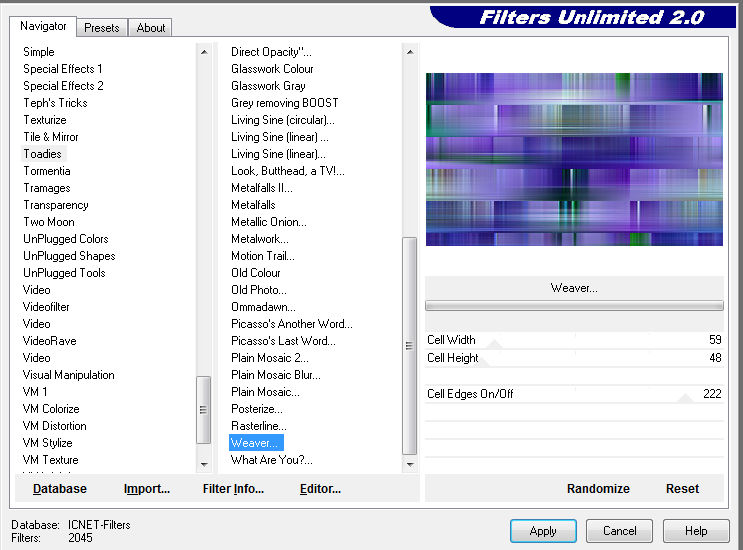
19.
Effects---Plugins---<I C Net Software> Filters in Unlimited 2.0
---Filter Factory Gallery B---Button Deluxe---125---120---118---123---122.
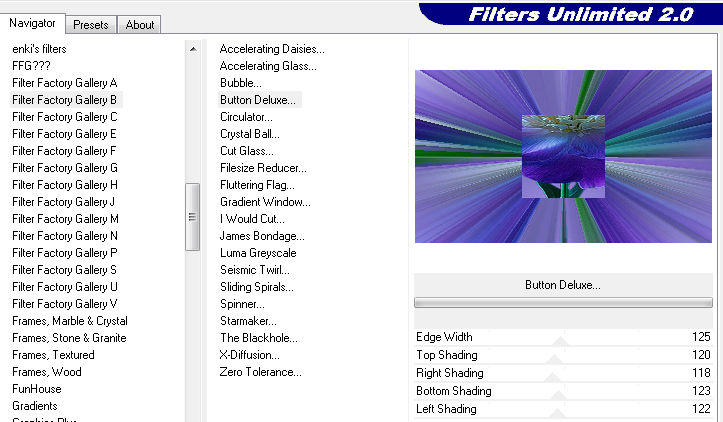
20.
Repeat this filter--- with the default settings (edge Width op 211---120---118---123---122).
21.
Effects---Plugins---<I C Net Software> Filters in Unlimited 2.0---
Simple—Top Botton Wrap.
22.
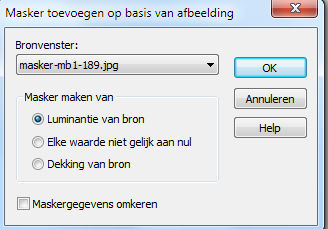
Open---Masker-mb-1-189---Click on the minus sign in the upper right corner.
23.
Layers--New mask layer--From image and select Mask----masker-mb-1-189
24.
Layers---Merge---Merge Group
25.
Effects---3D-effects---Drop Shadow---0---0---80---40---Color black
26.
Layers---Duplicate
27.
Effects---Plugins---<I C Net Software> Filters in Unlimited 2.0
Simple---Half Wrap.
28.
Layers--New raster layer.
29.
Flood fill the layer with the gradient
30.
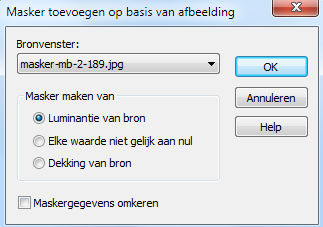
Open---Masker-mb-2-189---Click on the minus sign in the upper right corner.
31.
Layers--New mask layer--From image and select Mask ----masker-mb-2-189.
32.
Layers---Merge---Merge Group
33.
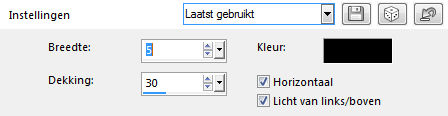
Effects--Texture effects--Blinds---5-30--Color black
Horizontal--Light from left/upper--Checked.
34.
Layers--Merge--Merge Down.
35.
Effects---Plugins---<I C Net Software> Filters in Unlimited 2.0
Simple---Top Bottom Wrap
36.
Effects---3D-effects---Drop Shadow---0---0---80---40---Color black
37.
Open--- deco-1-189.
38.
Edit---Copy
Activate your work -Edit - Paste as a new layer
39
Layers--New raster layer.
40.
Set your foreground color to color white #ffffff.
Flood fill the layer with the foreground color #ffffff
41.
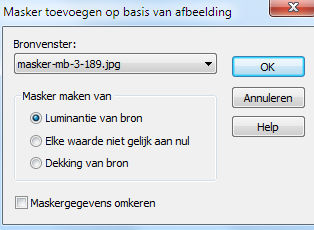
Open---Masker-mb-3-189---Click on the minus sign in the upper right corner.
42.
Layers--New mask layer--From image and select Mask ----masker-mb-3-189.
43.
Layers---Merge---Merge Group
44.
Efefcts---Edge Effects---Enhance
45.
Image--Add borders---1 pixel--Background color.
Image--Add borders---3 pixels---Foreground color.
Image--Add borders---1 pixel--Background color.
46.
Selections---Select All.
47.
Image--Add borders---45 pixels--Foreground color.
48.
Effects---3D-effects---Drop Shadow---0---0---80---40---Color black
49.
Selections---Select none
50.
Open tube--- Open--- tube-gerry-bloemen
51.
Edit---Copy
Activate your work -Edit - Paste as a new layer
Put the tube in a nice place----See finished image
52.
Effects---3D-effects---Drop Shadow---0---0---80---40---Color black
53.
Layers--Merge--Merge Down
54.
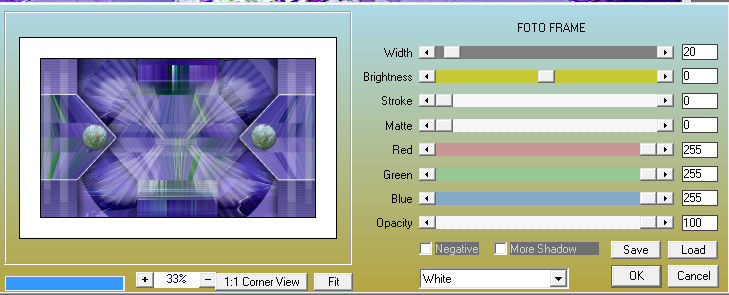
Effects---Plugins--- AAA Frames---Foto Frame
20---0---0---0---3x-255---100---White .
55.
Selections---Select All.
56.
Selections--Modify--Contract 20 pixels.
57.
Effects---3D-effects---Drop Shadow---0---0---80---40---Color black
58.
Selections---Select none
59.
Image--Add borders---1 pixel--Background color.
60.
Layers---New raster layer---Place your watermark
Layers--Merge--Merge All (flatten)
Save as JPG
Enjoy this lesson
Greetings Mieke
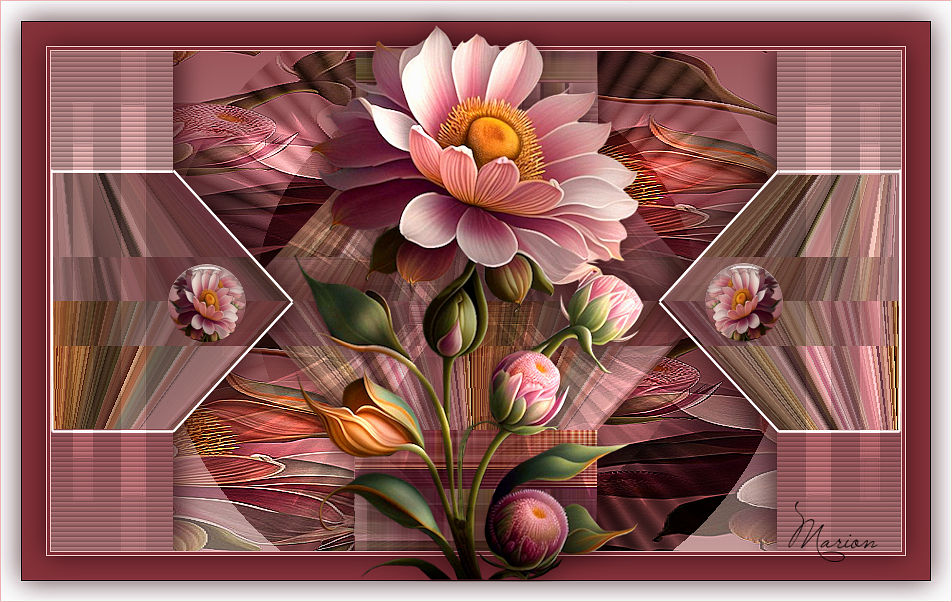
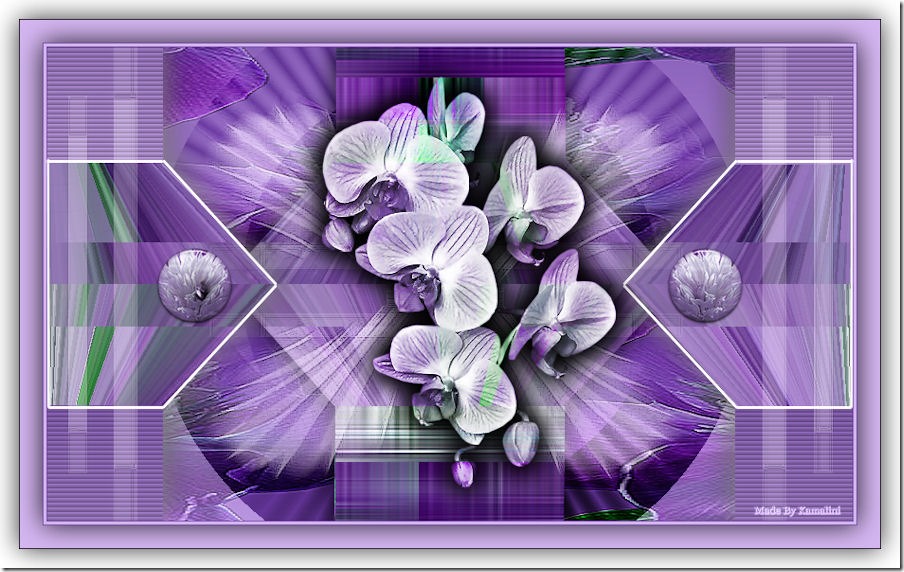
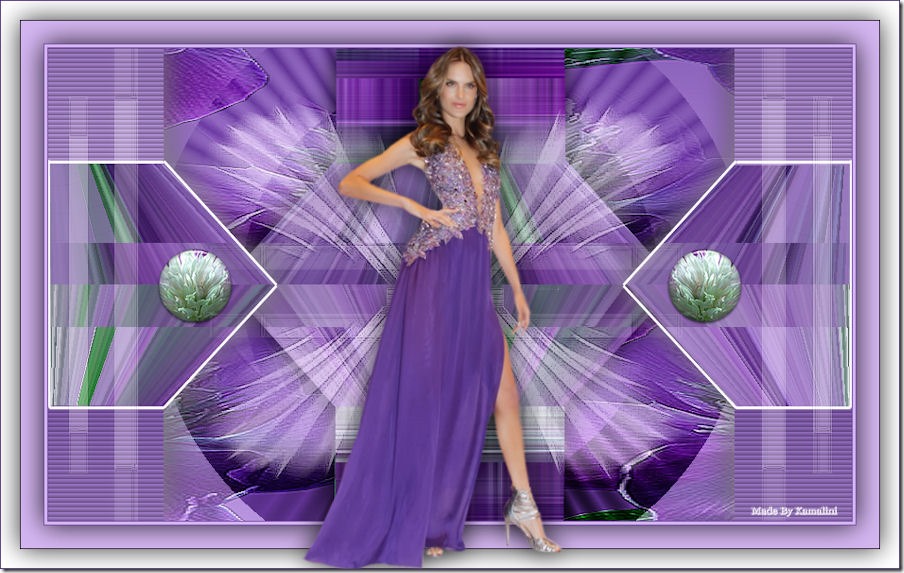
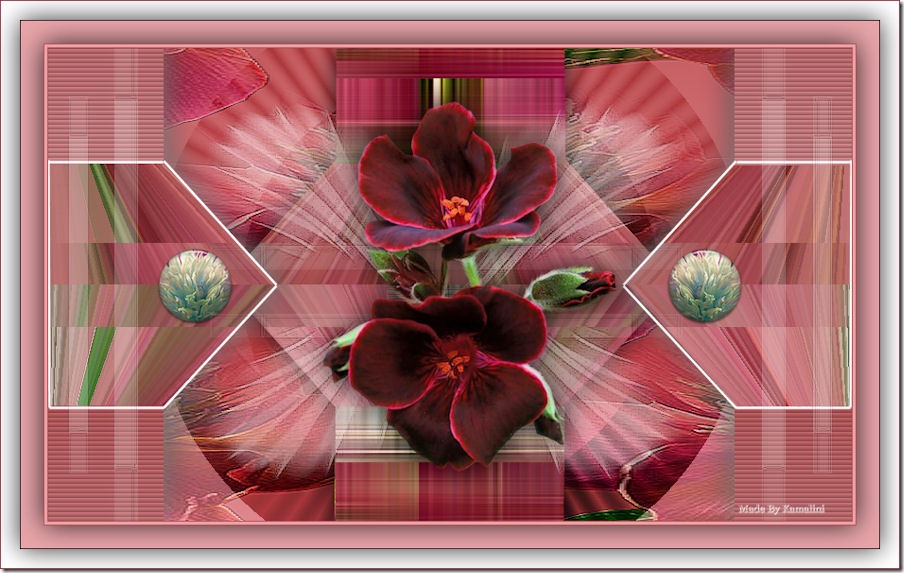
Examples created by Kamalini and Hennie

|


