Lesson-277
Engelse vertaling van Marion

Benodigdheden
Materiaal.

Supplies/Material
Plugins
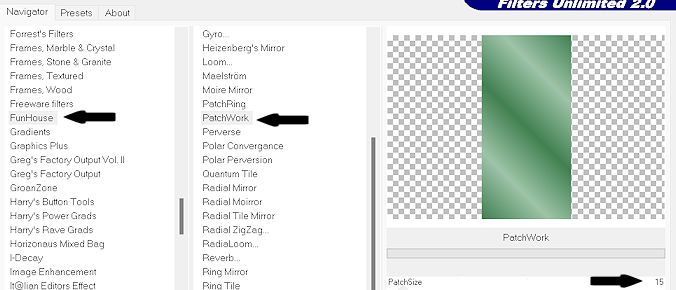
Plugins---<I C Net Software> Filters Unlimited 2.0>---Funhouse---PatchWork
filter---Flaming Pear---Flexify 2
Plugins---<I C Net Software> Filters Unlimited 2.0>---Toadies
Plugins---Carolaine and Sensibility CS-LDots
Material Properties-
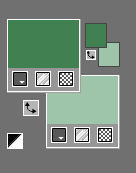
Set your Foreground color to color #428151
Set your Background color to color #9ec4a9
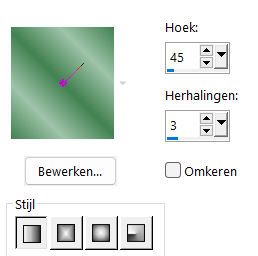
Replace your Foreground color with a Foreground/Background linear gradient with these settings----45-3.
1.
File-Open a New Transparent Image ---in this size:
Width---900---Height 600

2.
Flood Fill Tool – Fill the layer with the Gradient
3.
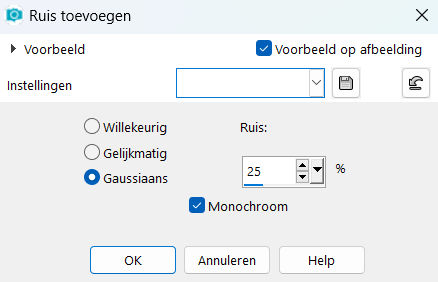
Adjust---Add/Remove Noise---Add Noise---Gaussian--- 25%---Monochrome
4.
Layers---Duplicate
5.
Image - Mirror - Mirror Horizontal (Imagr - Mirror in older versins of PSP)
6.
Layers-Properties-Lower the Opacity of the layer to 50%
Layers Merge ---Merge Down
7.
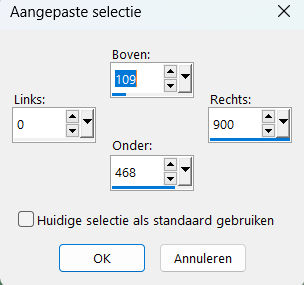
Activate Selection Tool -Custom Selection (S) -Rectangle with these settings

Top 109---Left 0---Right 900--Bottom 468
8.
Selections---Promote Selection to Layer
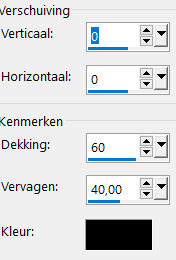
Effects---3D-Effects---Drop Shadow with these settings:
---0---0---60---40---Color Black #000000
Selections---Select None
9.
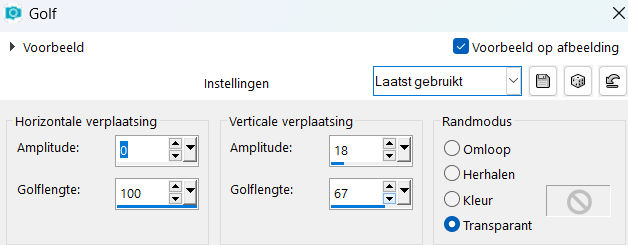
Effects---Distortions---Wave---0---100---18---67---Transparent.
10.
Layers---Duplicate
11.
Image - Mirror - Mirror vertical ( Image - Flip in older versions of PSP)
12
Layers---Duplicate.
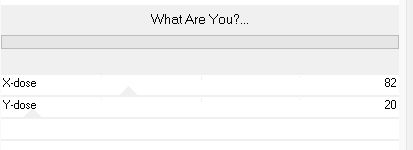
Effects---Plugins---<I C Net Software> Filters in Unlimited 2.0>---Toadies---What Are You with these settings:---82---20.---OK
13.
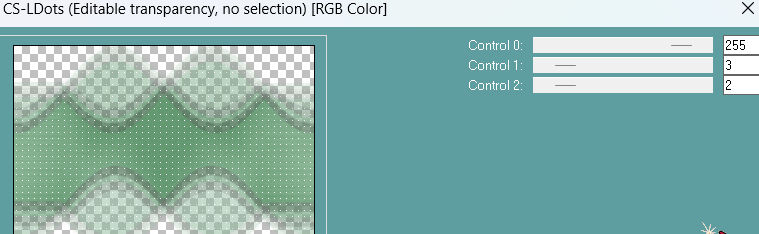
Effects---Plugins---Carolaine and Sensibility CS-LDots with these settings: ---255---3---2
14.
Effects---3D-Effects---Drop Shadow with these settings:---0---0---60---40---Color Black #000000
Layers-Properties-Change the Blend Mode to " Hard Light" (Customize if you use other colors)
16.
Layers---New Raster Layer
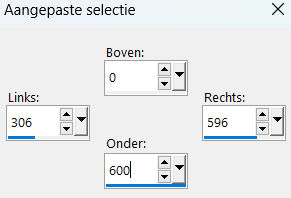
Activate Selection Tool -Custom Selection (S) -Rectangle with these settings
---Top 0---Left 306---Right 596---Bottom 600.
Flood Fill Tool – Fill the Selection with the Gradient.
Selections---Select None
17.
Effects---Plugins---<I C Net Software> Filters in Unlimited 2.0>---Funhouse---PatchWork---using the default settings.
18.
Effects---3D-Effects---Drop Shadow with these settings:---0---0---60---40---Color Black #000000
19.
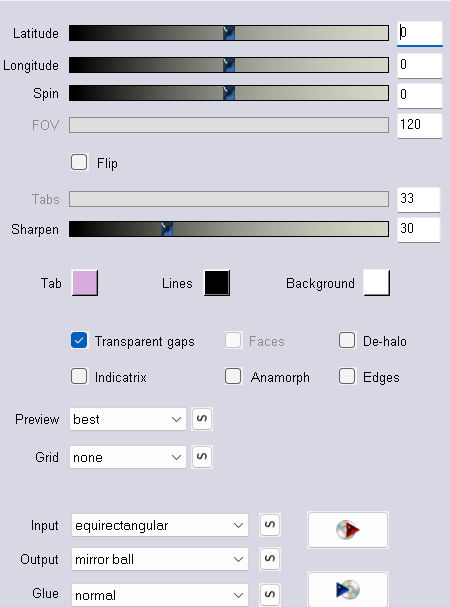
Effects---Plugins---Flaming Pear---Flexify 2 with these settings;
---Input---equirectangular---Output---mirror ball--- rest default.
Layers---Duplicate
20.
Activate the Layer underneath---(Raster 2)
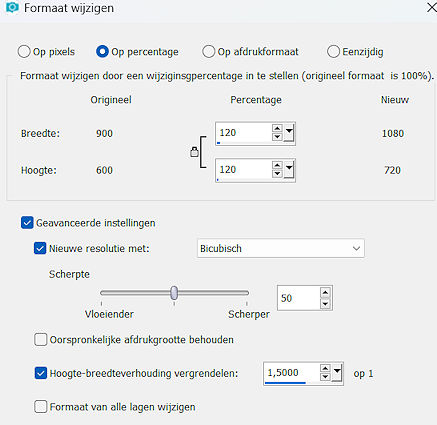
Image-- Resize---120 %.
Resize all layers unchecked.
21.
Adjust---Sharpness---Sharpen.
22.
Activate the layer above--- (Copy of Raster 2)
Image-- Resize---80 %.
Resize all layers unchecked.
Edit---Repeat---Resize
Again-Edit---Repeat---Resize
Adjust---Sharpness---Sharpen.
.
23.
Open the tube---kleine bloem.
Edit - Copy- Activate your work -Edit - Paste as a new layer
Layers----Merge---Merge Down
Effects---Image Effects---Offset with these settings:
---305---180---Transparent

Effects---3D-Effects---Drop Shadow with these settings;
---0---0---60---40---Color Black #000000
24.
Layers---Duplicate
Image - Mirror - Mirror Horizontal (Image - Mirror in older versions of PSP)
Layers----Merge---Merge Down
25.
Layers---New Raster Layer.
Color palette - Change the Foreground color to color #ffffff
Flood Fill Tool-Fill the layer with the Foreground color # #ffffff.
Layers---New Mask Layer ---From Image and select--- 12501824221_nikita_masque.jpg

Layers---Duplicate
Layers---Merge---Merge Group.
Layers-Properties-Lower the Opacity of the layer to 50 %.
Layers---Arrange ---Move Down.
26.
Open---the tube deco-1-png
Edit - Copy-
Activate your work -Edit - Paste as a new layer
Objects---Align---Bottom
Layers-Properties-Change the Blend Mode to " Overlay "
27.
Open Tube--- 12587hjk.png
Edit - Copy-
Activate your work -Edit - Paste as a new layer
Move the tube slightly to the right (see finished image).
28.
Image - Add borders-Symmetric checked: ---1 Pixel ---Color #000000
Image - Add borders-Symmetric checked: ---3 Pixels ---Color #9ec4a9
Image - Add borders-Symmetric checked: ---1 Pixel ---Color #000000
Selections---Select All
Image - Add borders-Symmetric checked: ---50 Pixels --- Different color.
Selections---Invert
Set your Foreground color to color #428151
Replace your Foreground color with a Foreground/Background linear gradient with these settings----45-3
(as in the beginning)
Flood Fill Tool-Fill the selection with the Gradient
Effects--Plugins---Carolaine and Sensibility CS-LDots with these settings:---255---3---2
Selections---Invert
Effects---3D-Effects---Drop Shadow with these settings:---0---0---60---40---Color Black #000000
Selections---Select None29.
Image - Add borders-Symmetric checked: ---1 Pixel ---Color #000000
Add you watermark on New Layer.
Save as JPG.
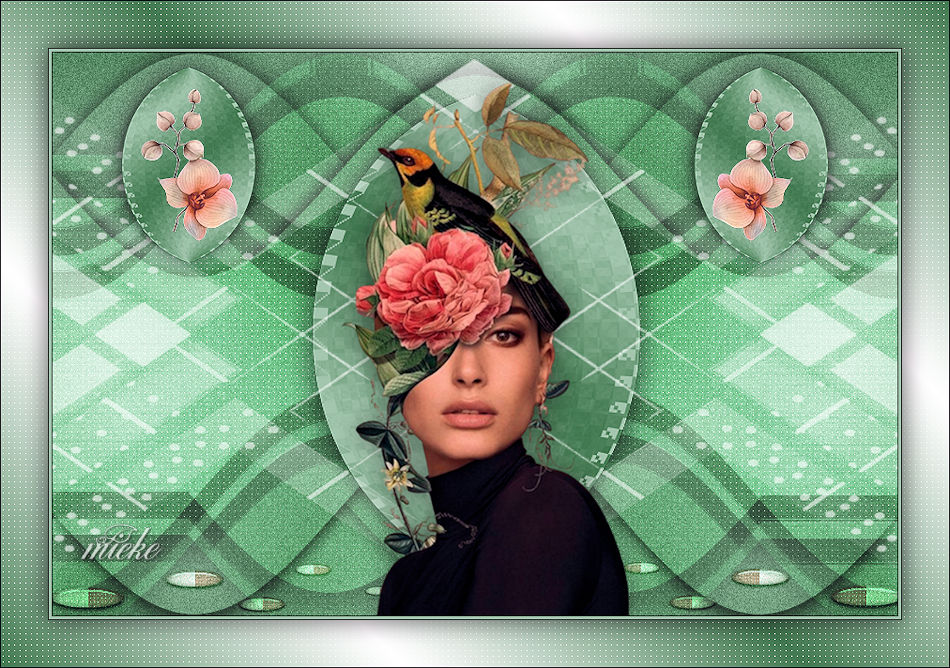
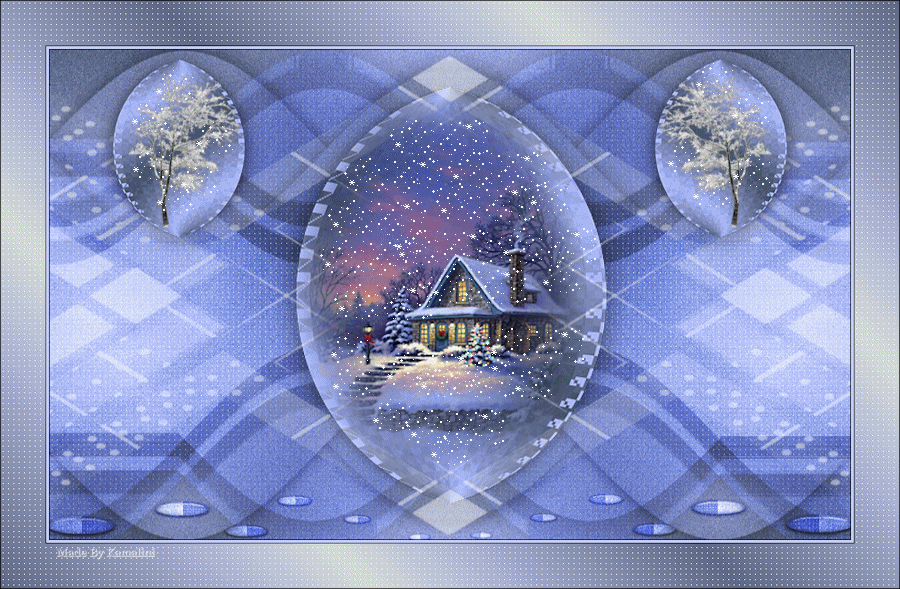
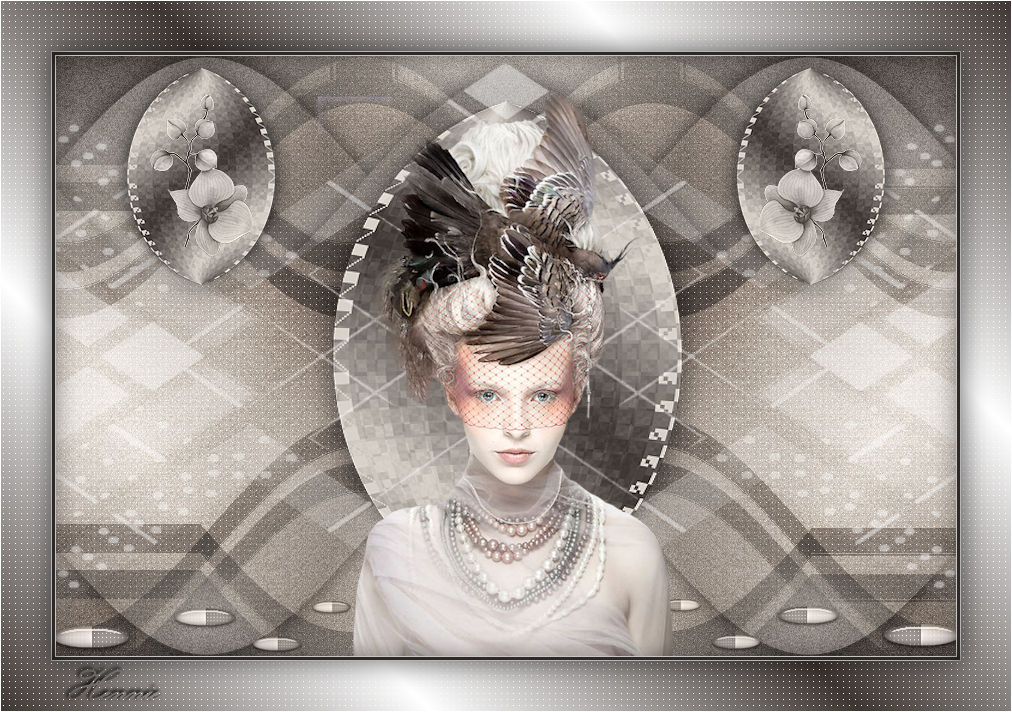
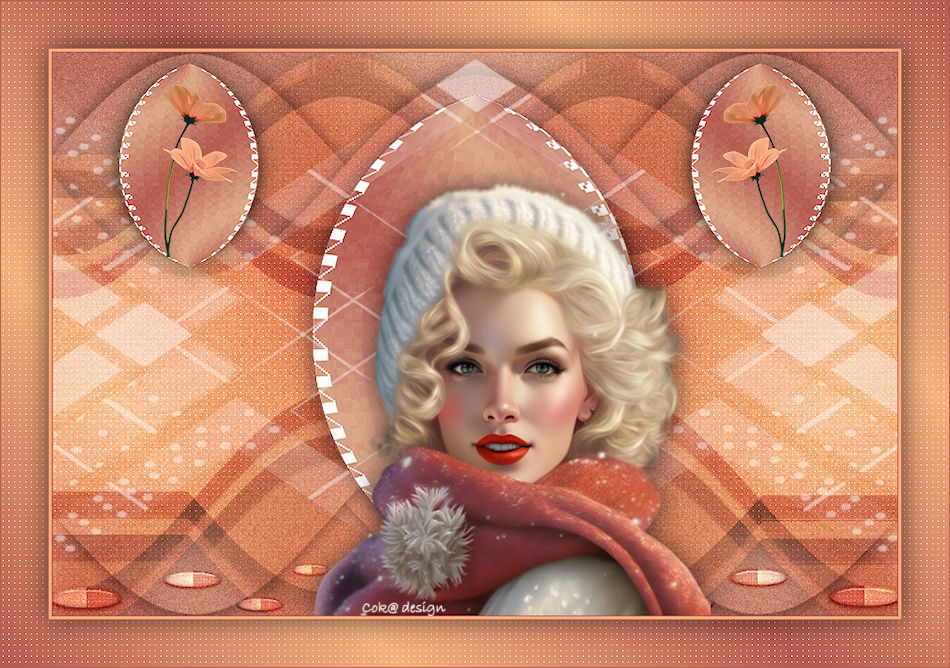
Voorbeelden gemaakt door Kamalini-Hennie-Corrie--Marion

|