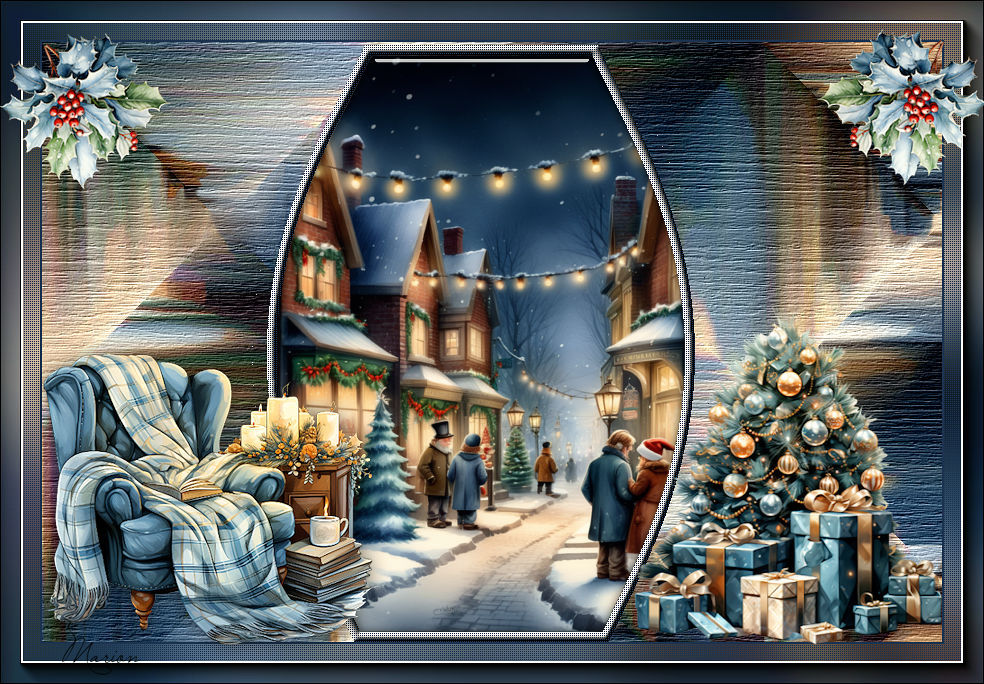
KerstlesChristmas lesson 5
Translation made by MARION


Material

Plugins
Filter---Mehdi ---Sorting Tiles
Filters---<I C Net Software> Filters Unlimited 2.0>---Texturize
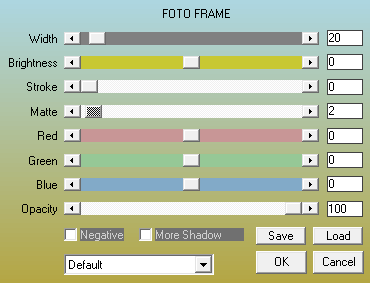
Filters---AAA Frames--- Foto Frame
Colors
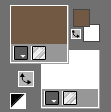
Foreground color---#725945---Background color #ffffff ( white).
1.
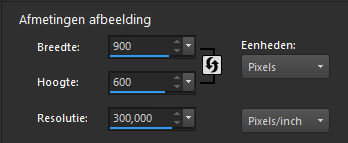
Open a new transparent image 900---600
2.
Flood fill the Layer with the background color #ffffff
3.
Selections---Select All
3.
Activate----b96c.jpg
Edit---Copy
Activate your work ---Edit --- Paste into Selection.
Selections---Select none
4.
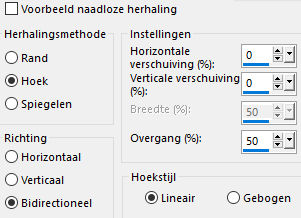
Effects---Image Effects---Seamless Tiling---Default settings
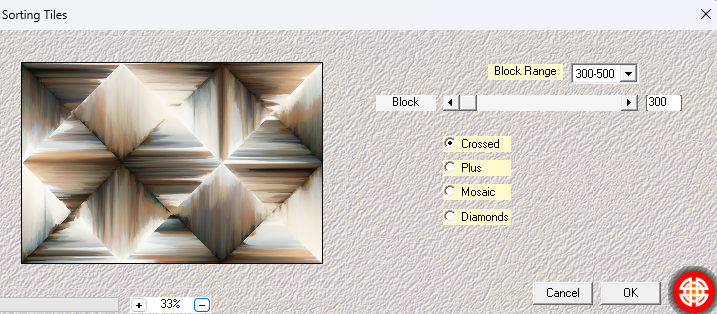
5.
Effects---Plugins---Mehdi ---Sorting Tiles –Block Range 300-500---Block-360---Crossed checked
6.
Effects---Plugins---<I C Net Software> Filters Unlimited 2.0>
---Texturize---Wood1---220

7.
Layers--- New Raster layer
8.
Selections ---load/save selection ---load selection from disc and select my selection:kerst-5-2024
Flood fill the selection with the background color #ffffff
9.
Selections---Modify---Contract 10
Click delete on the keyboard
10
Selections---Select All
Selections---Float
Selections---Defloat
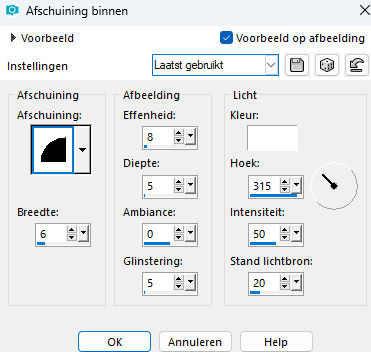
11.
Effects---3D -Effects---Inner Bevel---6---8---5---0---5---White---315---50---20.
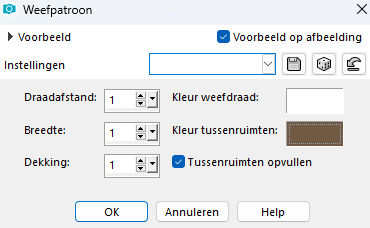
12.
Effects---Texture Effects ---Weave 1---1---1---Color white---Dark Color
Selections--- Select none
13.
Activate your Magic Wand – Tolerance at 0 and Feather at 0
click in the middle of the frame

14.
Layers--- New Raster layer
15.
Activate--- b96c.jpg
Edit---Copy
Activate your work---Edit---Paste into selection
16.
Effects---Plugins---Alien Skin Eye Candy 5: Impact---Glass---Settings--- Clear
17.
Selections---Select none
18.
Activate--- deco-kerst-67.png
Edit---Copy
Activate your work---Edit---Paste as new layer
Move to the bottom right.
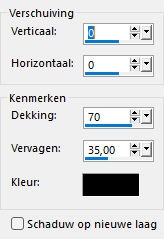
Effects---3D-Effects---Drop Shadow---0---0---70---35---Color Black
19.
Activate--- kerst-f742.png
Edit---Copy
Activate your work---Edit---Paste as new layer
Move to the top left
Effects---3D-Effects---Drop Shadow---0---0---70---35---Color Black
20.
Activate--- kerst-bd.png
Edit---Copy
Activate your work---Edit---Paste as new layer
Move to the bottom left.
Effects---3D-Effects---Drop Shadow ---0---0---70---35---Color Black
21.
Image---Add borders ---2 pixels with your dark color
Edit---Copy
Image---Add borders ---40 pixels with your light color
Selections---Invert.
Edit ---Paste into selection
Adjust ---Blur---Gaussian Blur ---30.
Effects---Textur Effects---Weave ---1---1---1---
Color White---Dark Color
Effects---Plugins---AAA Frames--- Foto Frame---20----0---0—2--- rest standard.
Selections---Select none
Place your watermark on a new layer.
Save as JPG
Opslaan als jpg.
Voorbeeden gemaakt door Kamalini-Hennie-Corrie-Marion

|