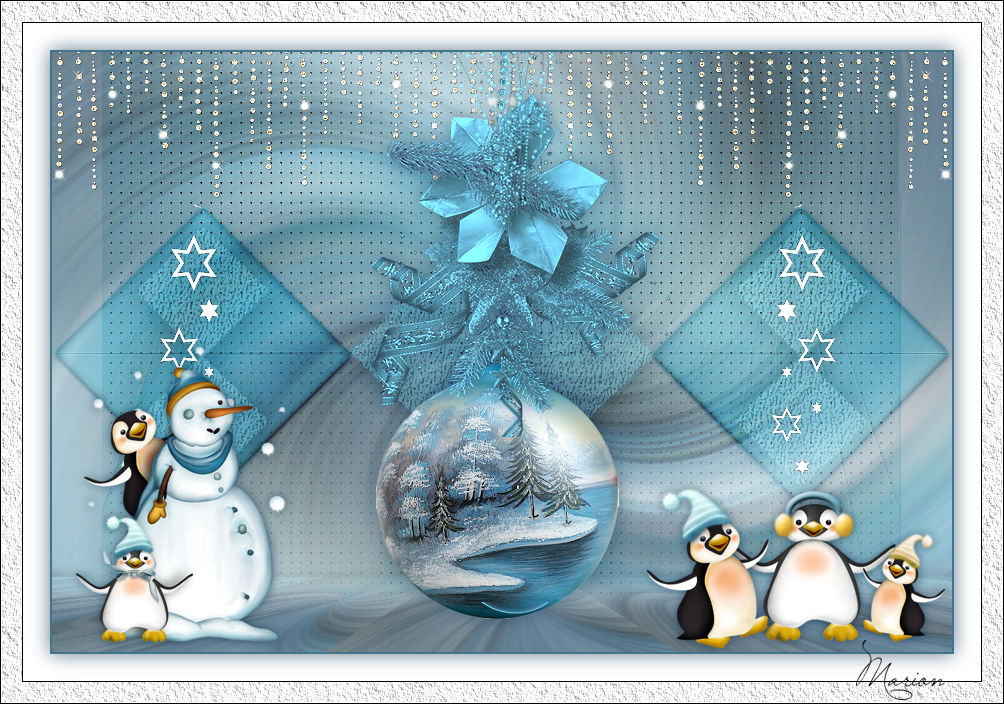
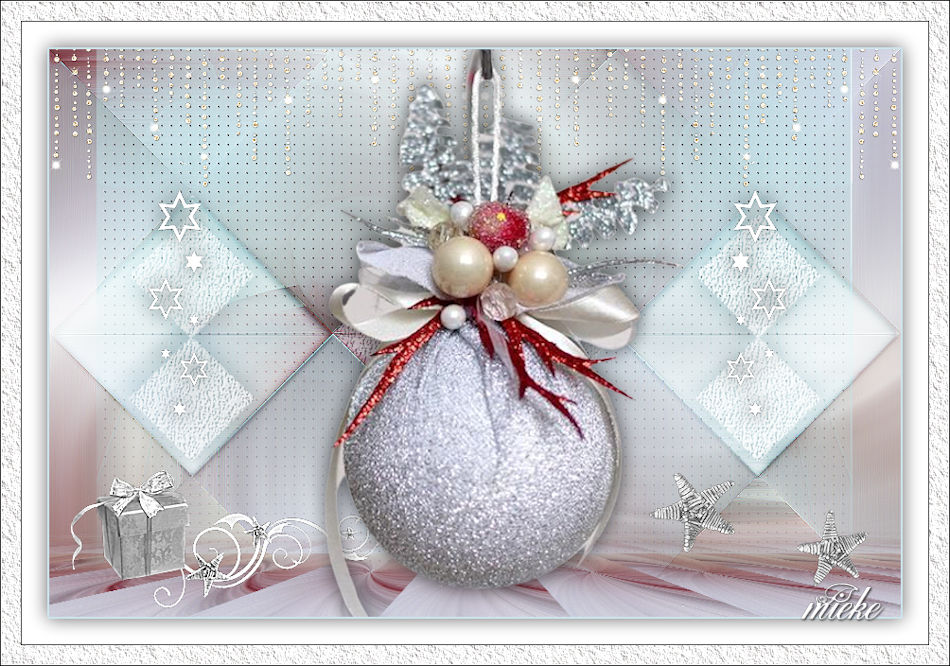
Christmas Lesson 2--- 2023
Translation made by MARION

Supplies
Material

PLUGINS
Filter---Mehdi---Sorting Tiles
Filter---Mura`s Meister---Perspective Tiling 1.1
Filters---AAA Frames---Texture Frame
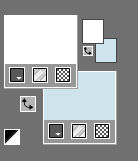
Material Properties: Set your Foreground color to ---#ffffff---
and your Background color to #cde4ec.
1.
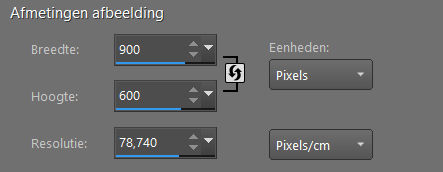
File: Open a Transparent Image in this size
Width ---900---Height--- 600--- Pixels
Flood Fill Tool --- Fill the layer with the Foreground color #ffffff
2.
Layers---New Rasterlayer
Selections---Select All
3.
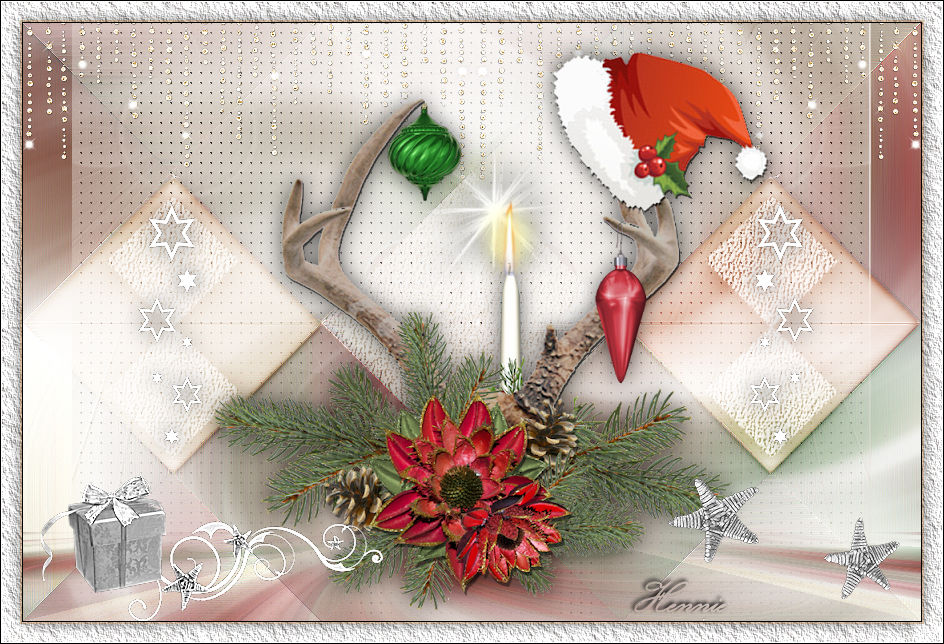
Open---the Tube Kerstbal
Edit---Copy
Activate your work
Edit --- Paste into Selection
Selections---Select None
4.
Effects---Image Effects---Seamless Tiling using the default settings
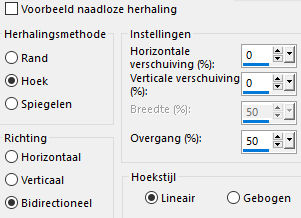
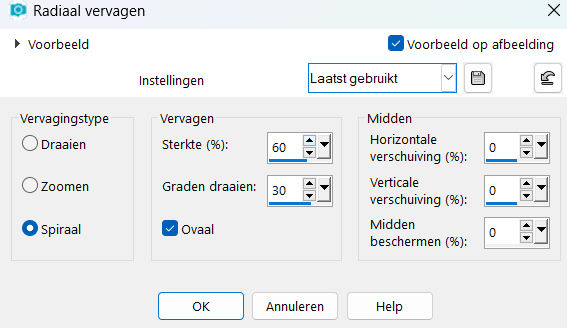
5.
Adjust---Blur---Radial Blur use the settings below
---Twirl---60---30---3x 0---Elliptical checked
6.
Effects---Edge Effects---Enhance More.
7.
Layers---Duplicate
Effects---Plugins---Mehdi---Sorting Tiles---Block Range---300---500---300---Crossed ---checked
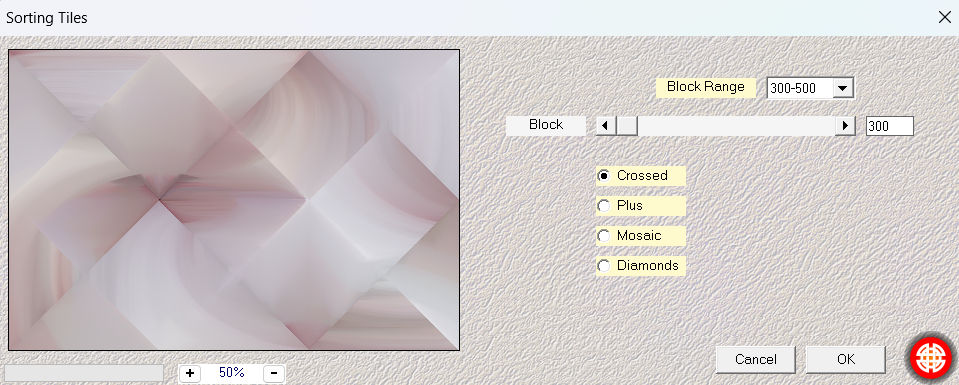
Effects---Edge Effects---Enhance.
8.
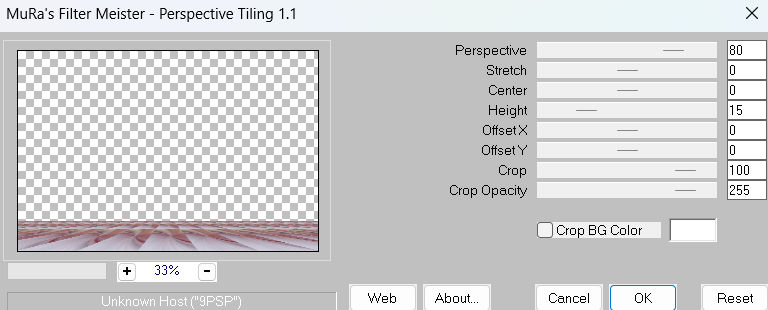
Activate ---Raster 2---in the Layer Palette
Effects---Plugins---Mura`s Meister---Perspective Tiling 1.1---80---0---0---15---0---0---100---255.
10.
Layers---Arrange--- Bring to Top
11.
Click with your Magic Wand (Tolerance--Feather on o)---in the upper part of Raster 2.
Selections---Modify----Feather 60---
Click 4 times delete on the keyboard.
Selections---Select None.
12.
Open---the Tube --- deco-1.png
Edit---Copy
Activate your work
Edit --- Paste as a new layer
Layers---Arrange---Move Down
13.
Open---the Tube---deco-4.png
Edit---Copy
Activate your work
Edit --- Paste as a new layer
Objects---Align---Top.
14.
Open---the Tube ---deco-2.png
Edit---Copy
Activate your work
Edit --- Paste as a new layer
Layers-Properties-Change the Blend Mode to " Overlay "
Activate the Top of the Layer Palette
15.
Open---the Tube ---deco 3
Edit---Copy
Activate your work
Edit --- Paste as a new layer
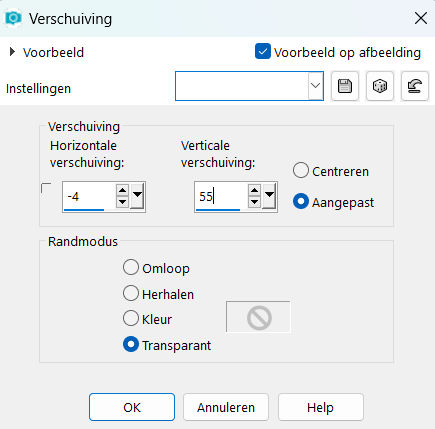
Effects---Image Effects---Offset---min 4---55---Custom-Transparent checked
Effects---3D-Effects---Drop Shadow with these settings:---0---0--60---30---
Color Black.

16.
Open---the Tube ---deco-5
Edit---Copy
Activate your work
Edit --- Paste as a new layer
Move to bottom left---(see finished image)
17.
Open----the Tube ---deco-6
Activate your work
Edit --- Paste as a new layer
Move tot the bottom right.
18.
Open---the Tube ---Kerstbal
Activate your work
Edit --- Paste as a new layer
Place it nicely in the center.
Effects---3D-Effects---Drop Shadow with these settings:---0---0--60---30. Color Black.
19.
Image - Add Borders-Symmetric checked---2 Pixels ---Color #cde4ec
Selections---Select All.
Image - Add Borders-Symmetric checked--- 50 Pixels ---Color #ffffff
Effects---3D-Effects---Drop Shadow with these settings:------0---0--60---30. Color Black.
Selections---Select None.
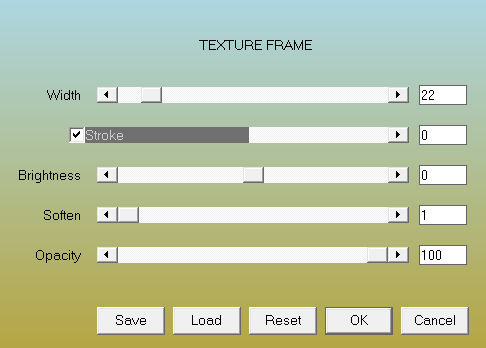
Effects---Plugins---AAA Frames---Texture Frame---22---0---0---1---100
Add you watermark on new layer.
Save as JPG
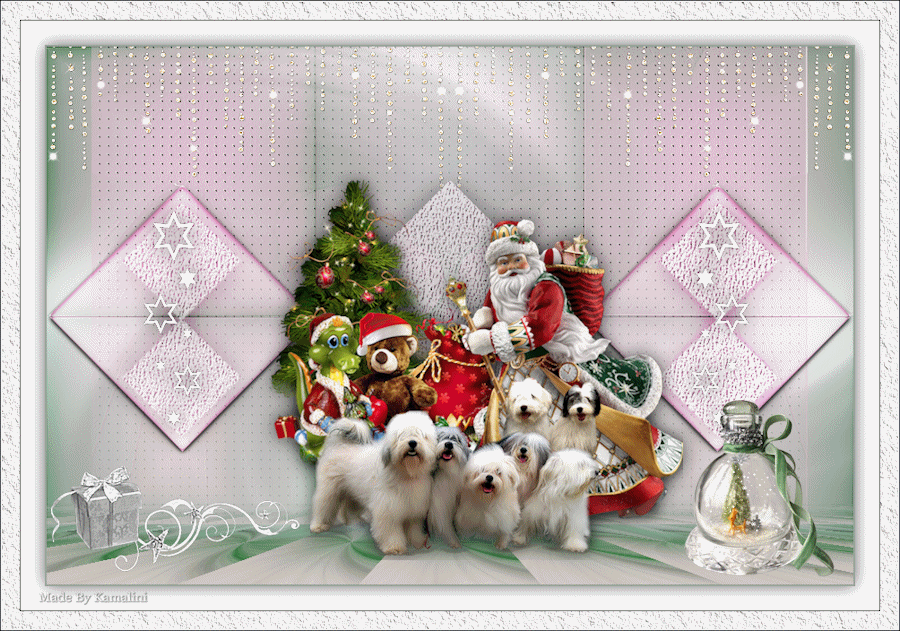
Voorbeelden gemaakt door Kamalini---Henny---Corrie---Marion

|