Christmas tutorial 1---2020
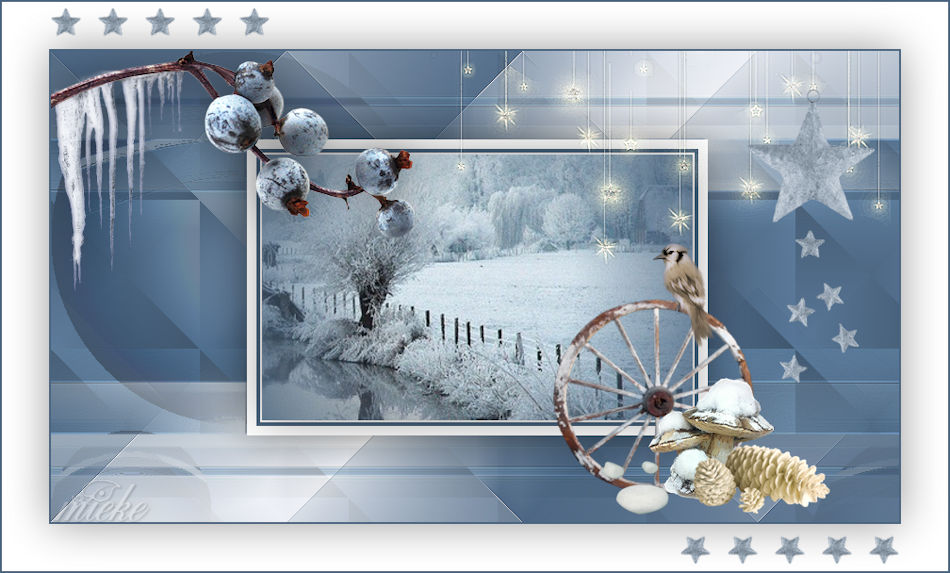
Material

Plugins
Filter---Mehdi---Sorting Tiles
Filter---<I C Net Software> Filters Unlimited 2.0>---V.M.Natural---Acid Rain
Filter---<I C Net Software> Filters Unlimited 2.0--- Filter Factory Gallery A
FG-Color # 49647f---BG-Color -#ffffff
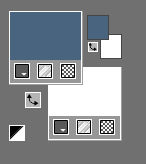
Set your Foregroundcolor to foreground-background "radial " gradient configured like this

File-Open a new transparent Image of 900/500 PX
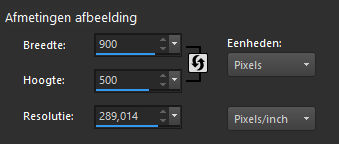
1.
Flood Fill Tool-Fill the Layer with the gardient
2.
Adjust---Blur---Gaussian Blur---Radius 30.
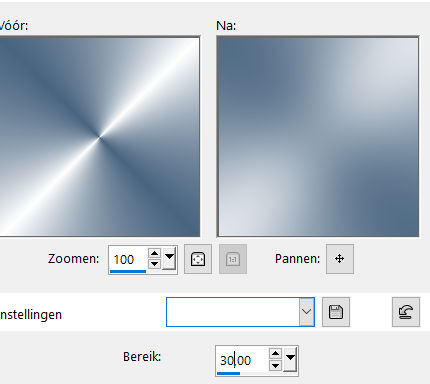
3.
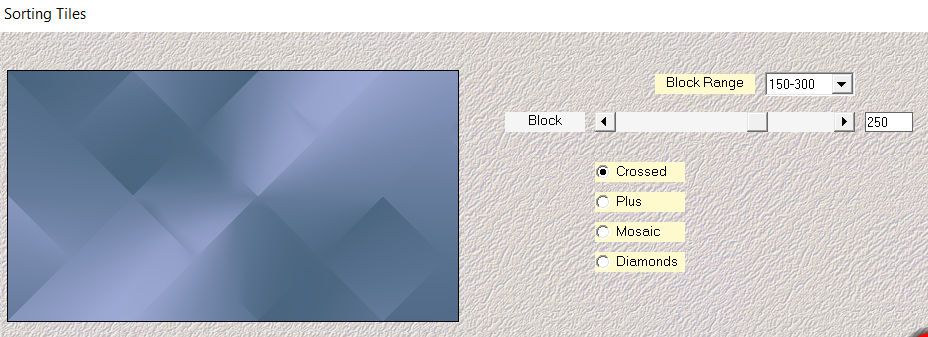
Effects---Plugins---Mehdi---Sorting Tiles---150---300---250---Crossed
4.
Effects---Edge Effects---Enhance More
5.
Layers ---New Raster Layer
Flood Fill Tool-Fill the layer with the Foreground color (#49647f)
5.
Open---- aditascreations_mask_12.jpg
Click on the minus sign at the top right
6.
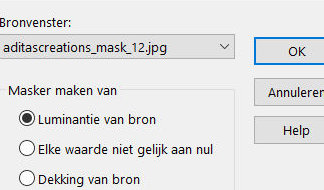
Layers---New Mask Layer ---From Image--- and select Mask aditascreations_mask_12.jpg
Source luminance checked
7.
Layers- Merge-- Merge Group
8.
Effects--- Edge Effects--- Enhance
9.
Layers- Duplicate
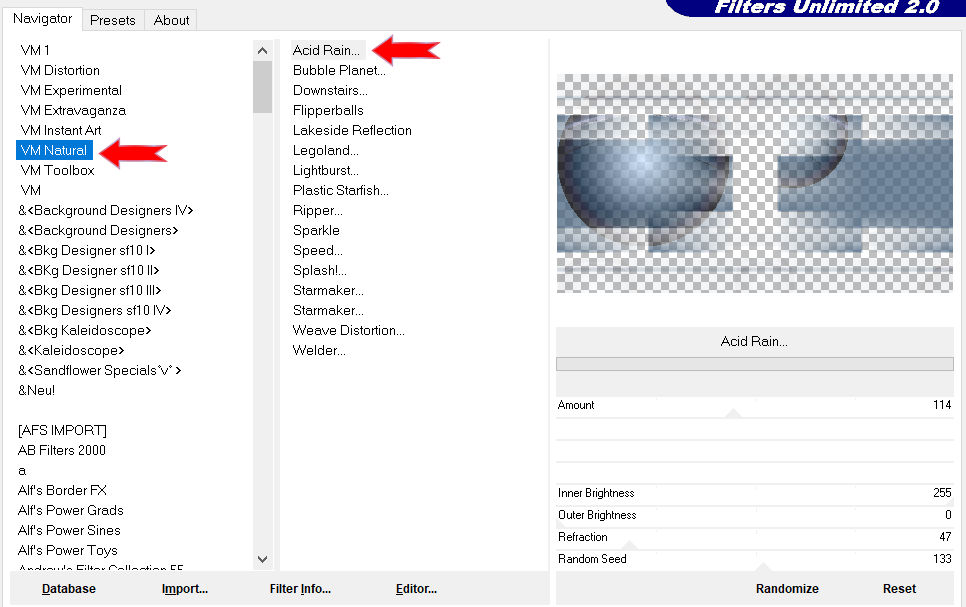
Effects---Plugins---<I C Net Software> Filters Unlimited 2.0>---
V.M.Natural---Acid Rain with these settings
---114---255---0---47---133
10.
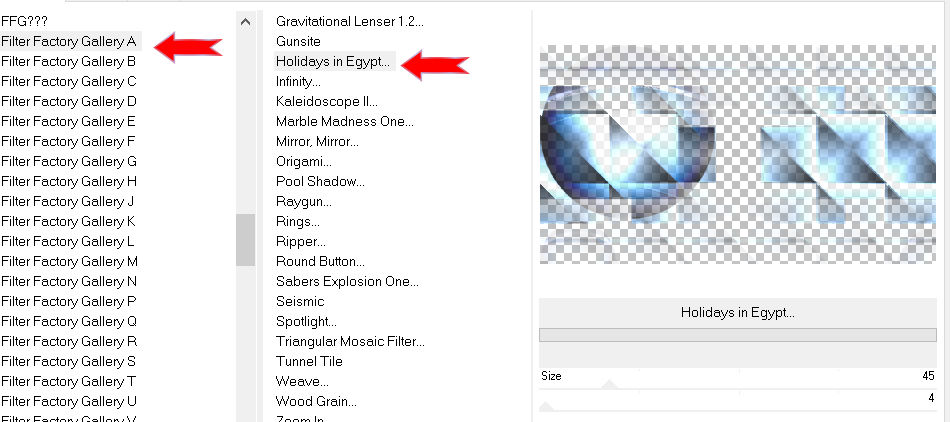
Effects--Plugins---<I C Net Software> Filters Unlimited 2.0---
Filter Factory Gallery A---Holidays in Egypt-use the settings below---45---4
11.
Layers---Arrange---Move Down
12.
To replace the top of the layer---palette
Activate Selection Tool

Layers--- New Raster Layer
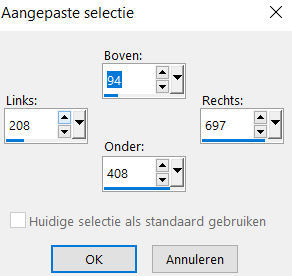
Custom Selection (S) ---Rectangle with these settings
---94---208---697---480
Flood Fill Tool---Match mode none.

Fill the selection with the background color #ffffff
13.
Selections -- Modify ---Contract with 10 pixels.
14.
Click Delete on your keyboard
Flood Fill Tool
Fill the selection with the Foreground color # 49647f
Selections --- Modify ---Contract with ---4 pixels.
Fill the selection with the background color #ffffff
Selections --- Modify --- Contract with ---2 pixel.
Fill the selection with the Foreground color # 49647f
15.
Open ---the tube --- d34f71.pspimage
Edit- Copy
Activate your work ---Edit --- Paste as a new layer
Slide the tube in the selection
16.
Selections---Invert
Click Delete on your keyboard
17.
Selections---Invert
18.
Layers--- Merge--- Merge Down
19.
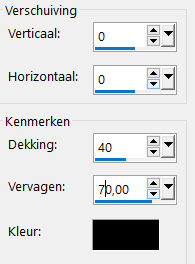
Effects---3D-Effects---Drop Shadow with these settings:
----0---0---40---70---Color#000000
20.
Selections---Deselect All
21.
Effects---3D-Effects---Drop Shadow with these settings
----0---0---40---70---Color #000000
22.
Open—the tube - wintertak-7027b
Edit- Copy---
Activate your work ---Edit --- Paste as a new layer
Pick Tool: (K) on your keyboard -Enter these parameters---Position X min 13---Position Y min 12 on the Toolbar

Effects---3D-Effects---Drop Shadow with these settings:
----0---0---40---70---Color #000000
23.
Open-the tube -- deco-kerst-01
Edit--- Copy---
Activate your work ---Edit --- Paste as a new layer
Pick Tool: (K) on your keyboard -Enter these parameters---Positie X 553---Positie Y 202. on the Toolbar

24.
Open-the tube ---deco---kerstles-1-1
Edit- Copy---
Activate your work---Edit --- Paste as a new layer
Pick Tool: (K) on your keyboard ---Enter these parameters---
Positie X 411---Positie Y min 33 on the Toolbar
25.
Open-the tube--- deco-kerstles-1-2
Edit--- Copy---
Activate your work---Edit --- Paste as a new layer
Pick Tool: (K) on your keyboard ---Enter these parameters--- Position X 739---
Position Y 41 on the Toolbar
Effects---3D-Effects---Drop Shadow with these settings
0---0---40---70---color #000000
26.
Press ( M ) to close the Pick Tool
27.
Image - Add borders-Symmetric checked ---2 pixels---Foreground color #49647f
Selections---Select All
Image - Add borders-Symmetric checked---50 pixels---#ffffff
Effects---3D-Effects---Drop Shadow with these settings
----0---0---40---70---Color #000000
Selections---Deselect All
Image - Add borders-Symmetric checked---2 pixels--- Foreground color #49647f
28.
Open the tube ---Rand
Edit---Copy
Activate your work ---Edit --- Paste as a new layer
Add you watermark on new layer
Save as JPG
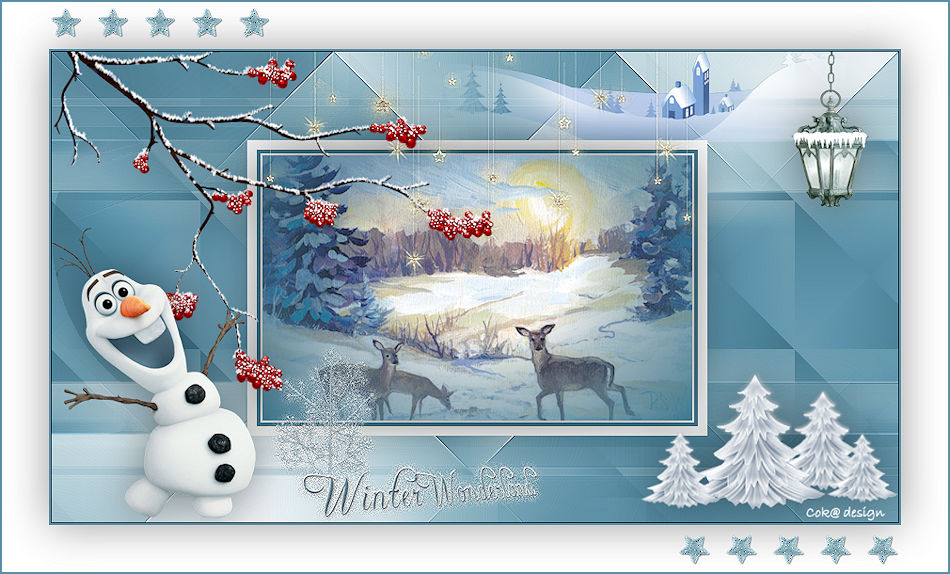
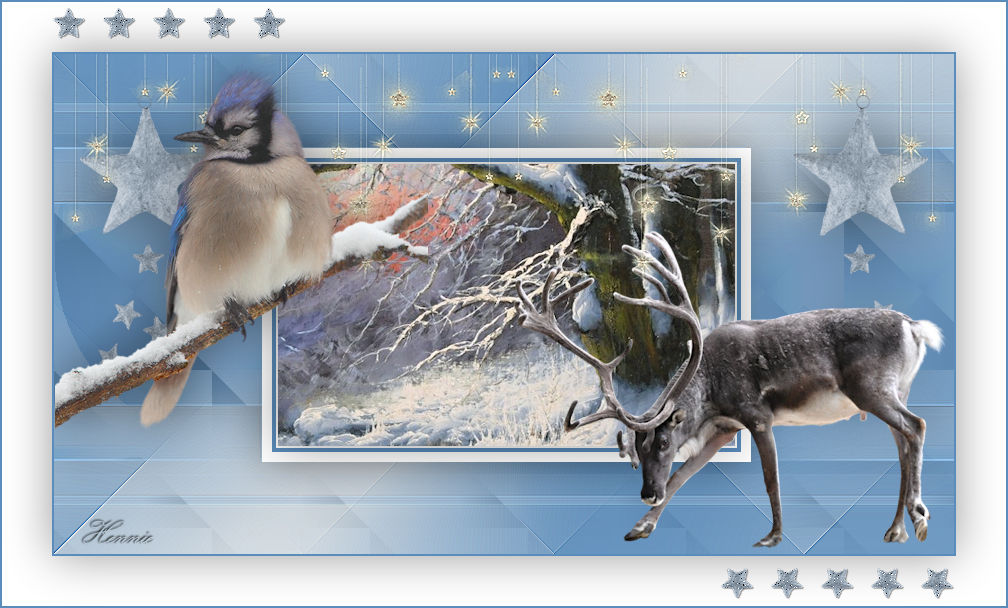
Voorbeelden gemaakt door Kamalini Hennie en Corrie
Bedankt voor het controleren van de les.
 
 
|